Message sequences
In this section you can use a builder to configure a message sequence - a triggered script that consists of several messages.
Click “Create sequence” to start. The builder will open your design space. You can see a purple block saying “Launch Conditions” (by default it has “Visited the website” event) and the first block of the chain - by default it's set to a pop-up.
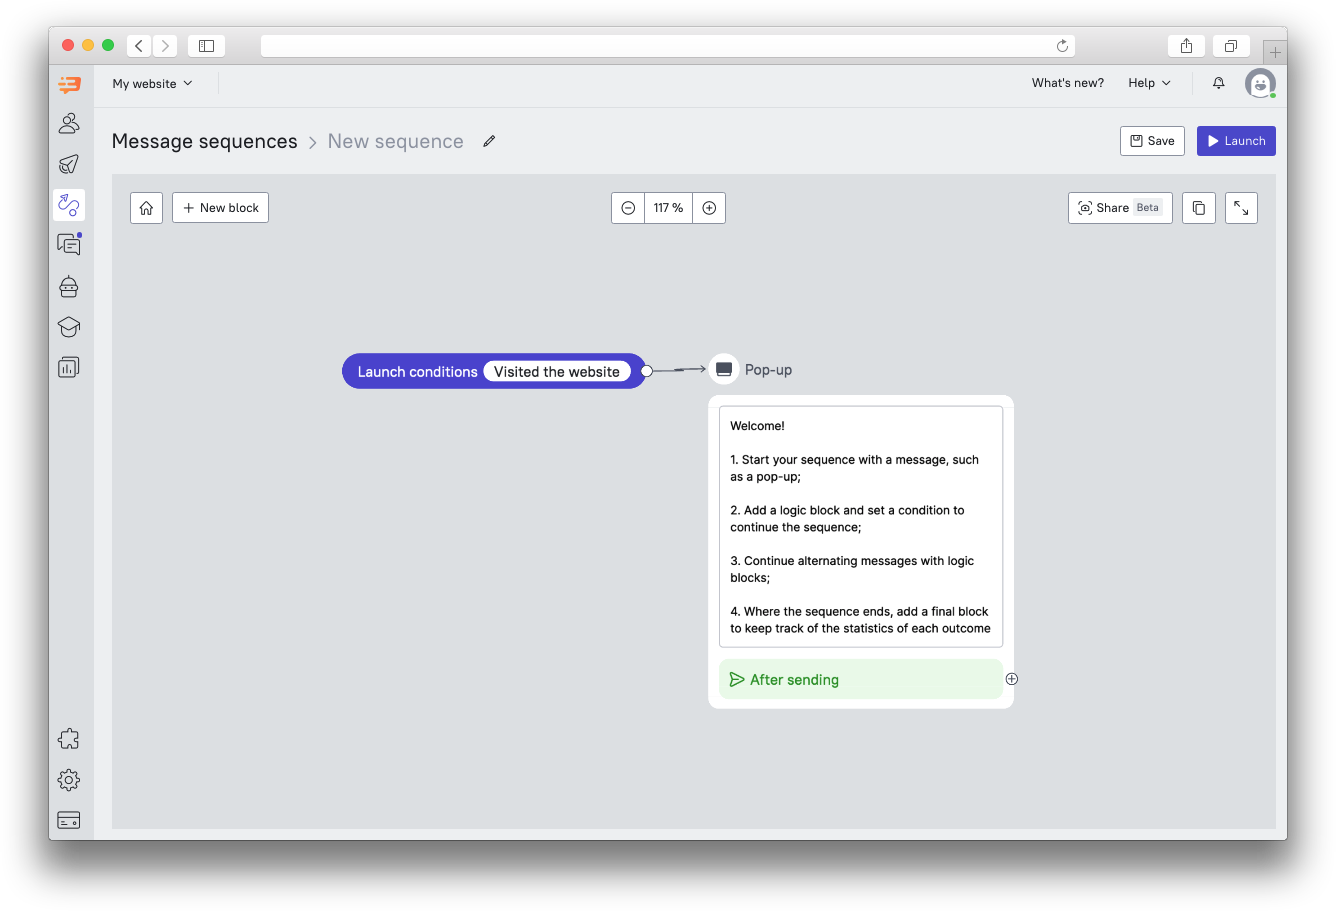
You can change both the “Launch Conditions” and the first block of the sequence, add further blocks, etc.
By clicking on the purple block you will be taken to the sending conditions settings menu. By clicking on the block with the message, an editor with content settings will open.
Their settings principle is the same as for triggered messages or chatbots: you can select a trigger to launch the sequence, segment the audience that will receive the first message, set a timeout for sending the first message, etc.
By clicking on the "+ New block" button you can select and add:
- Logic blocks
- One of 10 message types
- Final blocks
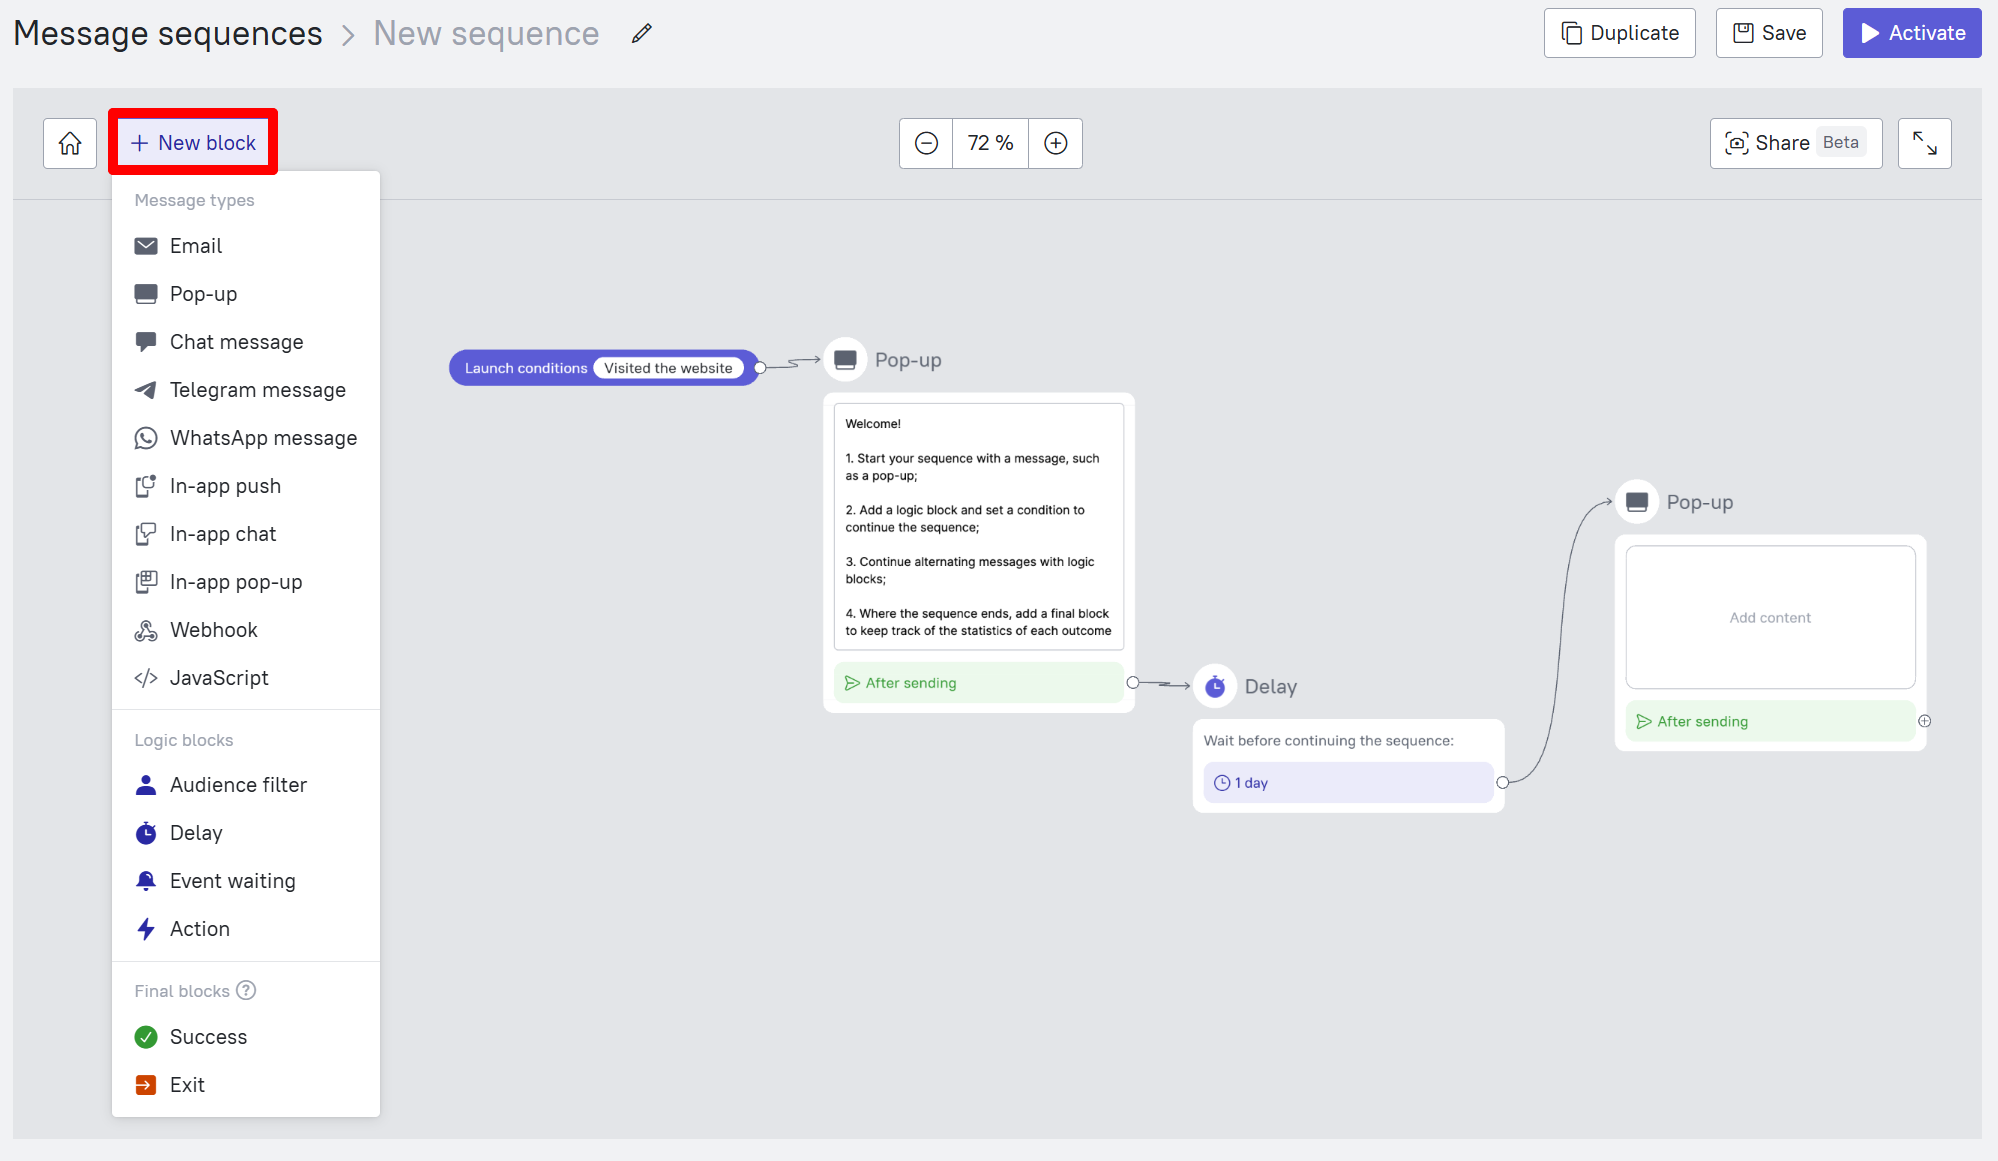
To add a block, select the desired type from the list. To set it up, click on the block. To delete or copy, hover the cursor over a block - the “Copy” and “Delete” buttons will appear on the right above the block.
You can also share the entire sequence by taking a screenshot of the entire workspace using the "Share" button in the top right corner. The screenshot will be saved to the downloads folder on your device.
Let's take a look at all the block types and their function.
Logic block
Logic blocks are responsible for the sequence of the chain - with their help you can segment the audience, add a timeout before sending the next message, and also wait until the user completes the event. You can add logic blocks between message blocks and after them, as well as after the "Launch conditions" block.
There are three types of logic blocks:
- Audience filter
- Delay
- Event waiting
1. Audience filter
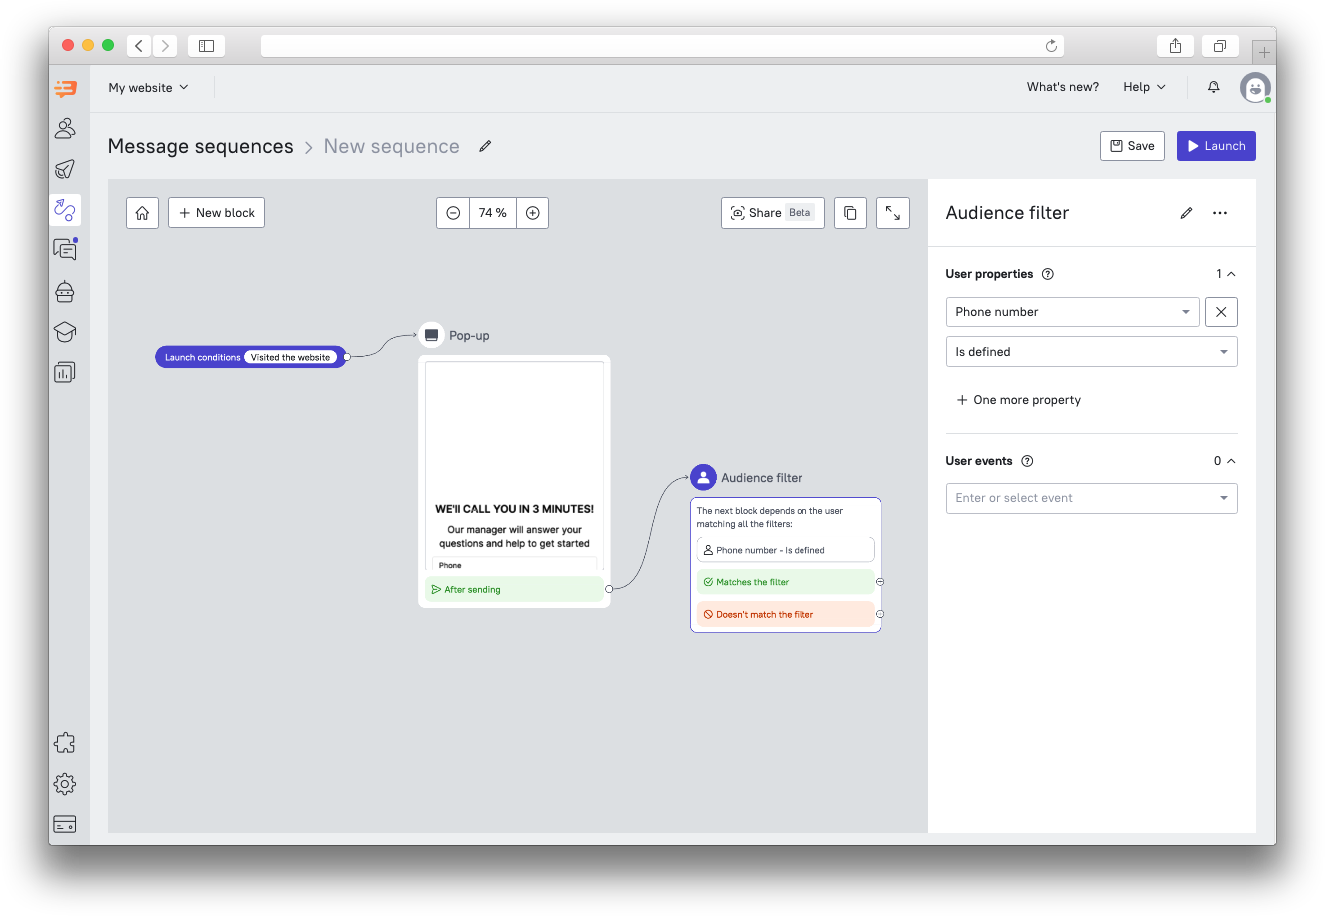
This block will help segment the sequence audience - you can select the properties and events that the recipients of the next message should have. Depending on whether users meet these conditions or not, the sequence will move further.
For example, you send a message asking everyone who visits the site to leave their phone number. Next, you add an Audience Filter and create a fork in your sequence - depending on users action, different messages can be sent:
2. Delay
This filter will allow you to set a timeout for sending the next message in the sequence, as well as for other conditions in the chain.
The delay can be fixed or dynamic.
Fixed delay
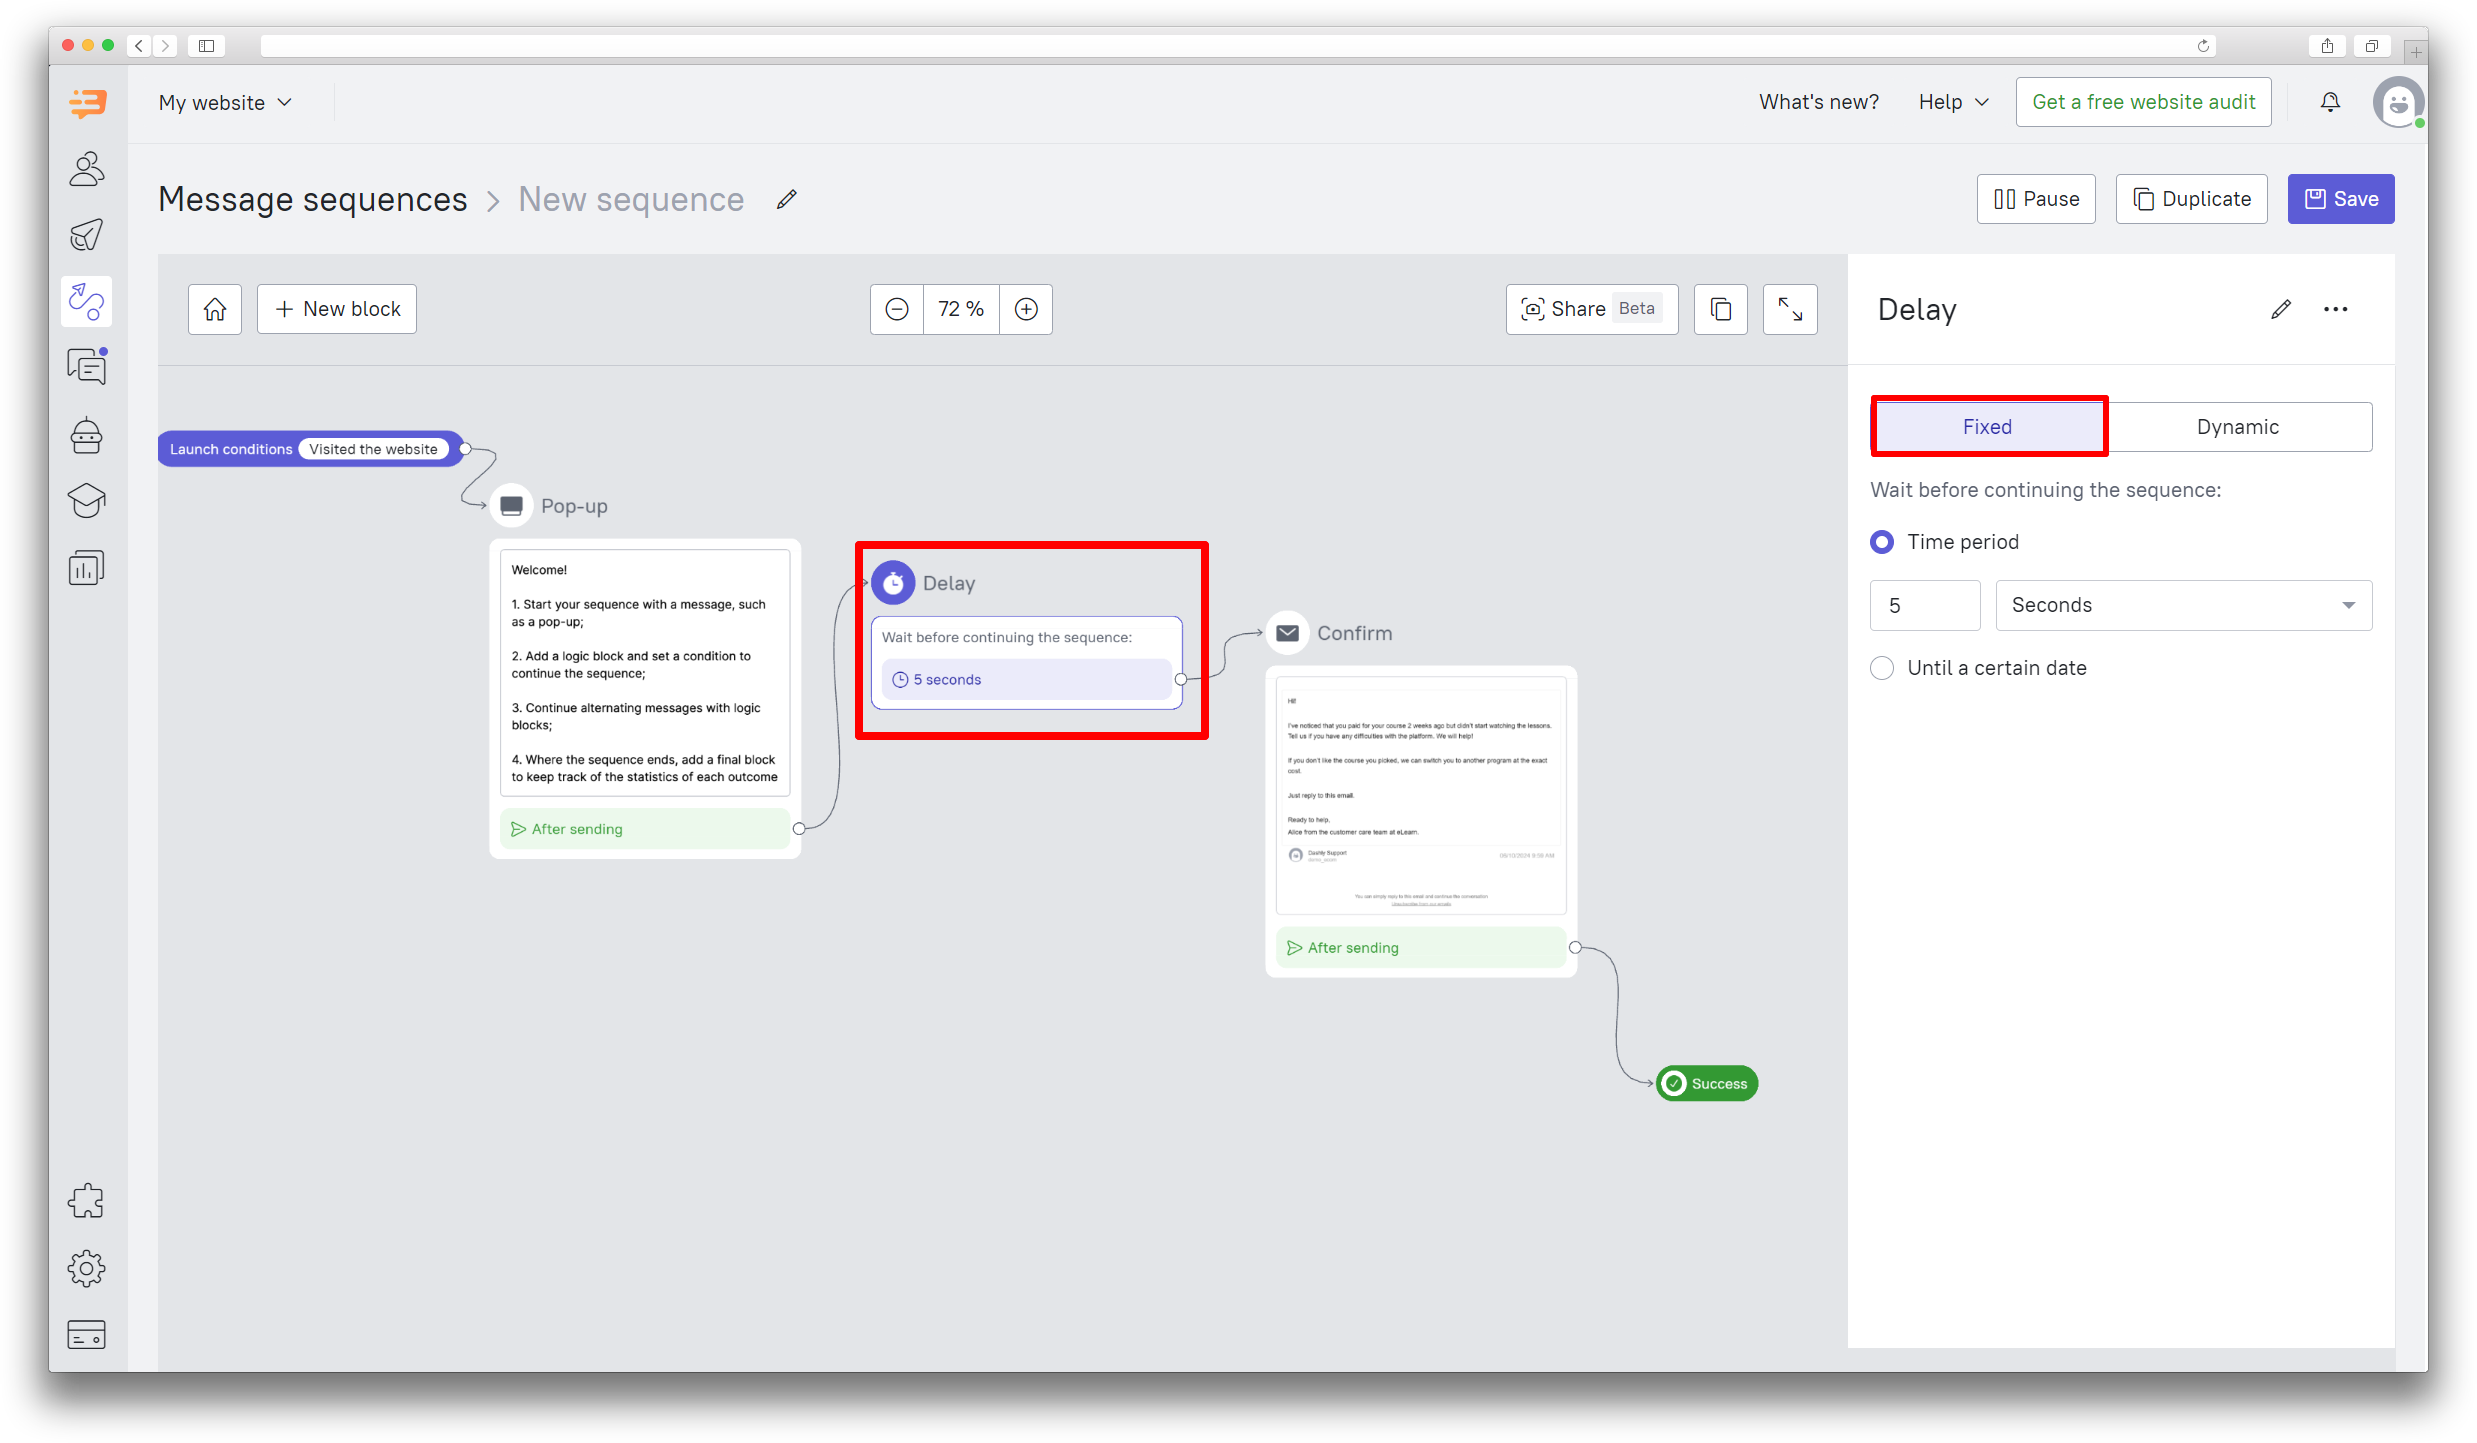
Let's say you are planning a webinar. A user of your website signs up for the webinar using a pop-up. After that, 5 seconds later, you need to send a follow-up email confirming their participation. This is where a fixed delay after a period of time comes in handy:
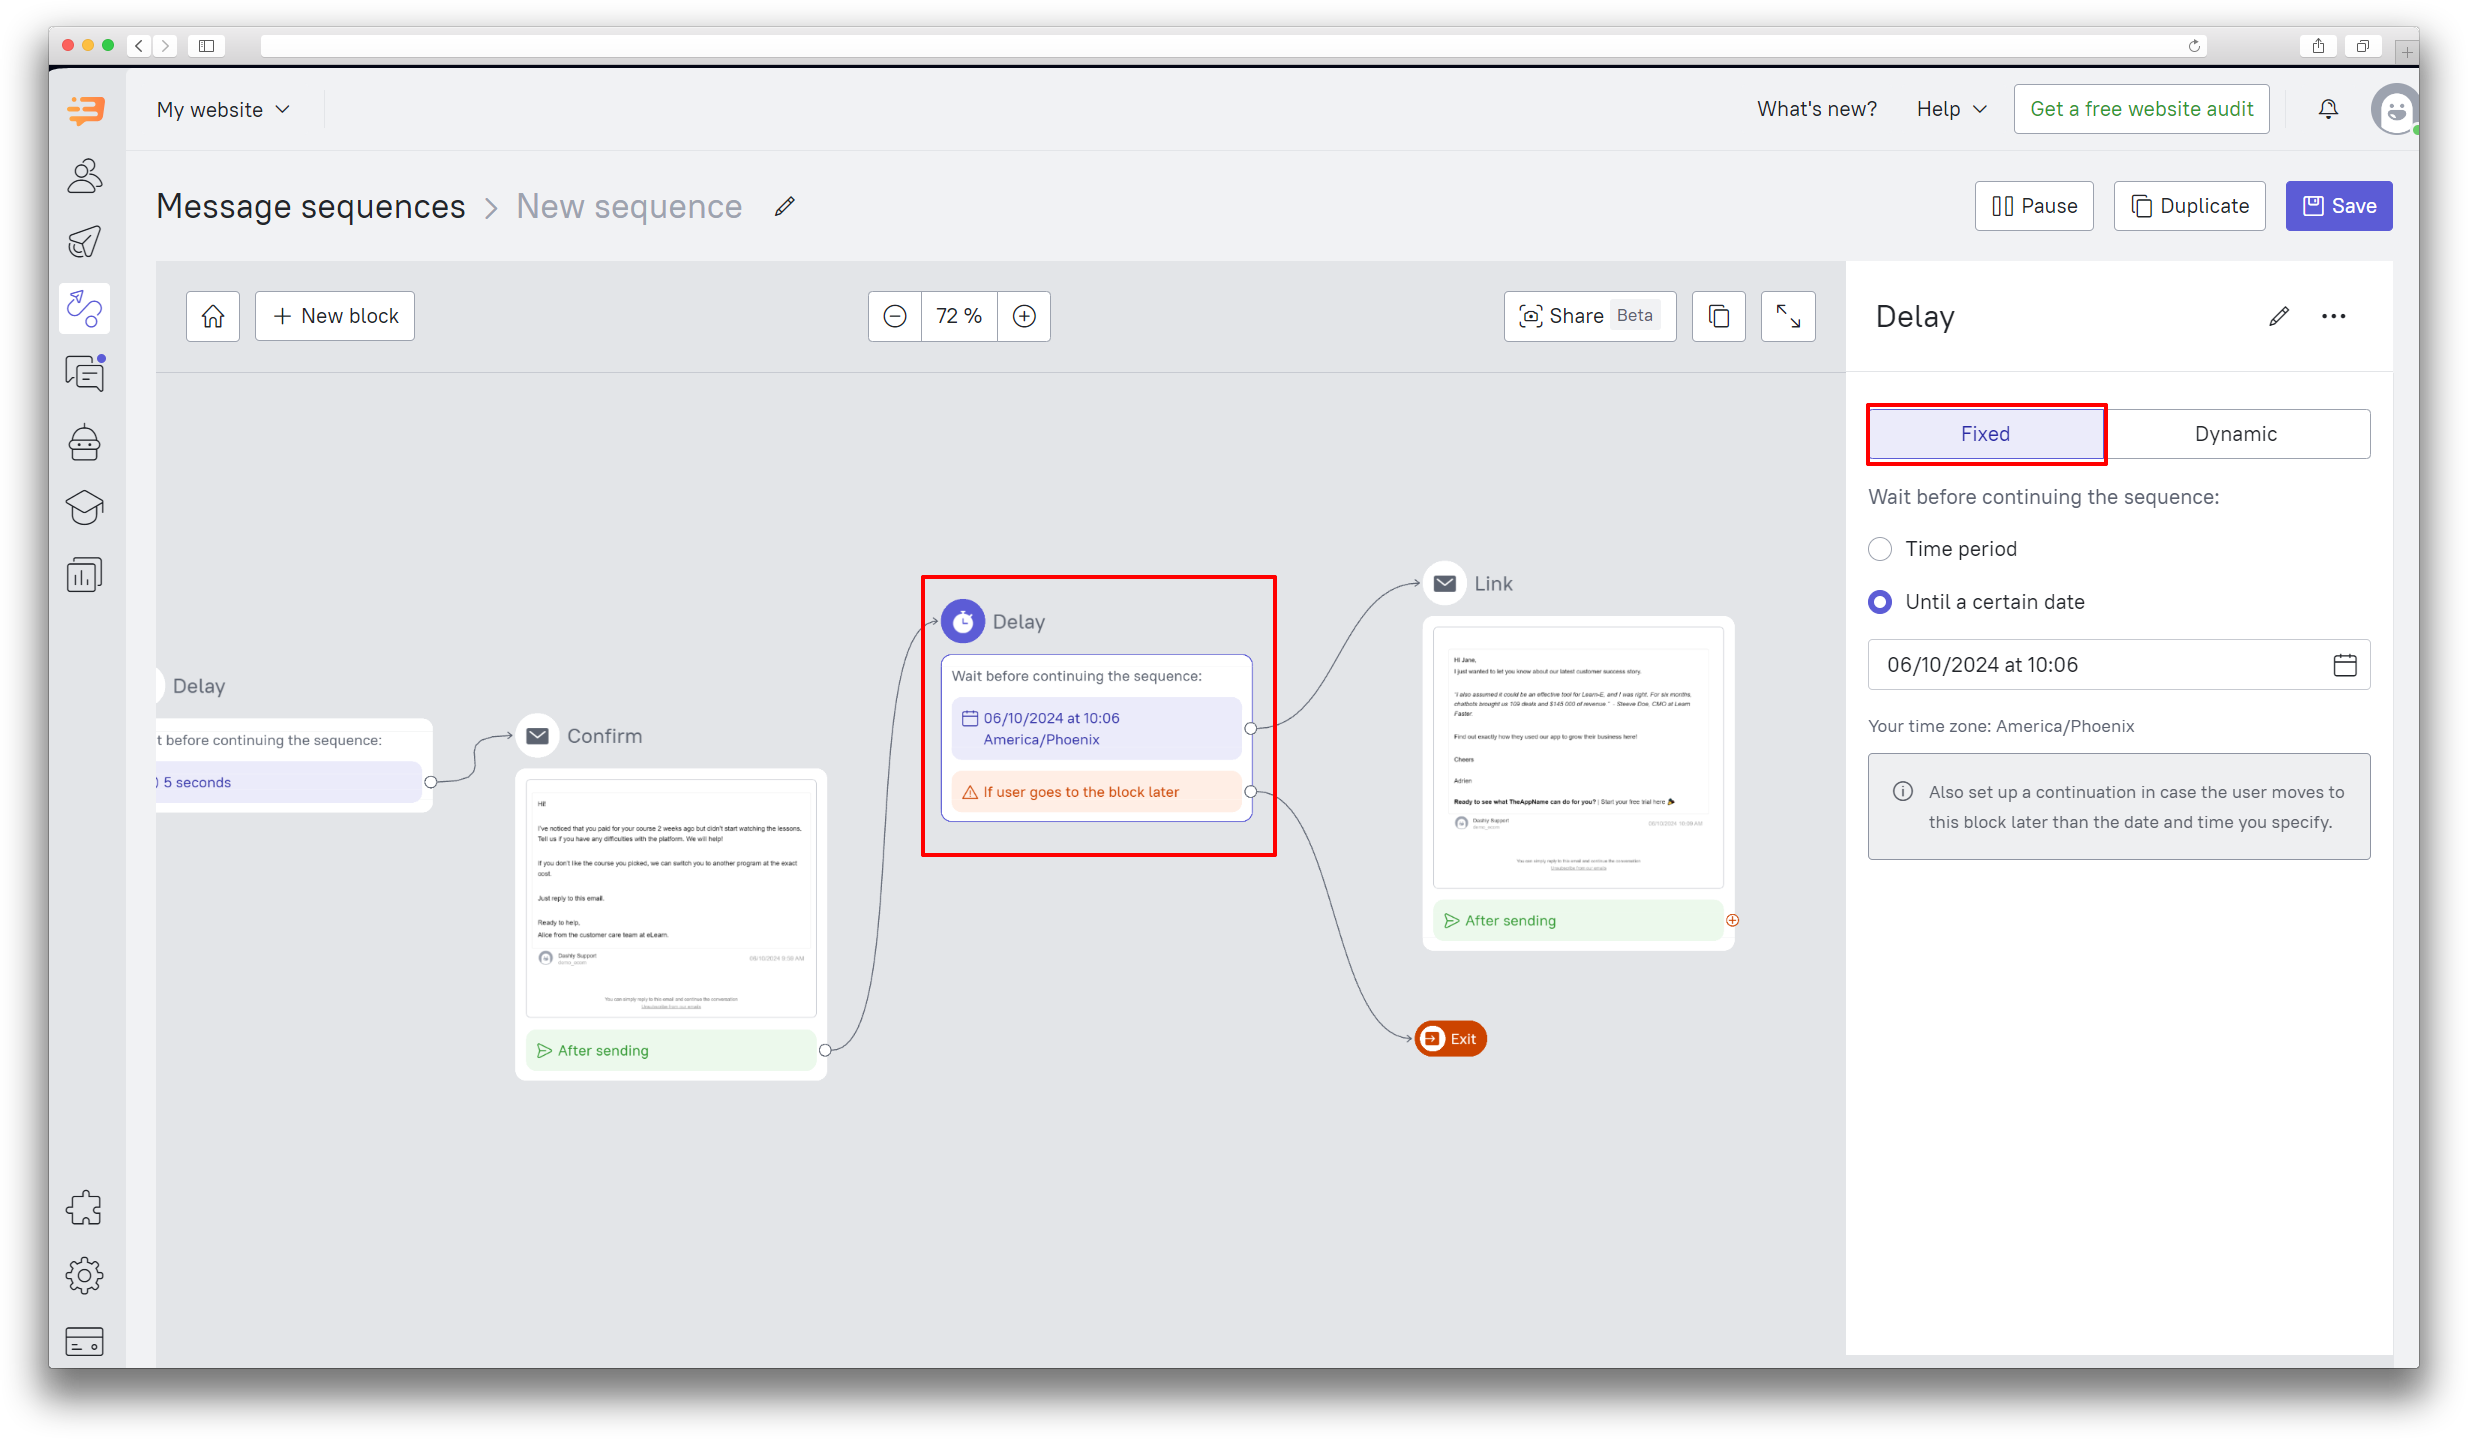
The user will also need an email with a link to the webinar itself. To send this email, use a fixed delay and specify time and date:
Dynamic delay
This delay will allow you to focus on the time recorded in the user property. For example, you use your form to book an appointment, with a date and time selection. If the date and time of your meeting are recorded in ISO 8601 format: YYYY-MM-DDTHH:MM:SS, then you can send a message to the user for the required timeout before this date.
For example, you have a form for booking a meeting with a manager. You record the “Application time” property in the lead card. You can use this property in a warm-up email sequence for those who have signed up for a meeting.
You can send the sequence however many times you need: a day before the meeting, 40 and 5 minutes before that, but the sequence will always be linked to one property - the date of the meeting itself:
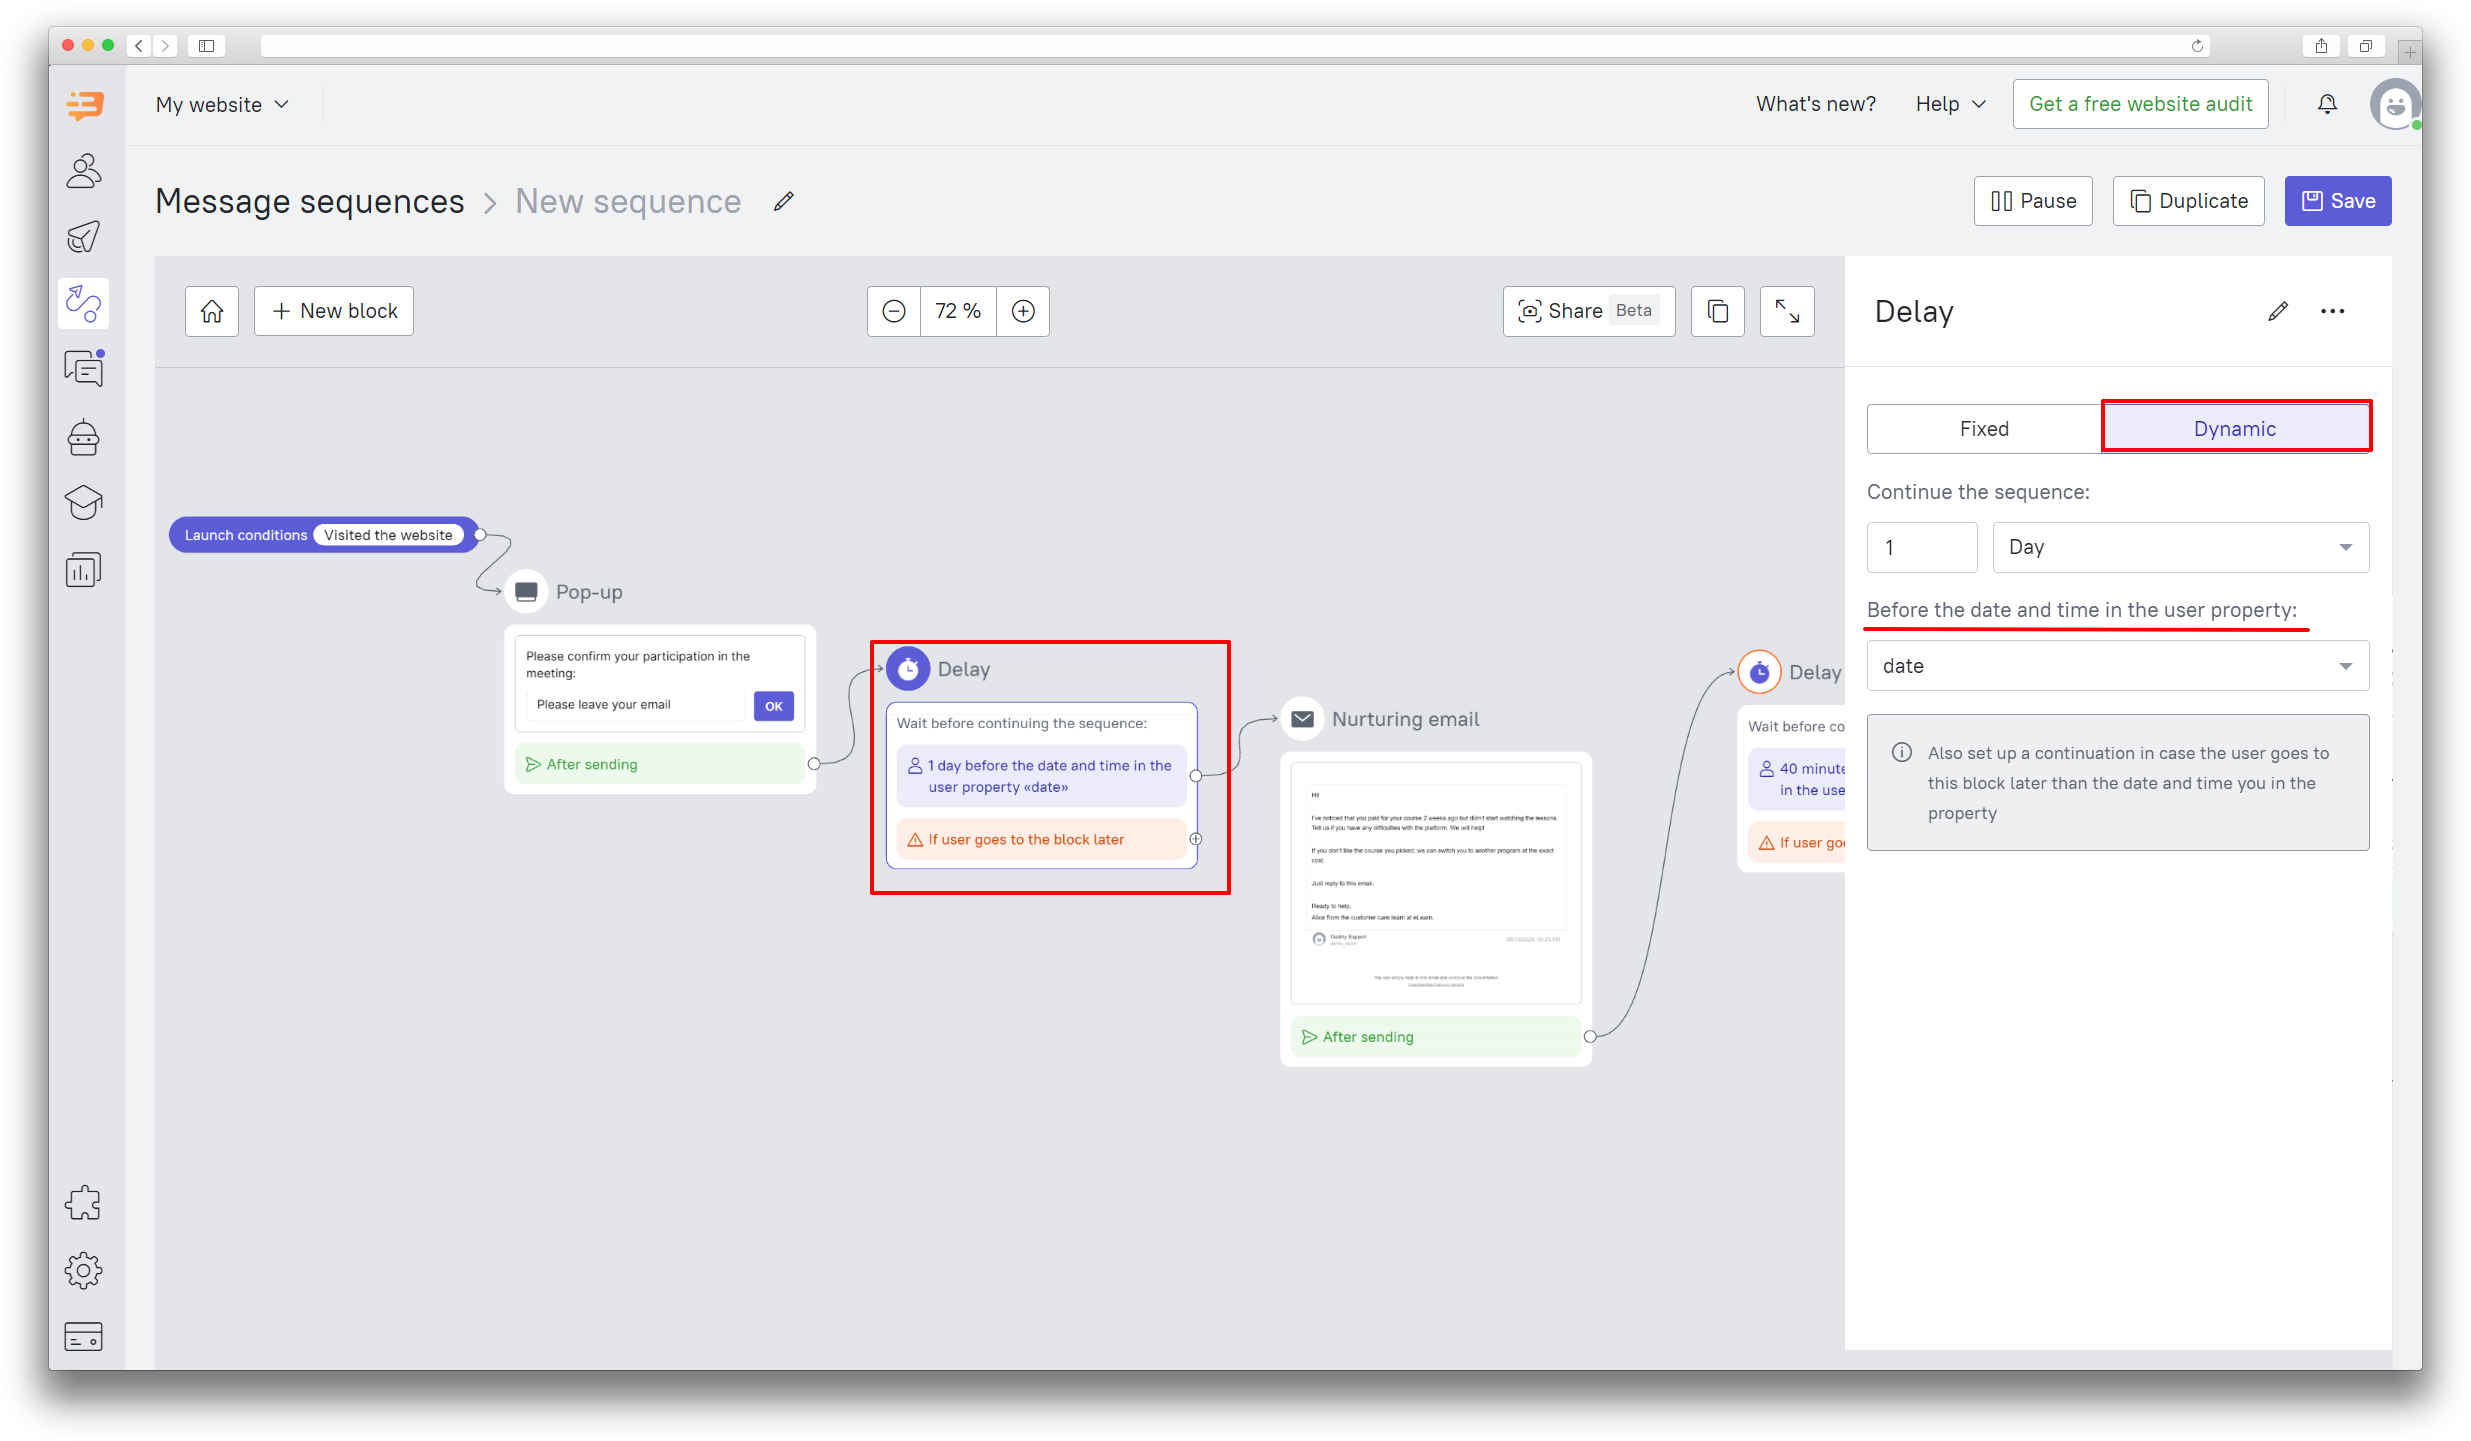
When you select a delay until a specific date or a dynamic delay, you will be asked to configure the continuation of the sequence in case the user is gets there after the date and time that you specified. For example, the user can get into the sequence 30 minutes before the invitation letter to the webinar is sent, in which case you can send them an email with alternative text, etc.
You can also set a Delay after the Audience filter - then the conditions will be checked immediately after sending the message, then 5 minutes will pass before the next action in the sequence is completed.
3. Event waiting
This block will allow you to wait until the user completes an event - for example, after the user left their phone, we send another pop-up, this time to collect an email. After sending the second pop-up, we can add an "Event waiting" block:
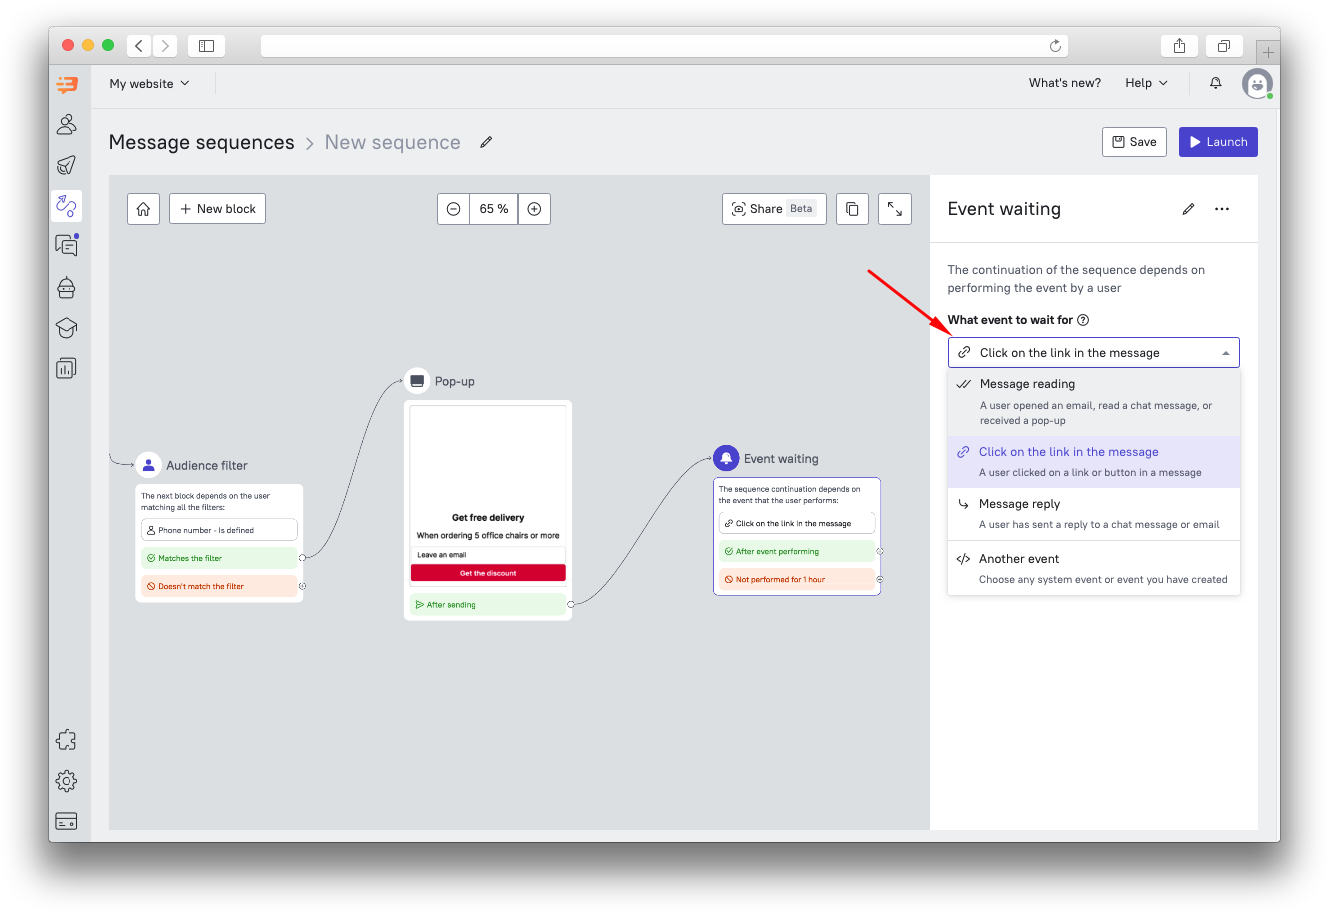
You can choose the event you want to wait for. These can be standard communication events (Message read, Clicked on the link, Message reply), or your own event events.
You can read more about the events here.
In our example above, we chose to wait for a click on a button in a message; we’ll wait an hour for the event to complete.
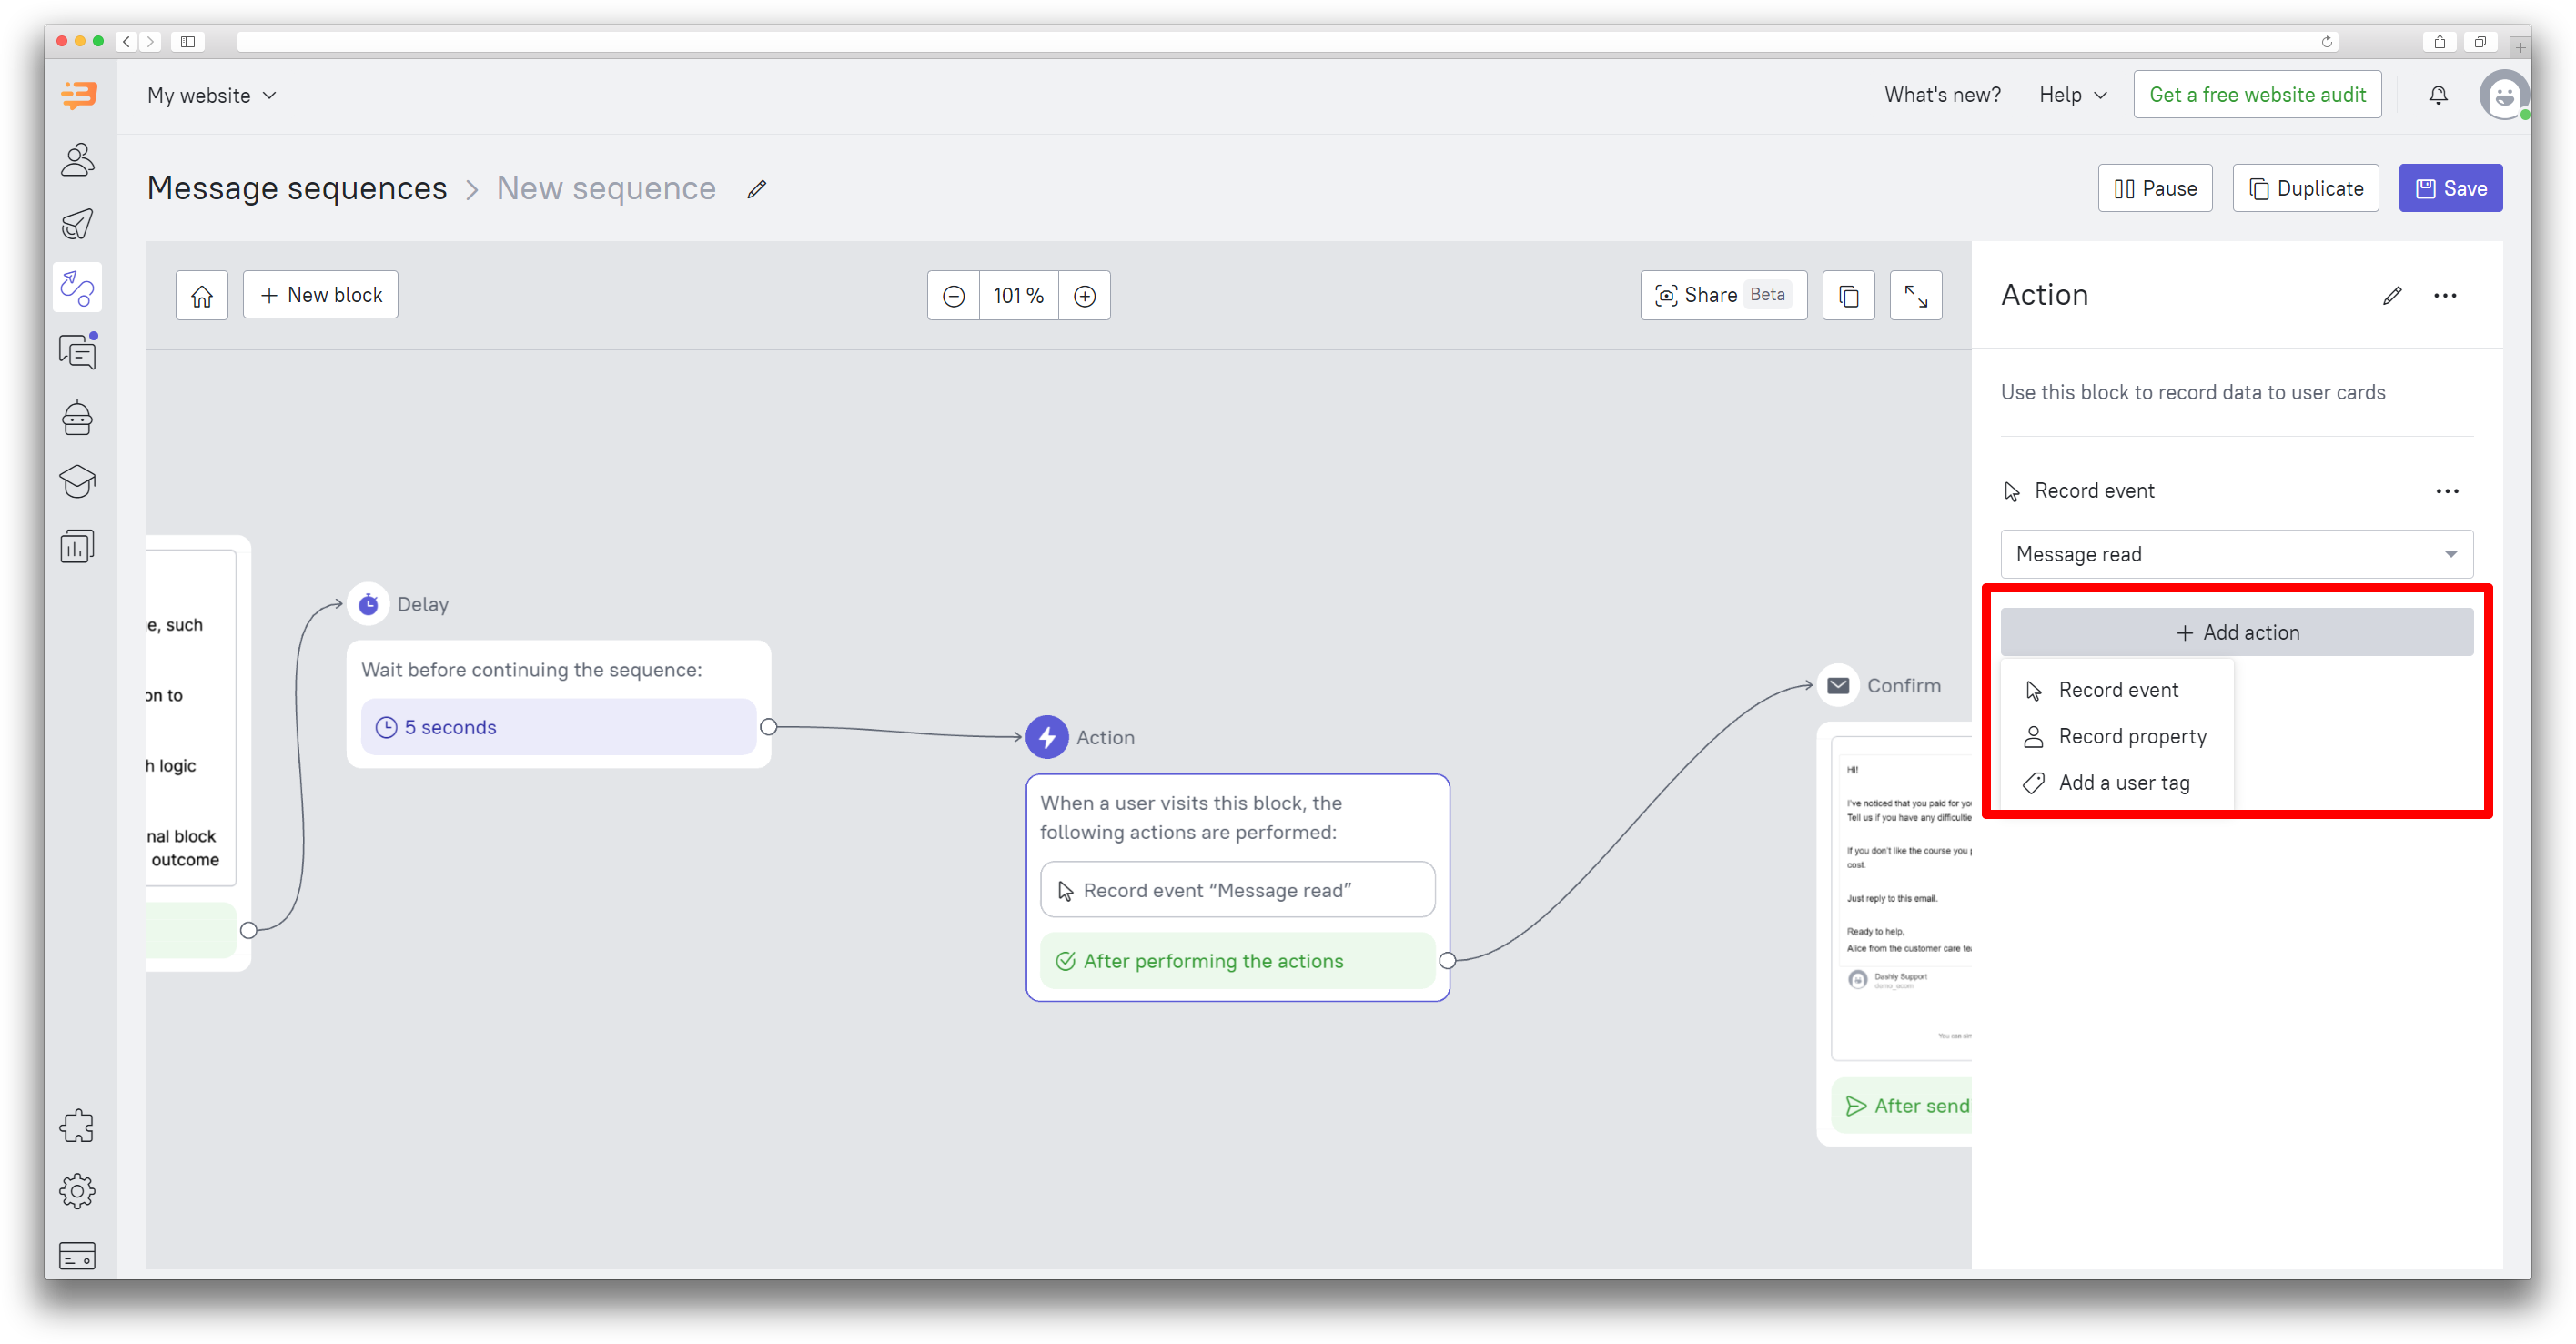
4. Action
Using the "Action" block, you can record an event, property, and tag to the user card when the user reaches the next block after "Action".
The events and properties configured in the sequence can be used in funnels, for segmenting leads, and for building complex scenarios.
Message Types
You can use the following types of messages in a chain:
- Pop-up
- Chat message
- Telegram message (if you have Telegram Messenger bot add-on activated)
- WhatsApp message
- In-app push
- In-app chat and pop-up
- Webhook
- JavaScript
Clicking on a block will take you to setting its content.
❗Please note: messages included in the sequence are included in your payment plan's quota of triggered messages.
Final blocks
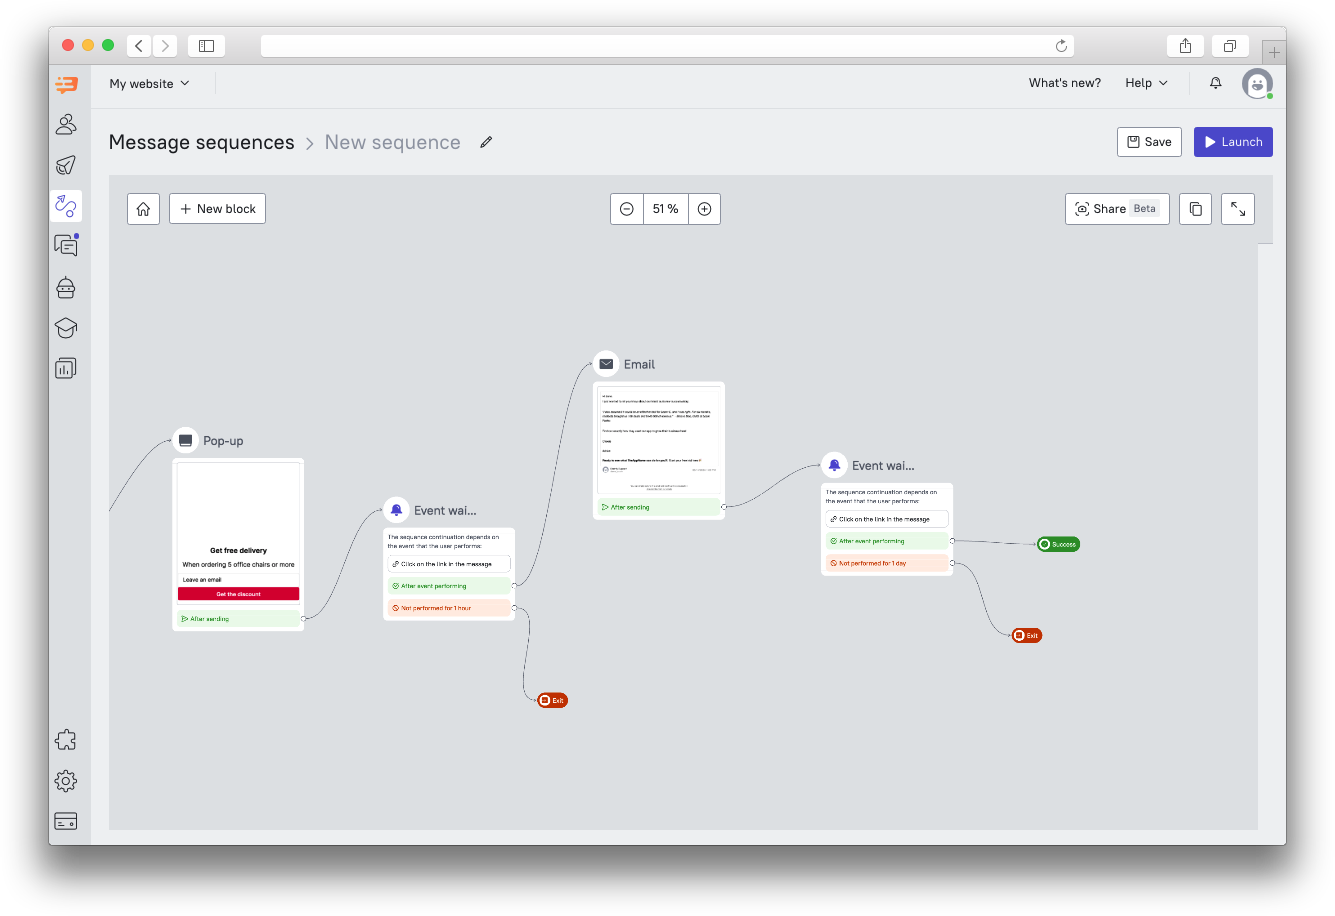
The final block is placed after messages or logic blocks. Use it to complete the sequence and determine whether it was successful (i.e. the final goal of the sequence was achieved). The "Exit" block is also taken into account in the sequence statistics.
For example, in our sequence, we will consider a it a success when the user clicks the link in the final email. If the user doesn't follow the link or doesn't reach this step, the chain is considered complete:
 Sequence Statistics
When you go to the statistics section, general statistics of the sequence will immediately be shown for the entire period of its existence. You will be able to see the date the scenario was created, the date the first message was last sent, and the total number of launches. Statistics will also show the number of users who haven't yet completed the sequence, those who left it and those who successfully completed the scenario.

To see detailed statistics, click on the button on the right:

Detailed statistics show overall statistics for each message in the sequence. You can also view detailed statistics for each message separately.

Read more in the article about triggered messages statistics.
