Webhooks
A webhook is a technical message that Dashly sends to another system.
Using webhooks, you can warm up a lead (if a client does not read your messages in chat, you can send a webhook to a service for sending SMS or WhatsApp messages), send user data to your website's backend, request and receive data from a third-party service, etc.
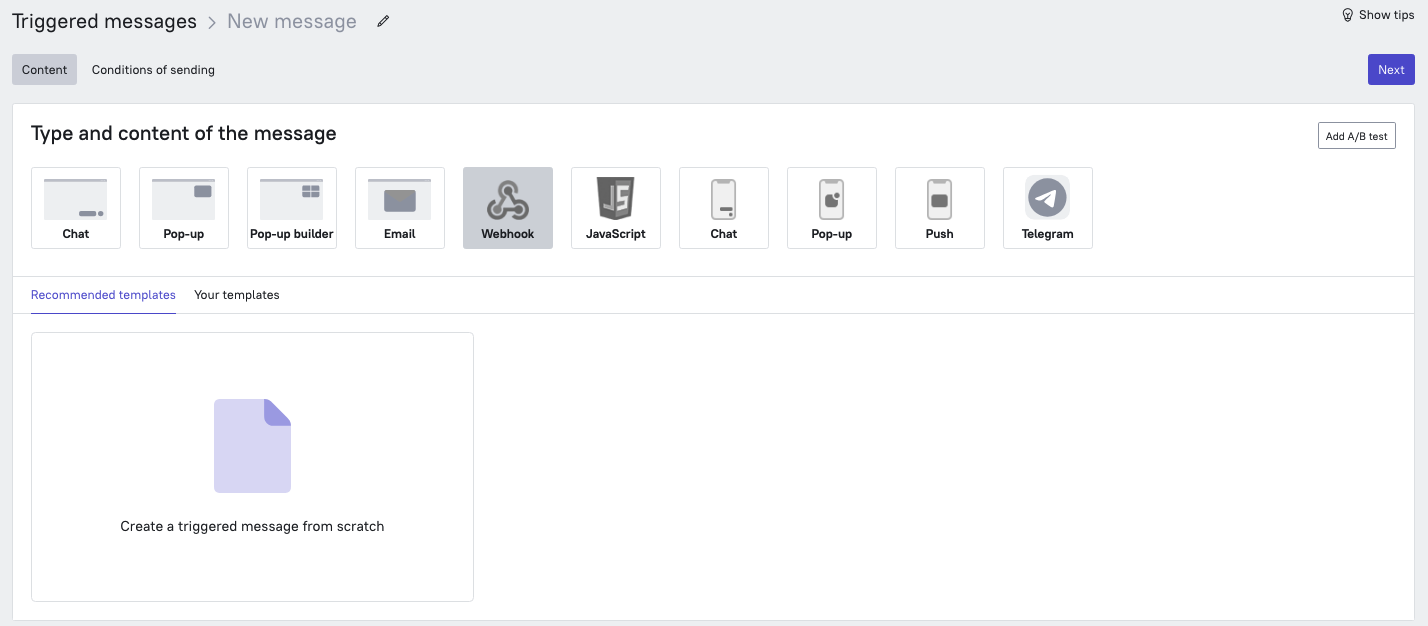
Let's set up a triggered webhook. Go to the Triggered messages section and create a new message, selecting Webhook as the message type:

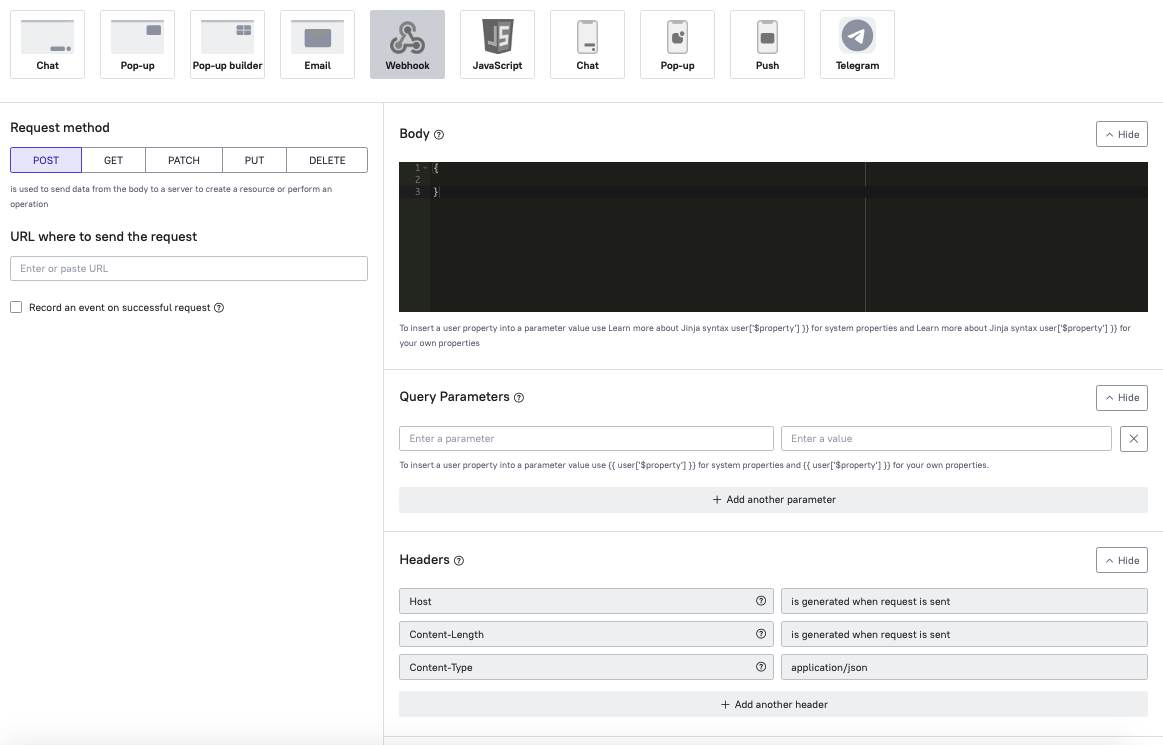
The interface for setting up the webhook will open:
 On this step, you need to select the request method, specify the URL to send the request to, and specify the request body. You can also specify Query parameters and add request headers.
Request method
- POST: allows you to send lead data from Dashly to other systems. For more information on what data such a webhook will send, see the documentation.
- GET: allows you to request data from a third-party service and write it to the Dashly lead card. The response from the third-party service is accepted and written to the event and its attributes.
A GET request has no body, all data is specified in the URL. - PATCH: receives data from a third-party service and replaces the lead data on Dashly's side.
- PUT: receives data from a third-party service and supplements the lead information in Dashly with the received data.
- DELETE: deletes the specified data on Dashly's side. With some exceptions, it usually has no body.
Body
The body uses Jinja syntax. If the service you are sending the request to accepts Python, you can use it as well.
The webhook body should contain parameters and variables. You can add a user property there, using Jinja - read more about this here.
Please note: before composing the webhook body, check with the documentation of the service the webhook is sent to. This will help you understand what webhook format the service accepts (the set of values and keys may differ from service to service) and how the webhook is parsed.
URL and Query Parameters
When creating a webhook, you must specify the URL to which the request will be sent. Query parameters (key name and value) are usually also sent via the URL, but there is a separate field for them to perform certain types of requests.
Request Headers
Request headers send metadata. Host (source), content length and content type are sent automatically and are not edited. They are needed so that the service receiving the webhook understands how exactly to process the incoming request.
You can also add your own parameters by specifying them manually in additional fields.
Please do not store and transmit confidential data in request headers.
After you've finished with the body and requests, you can move on to Conditions of sending. As webhooks use the same settings logic as the other triggered messages, you can find the instructions in this article.
💡 Webhook for chat messages
You can send a webhook to a selected address when a lead or an operator sends a chat message. If you use this feature with Web API, then you can create a chat bot (auto responder) or record conversation history in your system.
To connect a webhook like that, please contact us via chat.
A POST request will be sent to selected address with every lead/operator message.
Message request example from a lead:
User-Agent: Dashly Webhook 1.0
Content-Type:
application/x-www-form-urlencoded
conversation: {"direction": "u2a", "conversation_closed": false, "conversation_tags": [], "type": "reply_user", "id": 78183798, "body": "ewfwfwef", "assignee": {"type": "admin", "name": "inkov", "avatar": "https://files.dashly.io/avatars/default-v2.png", "id": 111}, "sent_via": "web_user", "created": 1492604036, "random_id": 132466821, "conversation": 64558819, "from": 85648207}
type: conversation
token: xxx
token helps you recognize that this request came from Dashly;
type is always equal to "conversation";
"conversation" contains the "ConversationPart" object.
💡 Bot via Webhooks
You can create an auto-response system (chat bot) via webhooks.
When you send a webhook like that in POST parameters, a lead's message is checked via dictionary and replied to via Web API.
Here is an example in python 2.7:
# -*- coding: utf-8 -*-
import json
import re
import requests
TOKEN = ' xxx '//application token can be generated in Settings-> API keys
QUESTIONS = [{'question':'Hello, how are you', 'answer':'Hey, great!'}] //Array which will check phrase match
def run(request):
converstation = json.loads(request['conversation'])
converstation_body = converstation['body'].upper()
conversation_id = str(converstation['conversation'])
for element in QUESTIONS:
exp = re.compile(r'(#\s|)(' + element['question'].upper() + ')')
if exp.search(converstation_body):
param = {"body": element['answer']}
response = requests.post('https://api.dashly.io/v1/conversations/%d/reply?auth_token=%s' % (conversation_id, TOKEN), data=param)
