
Telegram Messenger bot
Set up automatic user qualification via Telegram. The bot will offer the user answer options in the form of buttons, clarify the necessary information and transfer the dialogue to the operator.
Please note: only Beta version is available now. To connect the bot, contact us via live chat.
- Configure the content
- Conditions of sending
- Telegram Messenger subscription
- Interacting with subscribers
Starting out
Before you start setting up the bot, make sure you have an active Telegram integration. Here's how you create one.
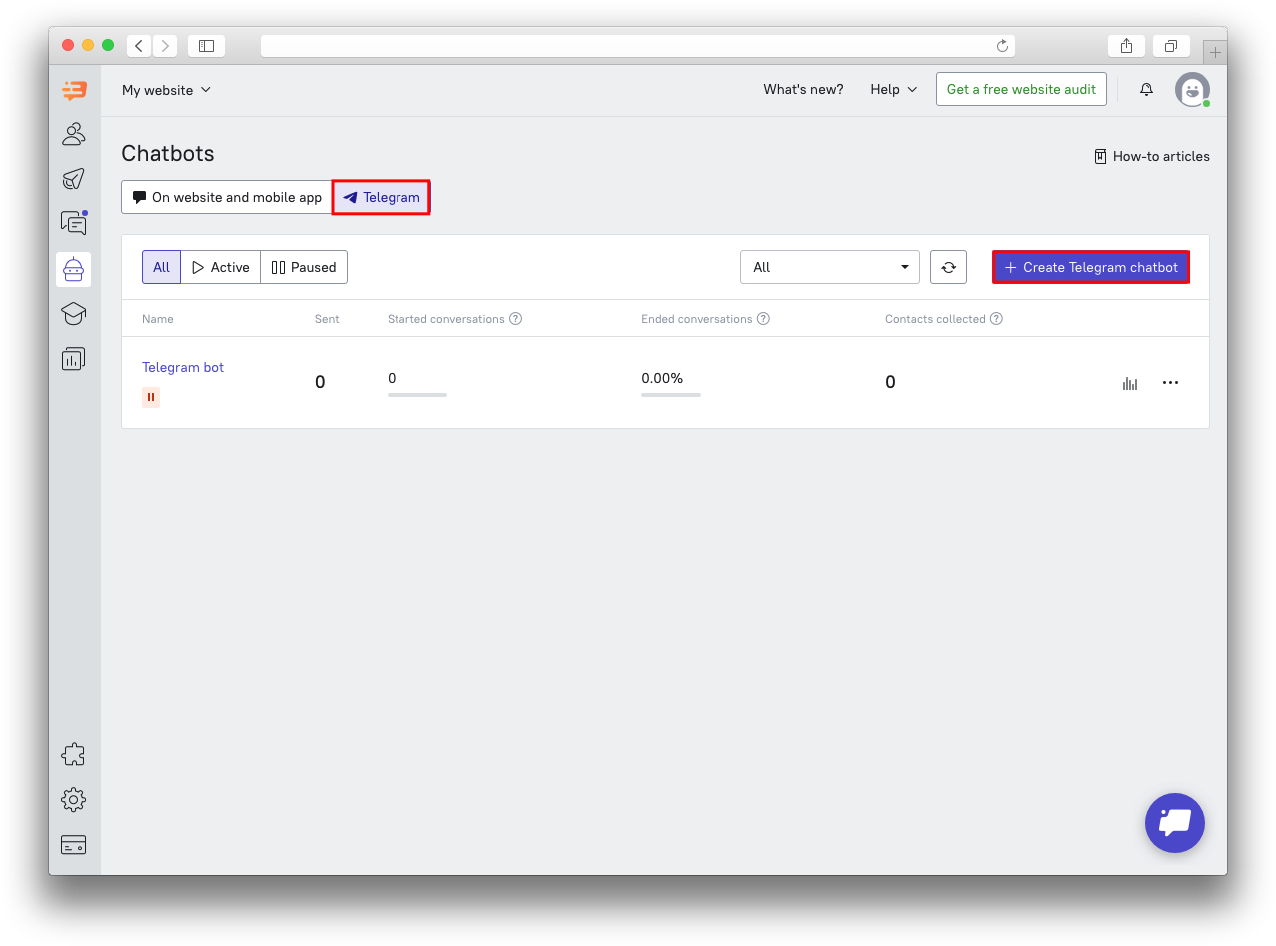
Go to the Chatbots section and click the Telegram button in the top panel to start creating the Telegram chatbot.
You can create several chatbots for Telegram - they can be used for different integrations with Telegram or, for example, in a single integration with different triggers.
Content
With the help of the visual chatbot constructor, you can create any scenarios without having to use code: set answers to frequently asked questions, collect user feedback and contacts, send photos or files or transfer conversations to operators.
Before the Start block, a badge with the trigger action is displayed. This is the event after which the chatbot script is launched.
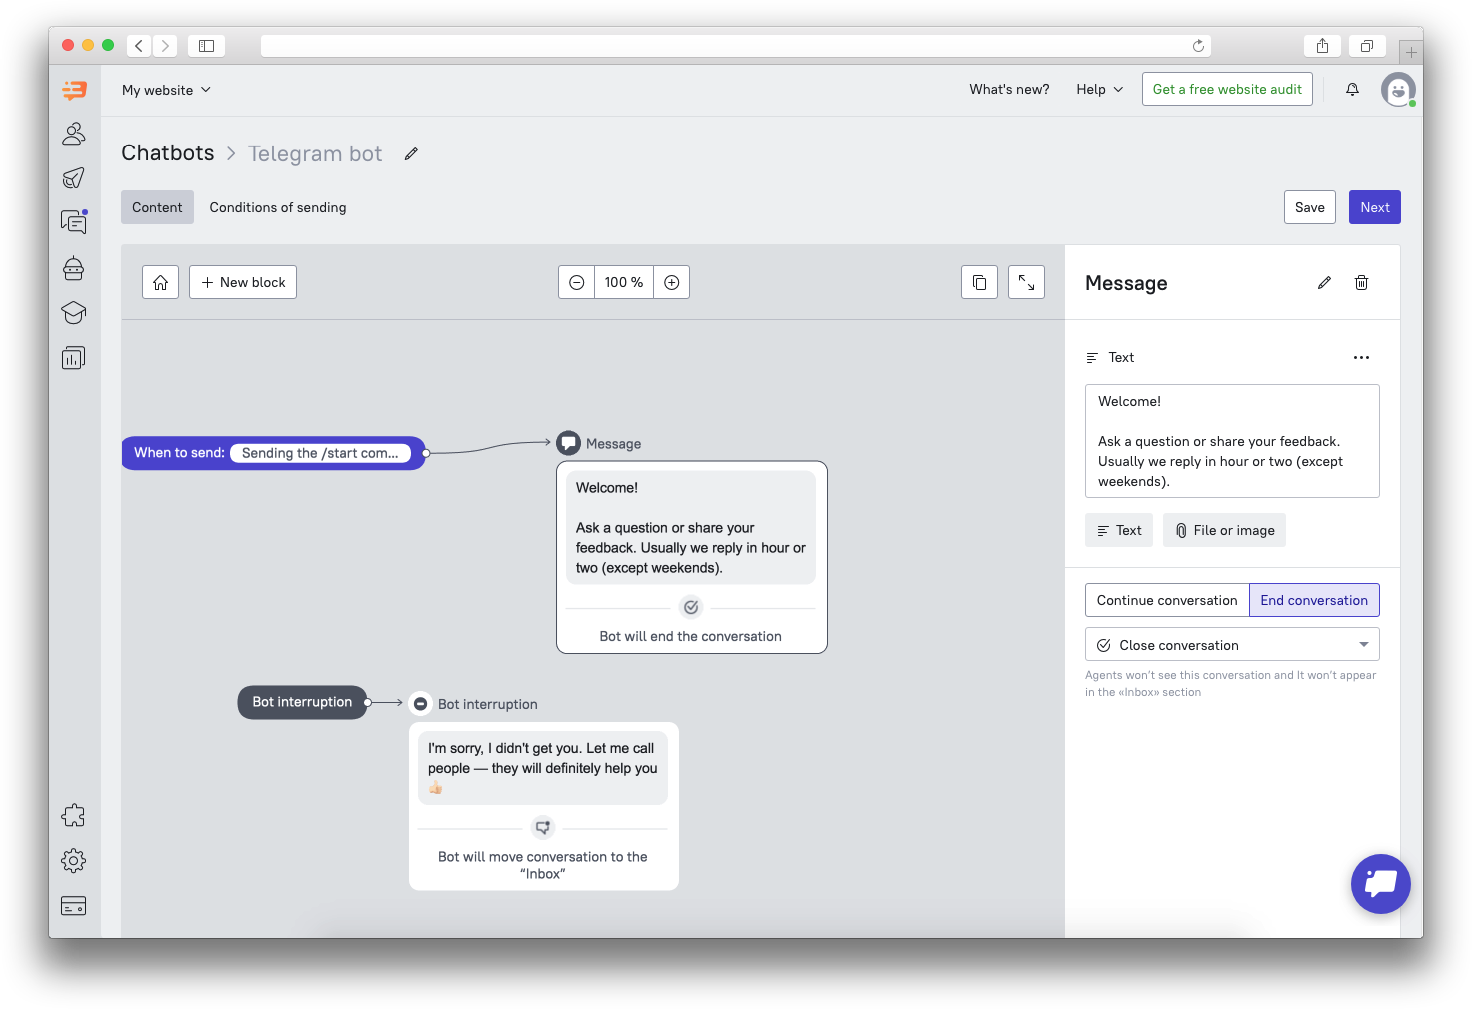
You can add response options to the first block it so that the user can select the question topic or the department they want to contact. To edit a block, click on it. The available actions and settings will appear in the right menu.
Depending on the selected option (button), the user will move to the next block. You can create a new block using the "New block" button or in the settings of the previous block.
To delete or copy a block, move the mouse cursor over it and select the desired action:
There are 4 types of blocks available:
- Message
- Condition
- Action
- Audience filter
"Message" block configurations:
- Text
Add a block with a text message that the user will see. Use visual text editor to format the text: add lists, use bold/italics text, underline and add links.
With the message block, you can end the conversation (the bot will close the chat or pass it to the operators):
- Move to channel.
The bot can pass the conversation to the agent or assign it to a specific channel, depending on your scenario. Assign conversations to the channel if the bot's conversations are processed by several operators (don't forget to give all the operators access to the channel).
- Mark conversation as unanswered
The conversation will appear in the Inbox section as unanswered, not assigned to an agent or channel.
- Assign to agent
Welcome-bot will assign the conversation to a specific operator, who will find it in the "Open" conversations list and see which answer options the user chose when interacting with the bot.
- Close conversation
The conversation will be closed and won't be seen in the "Open" section of the Inbox. You can find these conversations in the lead card.
You can also choose to continue the conversation (the bot will continue interacting with the user):
- Reply with text.
Use this response to collect contacts or any other information. For example, the bot can specify the user's phone number and pass it to the sales department.
❗With the “Write response to user property” option for response buttons and response input fields, you can choose whether the response entered by the user should be written to a property. You can then use this property to filter leads in the Leads Database section or to segment the audience of other bots or triggered messages.
- Reply with buttons
Buttons can be used to qualify users. Each option selected will lead to the next bot question, where you can record the event. You can select the text for the button, as well as select the next block where the user will be sent to after clicking the button. Each button must link to a block. It can be either a new block or any of the previously created ones.
You can add up to 10 buttons to one block.
"Action" block configurations:
There are two types of target actions in the block:
- Record data (event, property, tag)
For each Welcome bot block, you can set up data recording in the user's card. You can record an event (and then use it as a trigger for sending messages), assign a tag or a user property for later segmentation. Events configured in bot blocks can be used in funnels.
- Send recorded data to email.
"Condition" block configurations:
Add this condition to display different blocks depending on the configured working hours.
To add a new block with a condition, click on the "+ New block" - "Condition" button. Select the available options: working hours and non-working hours. For example, you can set up a bot to interact with a user outside of your working hours to collect contact details and pass info to a manager, so you don't lose any leads even when your managers are out of office.
"Audience filter" block configurations:
With this block you can segment chatbot's users while the bot's scenario is executed, based on their properties or events. This allows creating different scenarios for different segments.
For example, a Leadbot is launched for all visitors on a specific website page. You can add an audience filter. Depending on whether the user has already submitted their data, the bot will launch different scenarios.
Interruption block
Your users can interrupt the conversation with the bot. To activate this feature, enable the "Bot interruption" badge:
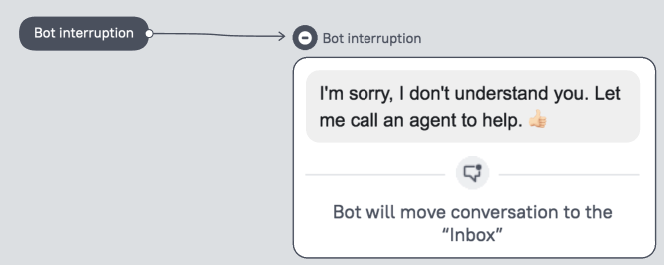
You can edit the content of the interruption block by clicking on it. On the right you will see text block section which can be changed.
❗ "Bot interruption" block is always active, except for branches with a text input field for entering an answer. This means that when the user leaves the reply in this block, the bot won't be interrupted, but will consider it as an answer.
Conditions of sending
You can pick between two triggers: launch the bot after /start command, or In a new question within a previously started convervsation (suitable for clients who have previously contacted you on Telegram and went through the start bot script).
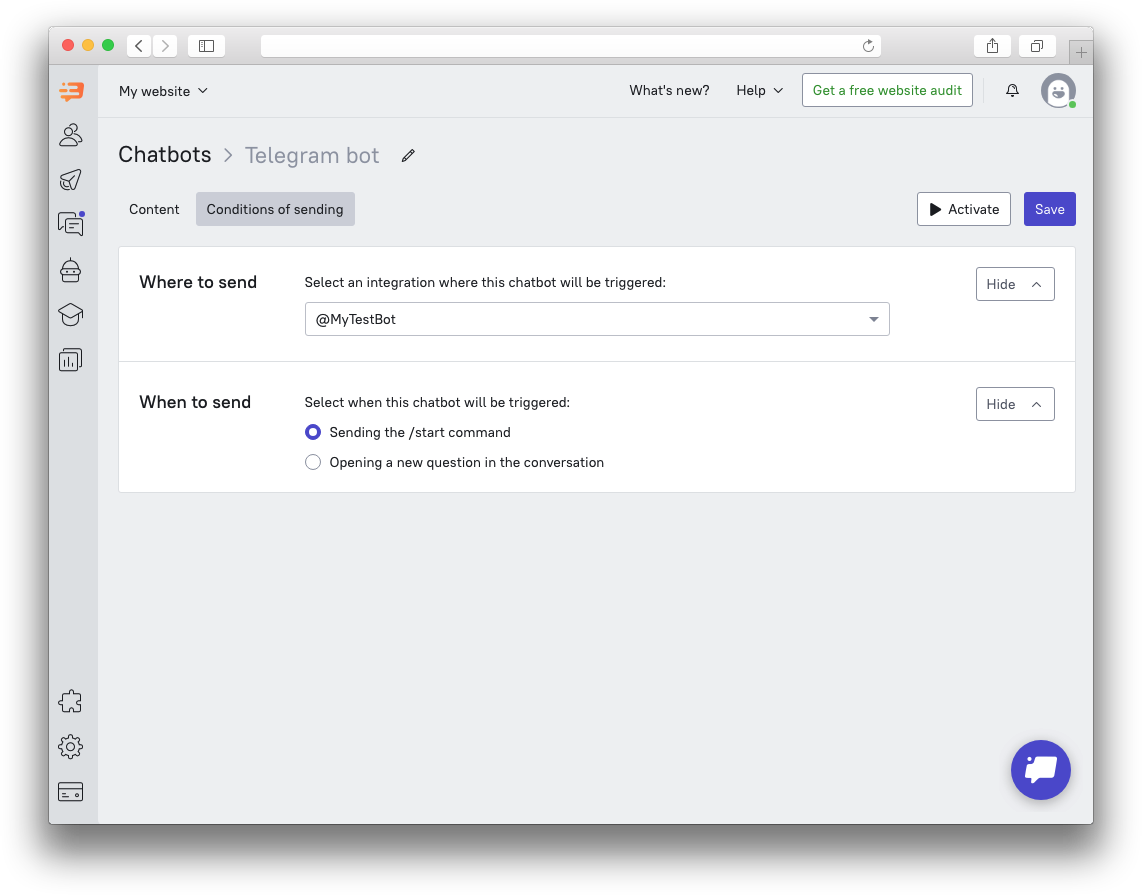 If you have several Telegram integrations, you can choose which one the bot should work in.
Please note:
- only one bot can be active with one trigger and for one integration;
- only active integrations will be shown in the dropdown list.
If the integration with Telegram Messenger is inactive or deleted, all Telegram bots that were associated with it are automatically suspended.
Telegram Messenger subscription
If you have configured at least one integration with Telegram Messanger and connected at least one Telegram chat bot, the events “Subscription to Telegram bot <Bot Name>” will automatically appear in the list of events on your project.
This is what it will look like in your leads database. You can select users subscribed to a certain bot or all of them:
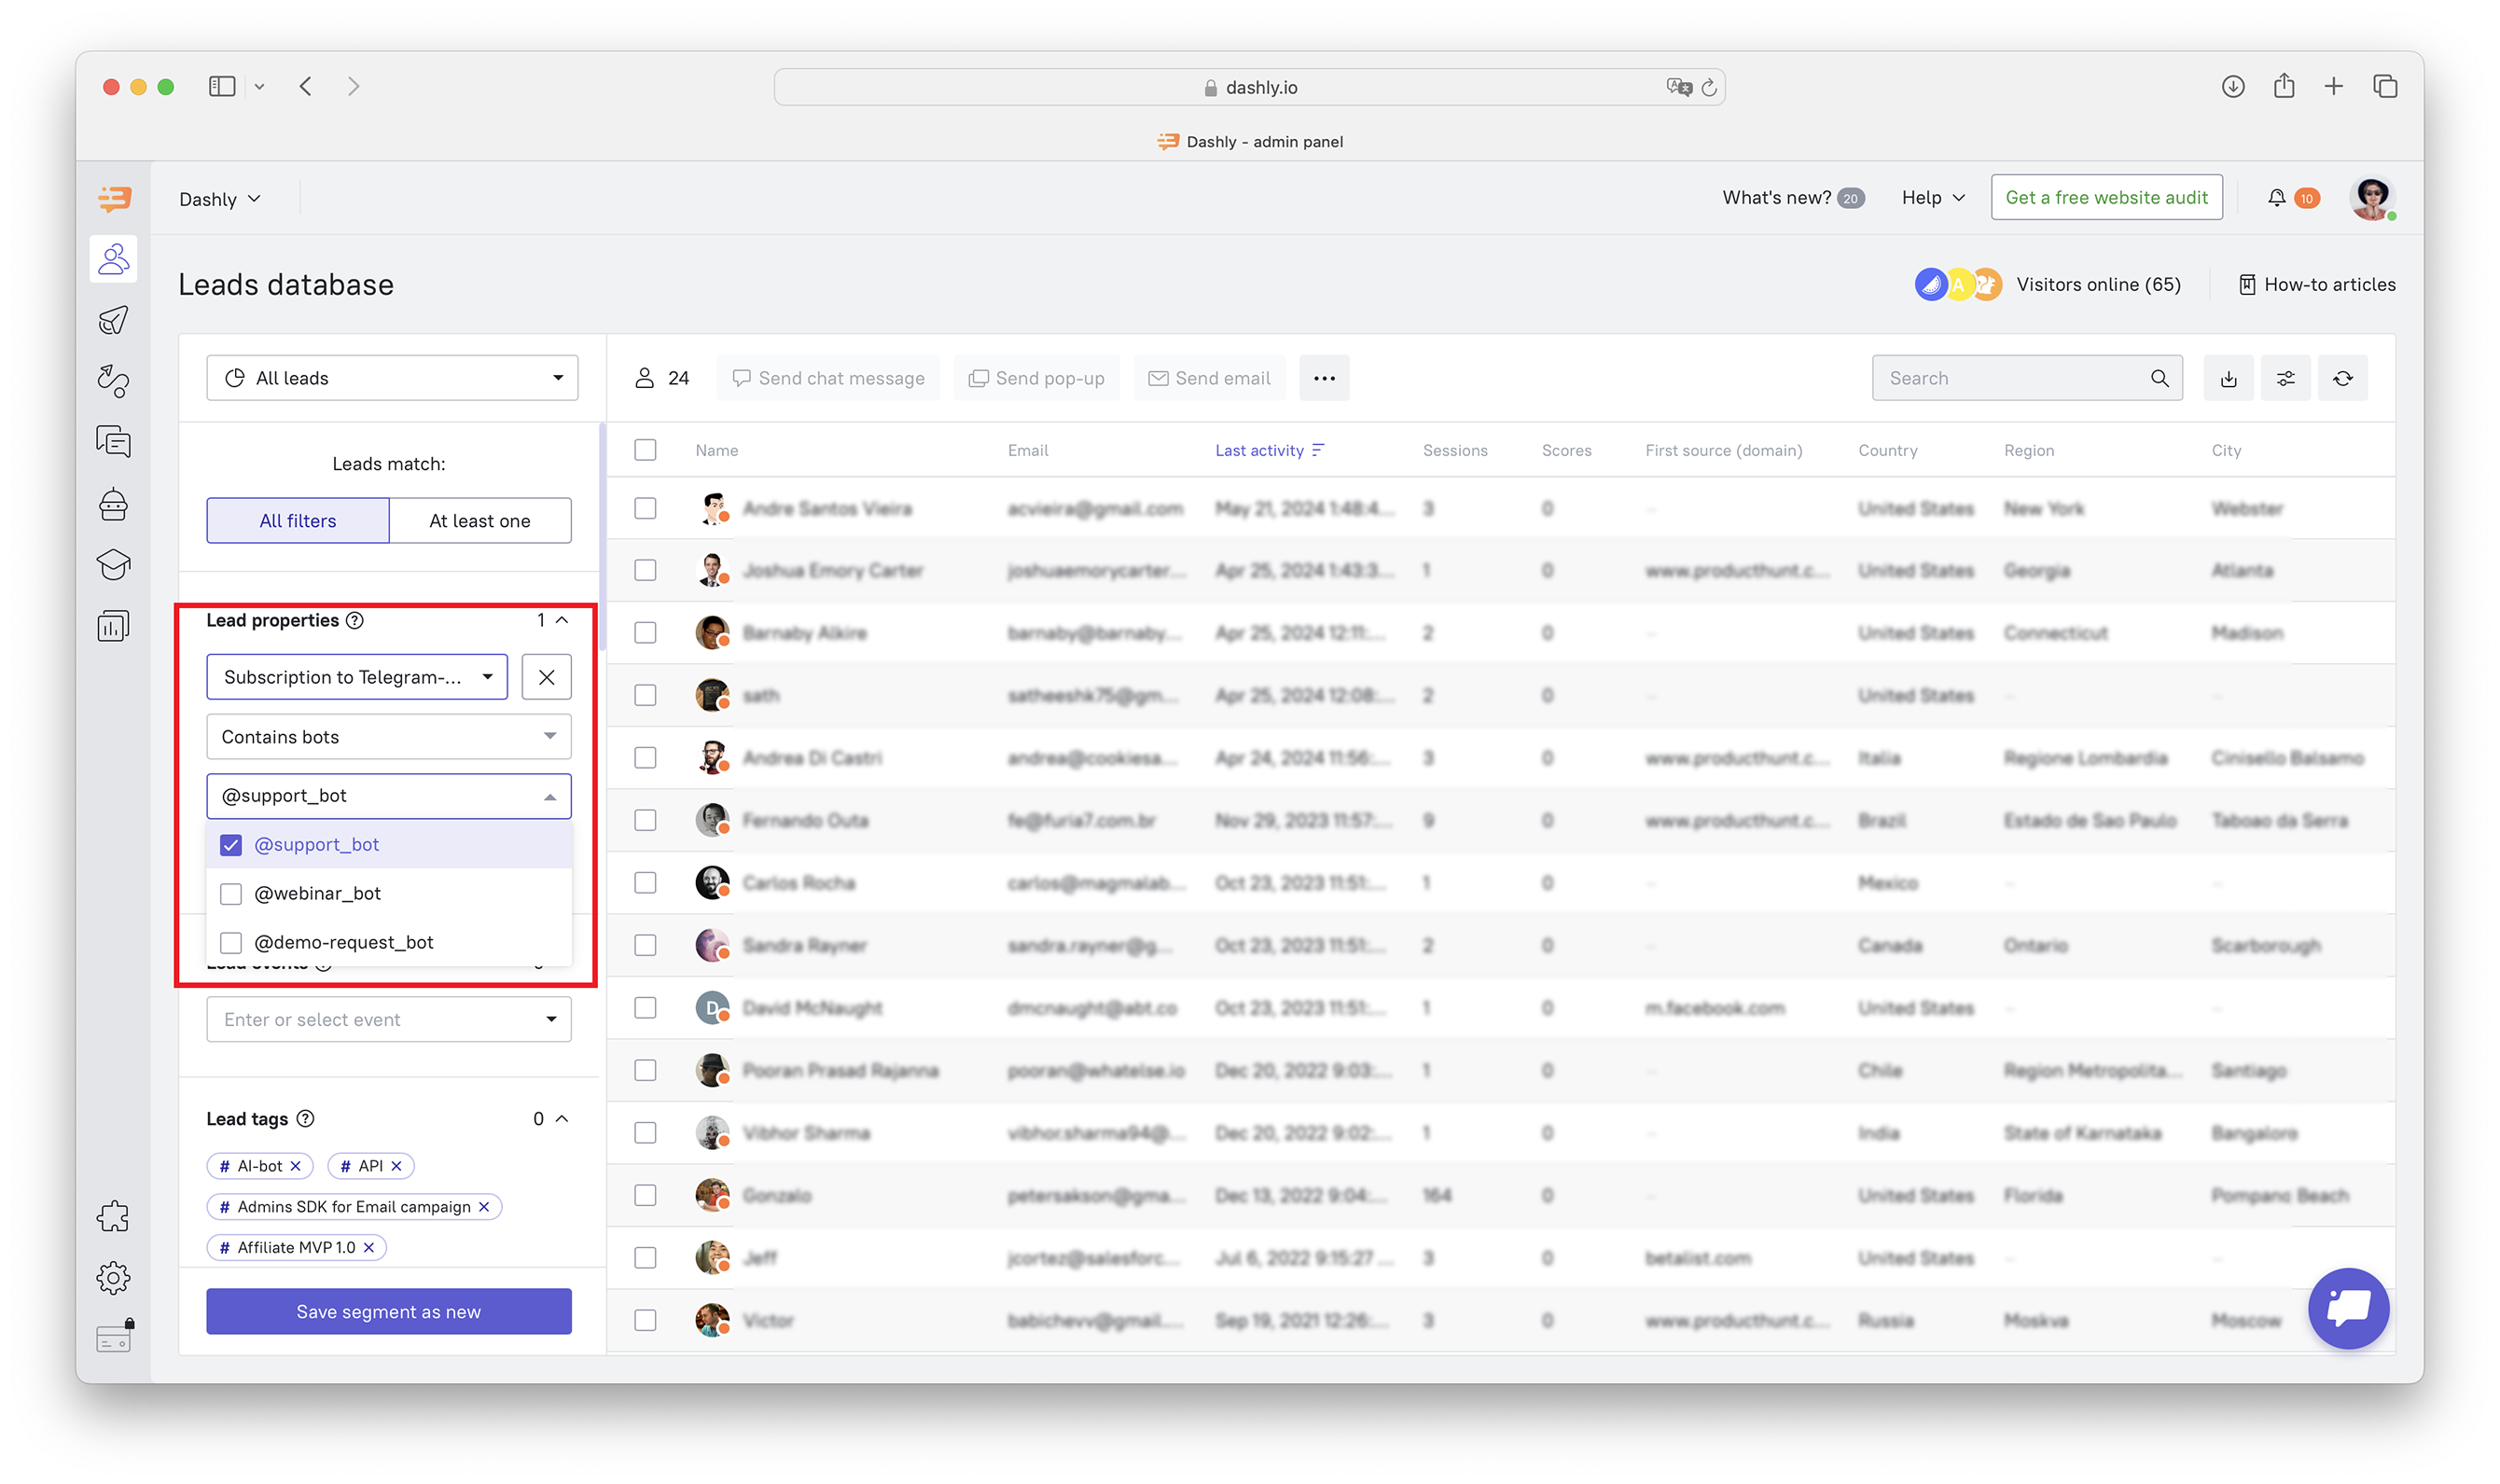
The event can be used for segmenting your leads database, creating funnels and event reports.
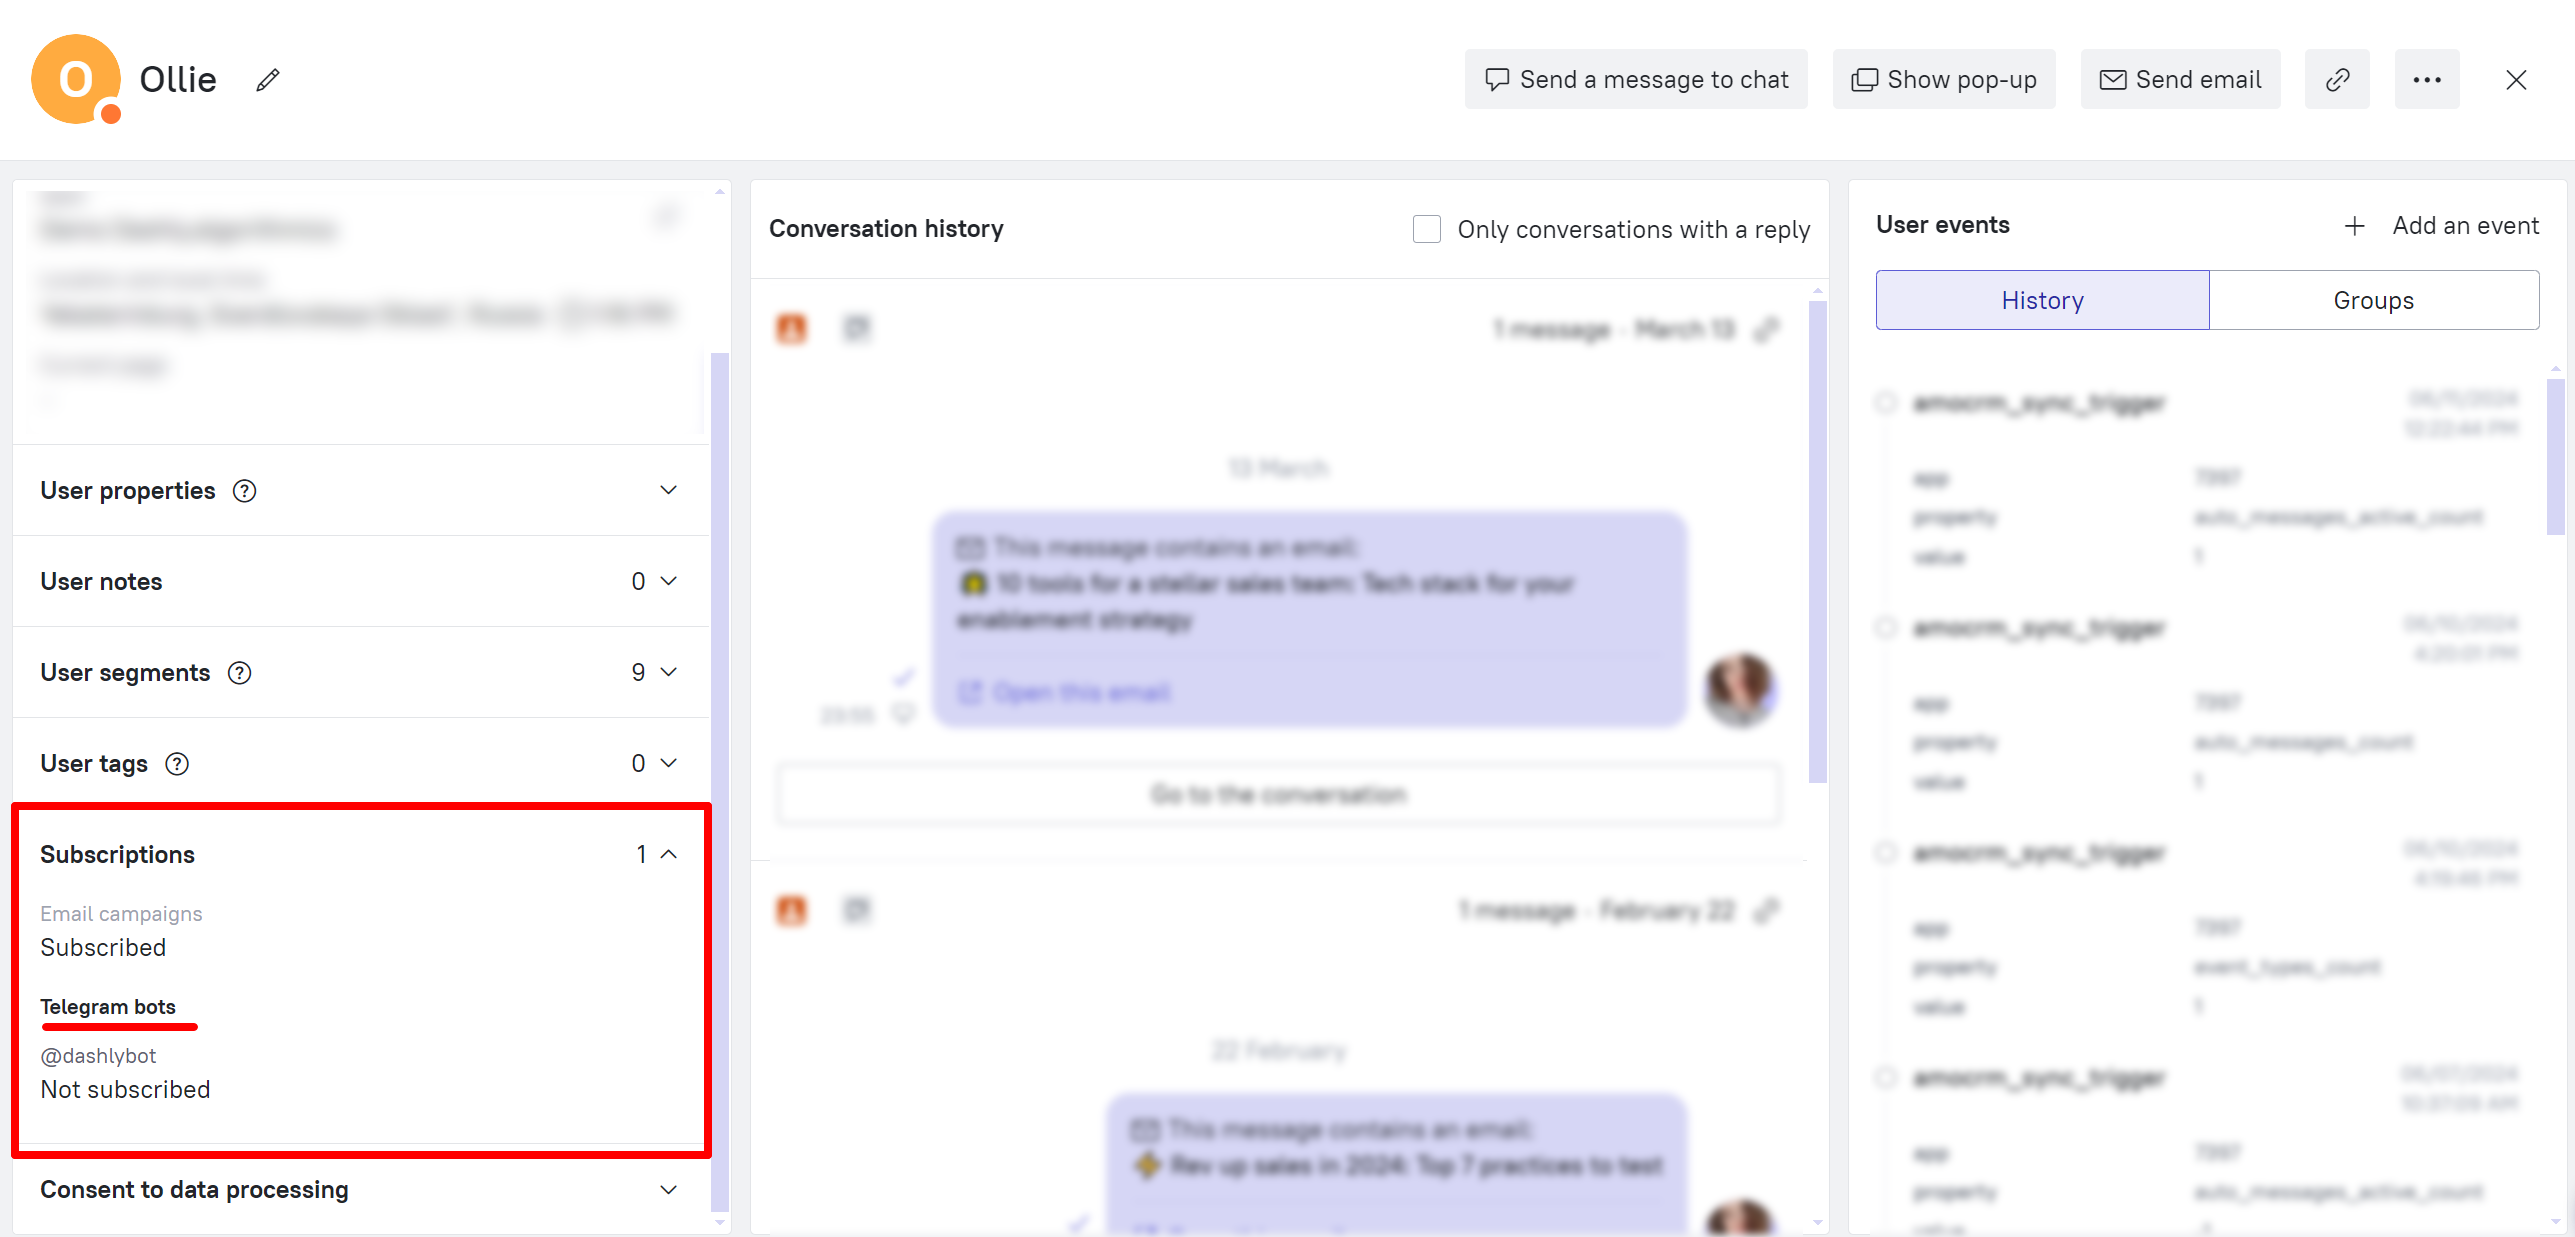
The chatbot subscription status will also be displayed in the lead card, in the “Subscriptions” section:
Additionally, you can get more info on Telegram Messenger bot statistics in this article.
Further interaction with chatbot subscribers
After you've created chat bots for Telegram Messenger, you can also send triggered messages to the bot’s subscribers and build entire sequences of such messages.
The trigger for sending a message to Telegram bot subscribers can be either their interaction with the bot, for example, clicking on a button, or performing any action on the website.
Read the article on Triggered messages for Telegram to learn more.