
Leadbot
Leadbot is a part of Dashly chat widget feature which could contact users automatically when they perform any action on your website. As a result of that, leadbot helps to involve more leads to the conversation and provide qualified once to sale agents or any other department.
What can leadbot do?
- Leadbot can be configured just like auto messages. It will be fired once a user performs a trigger event on your website. You could set segmentation as well;
- Leadbot can send text messages, share images, attachments, buttons or suggest entering users data;
- Fill users cards with tags, events or properties, which could be used for building any other auto scenarios;
- Assign conversation to any agent or channel.
Find 10 leadbot best practices here.
Tasks that leadbot will not be able to perform:
- Reply to your users in the live chat
Leadbot fires when a user performs a required action on your website. If a user initiates a new chat conversation, the leadbot won't be able to answer.
Please note, that at the moment there is no way to set Chat opened or Conversation started events as triggers for the leadbot. Technically you could do it, however the leadbot will start a new conversation, so there is a chance that the user won't see it (as they will have their current conversation open).
Leadbot appearance
You can find avatar and name settings in the general list of bots. Move to the Chatbots section and click on the "Edit bots appearance" button in the upper right corner.
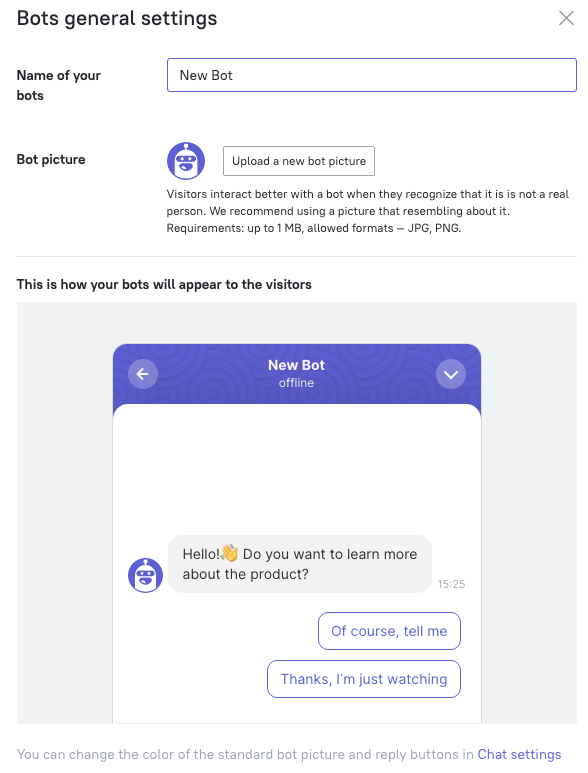
You will see bots general settings. Image format requirements: JPG or PNG, up to 1 MB.
❗Important: all bots on your site will have the same name and avatar.
Leadbot settings
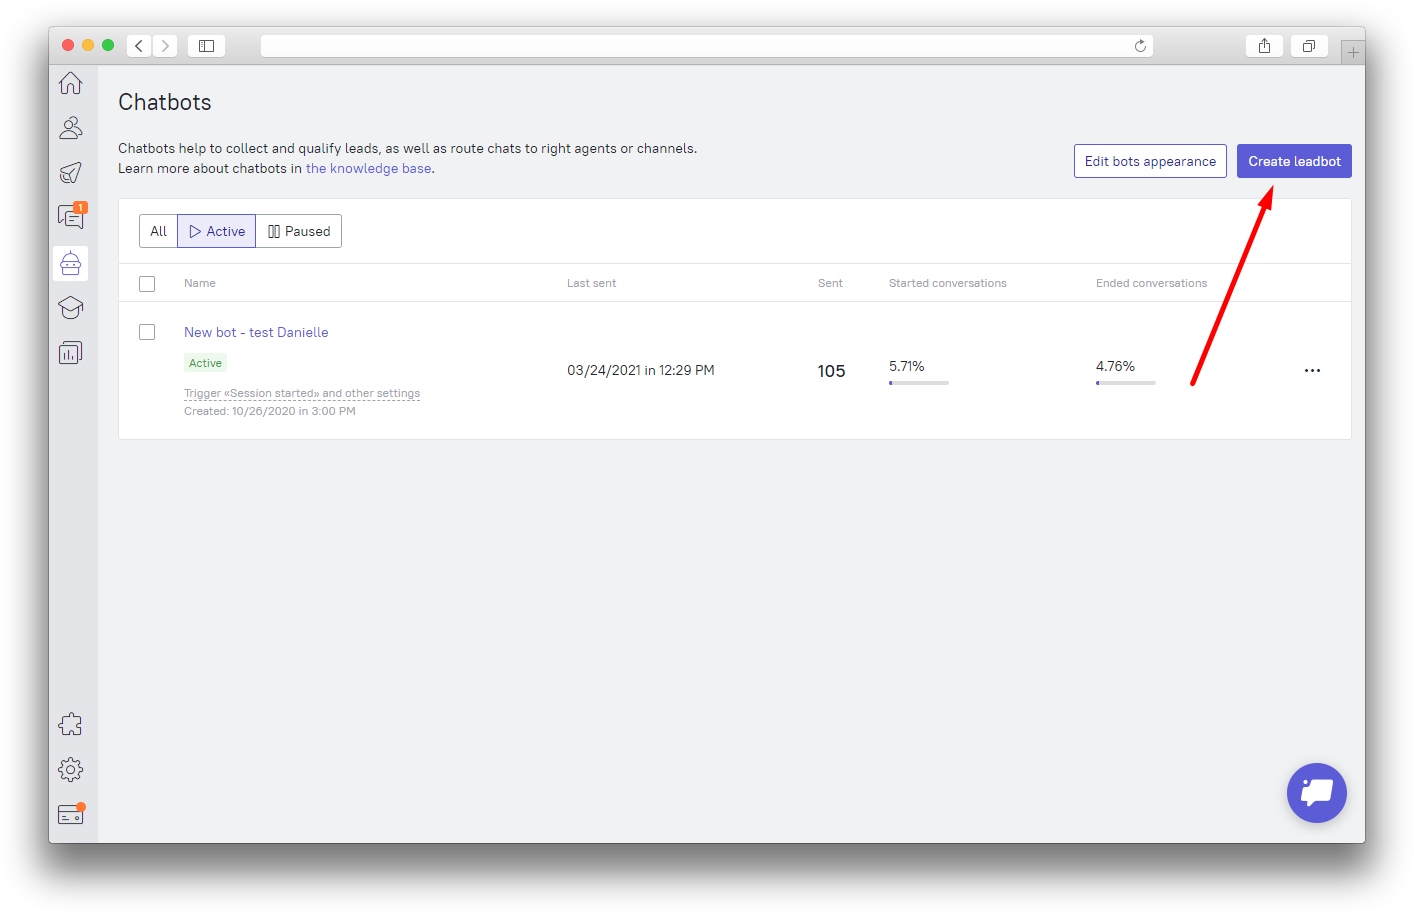
Leadbot is a code-free solution which can be configured just like any auto message. To set it, move to Chatbots section and click on "Create leadbot":
You will see the menu where you can set or edit your bot. All steps are just like in the Triggered messages create/edit mode, except for the Goal step - in the current bot version this step is missing.
Find out 7 tips on how to configure leadbot in this article.
Content
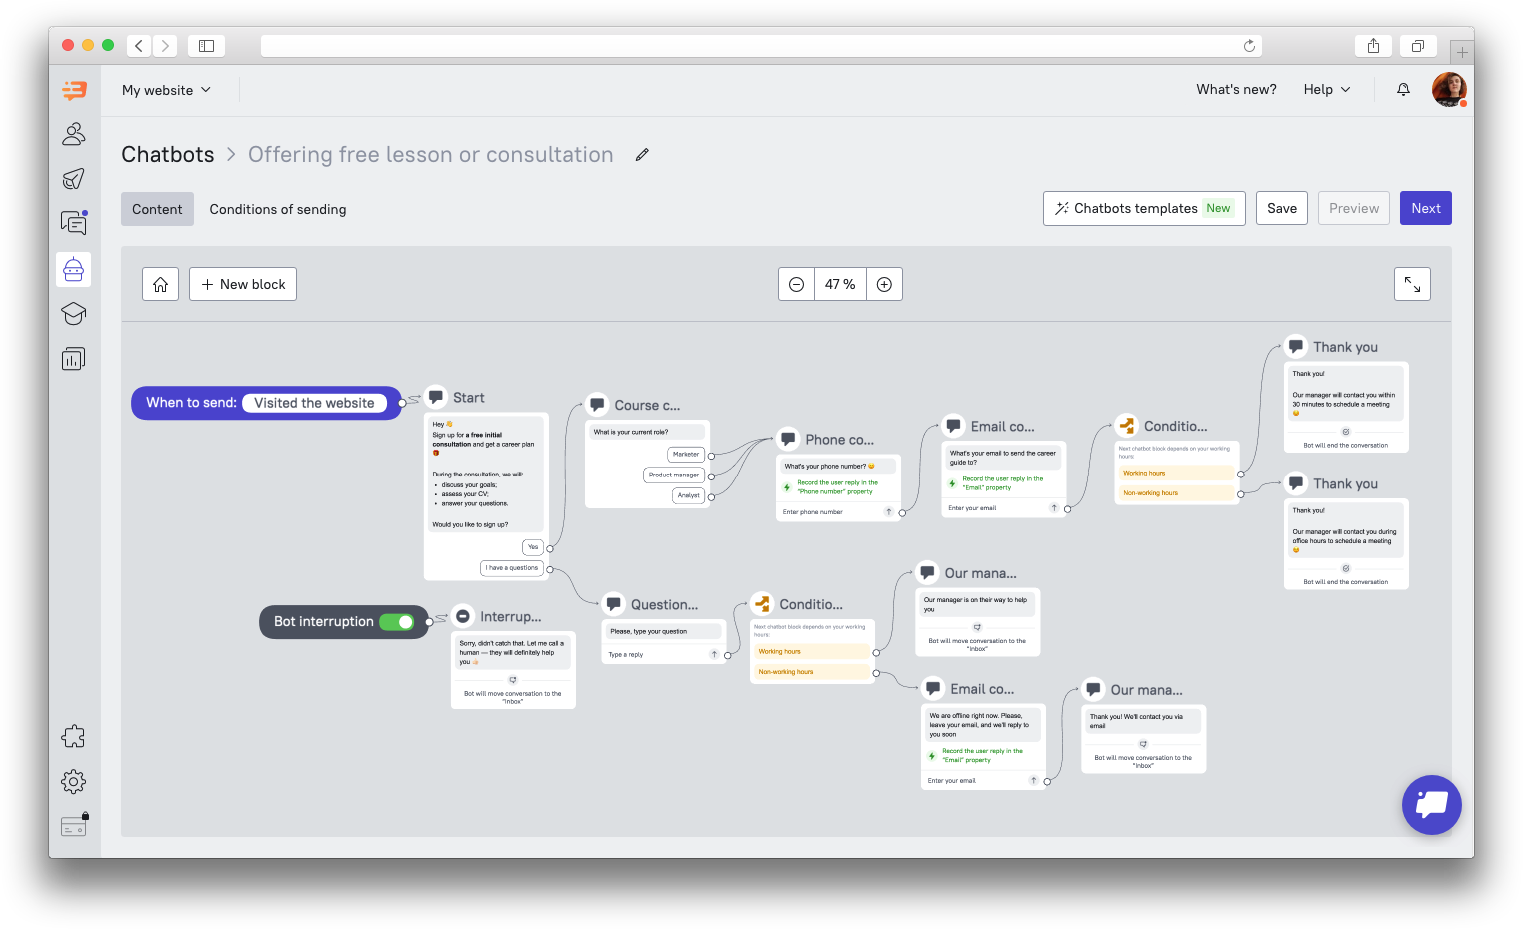
You can create any scenario using the visual editor. For your convenience, the position of each block can be changed and the scale can be edited as well.
Once you start creating a new leadbot, you will see some default settings as an example. You can also pick a template.
 You can keep and use it, edit or delete and create any other blocks.
Use the leadbot builder to create a visual chain of questions. The leadbot will ask the next question depending on the previous answers.
There are 4 types of blocks available:
- Message
- Condition
- Action
- Audience filter
To delete or copy a block, hover the mouse cursor over it and select the action.
Start block
This is the block that engages users in a conversation The users will see its content at the moment the leadbot starts a conversation. Click on the block to edit it. The available actions and settings will appear in the right menu. The name of the starting block does not change.
Message block
This block is responsible for involving users in the conversation and qualifying them. To edit the block, click on it. All available actions and settings will appear in the right menu. The name of the starting block does not change.
Here’s what you can add to the block:
- Text
Add a block with a text message that the user will see. There can be several text blocks, each new block will appear sequentially, with a slight delay.
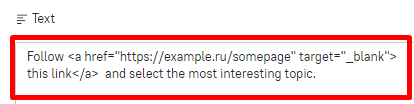
Use visual text editor to format the text: add lists, use bold / italics, underline and add links.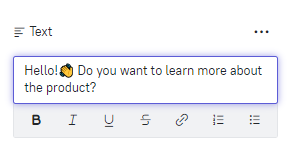
Html tags are allowed as well. Using html tags, you can arrange paragraphs, add lists and links, highlight text. Links are recognized by wrapping them in a tag or simply adding to the text.
Approved tags are:
['a', 'br', 'p', 'em', 'i', 'b', 'strong', 's', 'ul', 'ol', 'li', 'dl', 'dt', 'dd']
<a> has allowed attributes:
['href', 'rel', 'target']
- File or image
You can add a file or image to the bot block to attract attention.
Allowed file size that you can add to the block: up to 2 MB.
Allowed extensions: jpg, jpeg, png, gif, pdf, rar, zip, html, csv, docx, doc, xlsx, xls
- Record visitor event, property or add a tag
For each bot block, you can set up data recording in the user card. This could be an event that you selected as a trigger for sending a triggered message, assigning a tag or custom property for segmentation. Events configured in lead bot blocks can be used in funnels.
In addition, each block with a message should be given the target action (continue the conversation or end it).
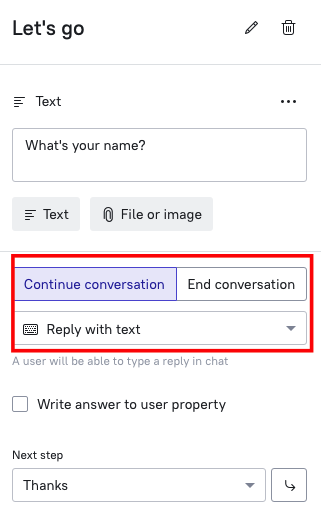
You can use the following options to continue the conversation:
- Reply with buttons
Reply buttons can be used to qualify users. Each option they choose will lead to the next bot question, where you can set up an event recording.
The text in the reply button can be changed, as well as the next block where the user will go after choosing the answer. Each reply button must refer to a block. This can be either a new block or any of the previously created ones.
If the required block has not yet been created, you can add it through the reply button menu. Communication is automatically established between the current block and the new block.
You can add up to 10 buttons to one block.. Reply with text
Use text reply input to collect contacts or any other information.
For instance, the leadbot can specify a user's phone number and assign the conversation to the sales manager.
❗With the “Write response to user property” option for response buttons and response input fields, you can choose whether the response entered by the user should be written to a property. You can then use this property to filter leads in the Leads Database section or to segment the audience of other bots or triggered messages.
Use the following options to end the conversation:Assign conversation
The leadbot can send the conversation to the manager or assign it to a specific channel, depending on your scenario.
You can use this feature to increase the effectiveness of your sales manager's calls. The leadbot will transfer only leads that match certain criteria to the manager. The manager will see all the information about the lead in the card.
Conversation assignment is always the last block, since a leadbot cannot assign a conversation in the middle of a script.
Please note that managers will see messages in the Inbox section only if the conversation with the leadbot has been completed (assigned by the bot to the channel or to the manager) or interrupted. If the dialogue has not been completed, it will be available for viewing in the user's card.- Mark conversation as unanswered
The conversation will appear in the Inbox section as unanswered, not assigned to an agent or channel.
- Close conversation
The conversation will be closed.Such conversations won't be seen in the Inbox section.
Action block
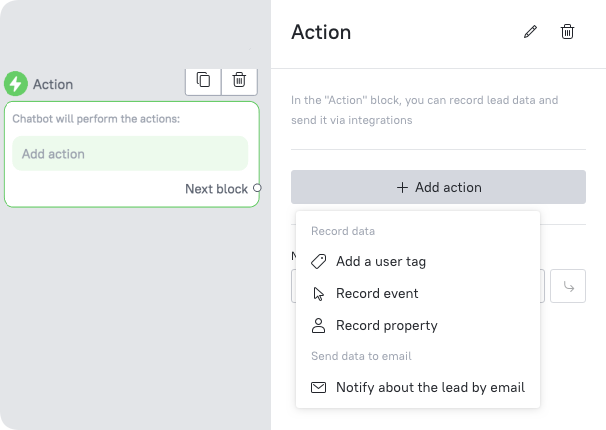 There are two types of target actions in the block:
- Record data (event, property, tag)
For each Welcome bot block, you can set up data recording in the user's card. You can record an event (and then use it as a trigger for sending messages), assign a tag or a user property for later segmentation. Events configured in bot blocks can be used in funnels.
- Send recorded data to email or amoCRM
Condition block
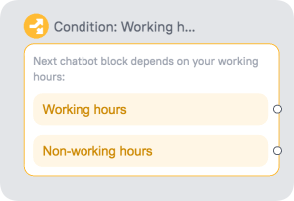 Add this condition to display different blocks depending on the configured working hours.
To add a new block with a condition, click on the "+ New block" - "Condition" button. Select the available options: working hours and non-working hours. For example, you can set up a bot to interact with a user outside of your working hours to collect contact details and pass info to a manager, so you don't lose any leads even when your managers are out of office.
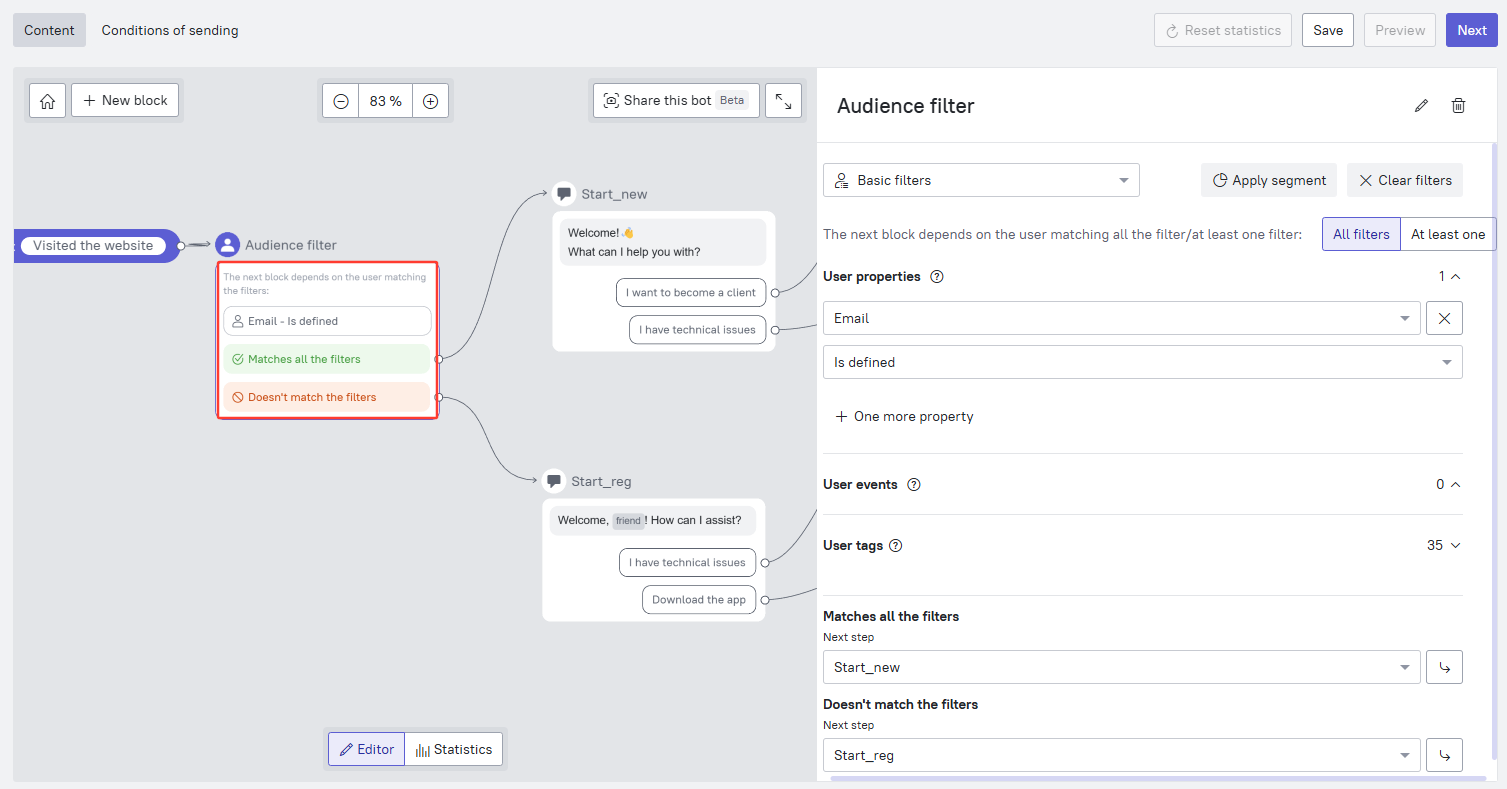
Audience filter block
With this block you can segment chatbot's users while the bot's scenario is executed, based on their properties or events. This allows creating different scenarios for different segments.
For example, a Leadbot is launched for all visitors on a specific website page. You can add an audience filter. Depending on whether the user has already submitted their data, the bot will launch different scenarios.
Interruption block
Your users can interrupt the conversation with the bot. To activate this feature, enable the "Bot interruption" badge:
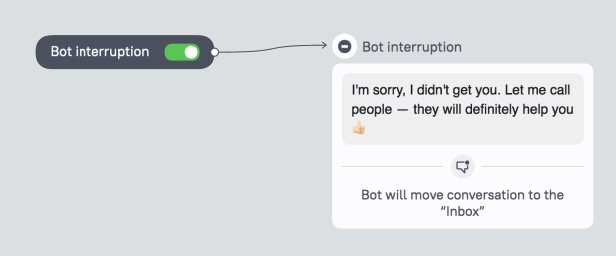
You can edit the content of the interruption block by clicking on it. On the right you will see text block section which can be changed.
❗Important: the chat input field changes to a special one in the blocks where we have Reply input option. This means that when users enter their data into this block, the leadbot will not be interrupted, but will count it as a reply.
Return to the start block
In case you have created a large number of blocks and decided to go back to the very beginning to check the chain, use the "Return to the starting block" button:
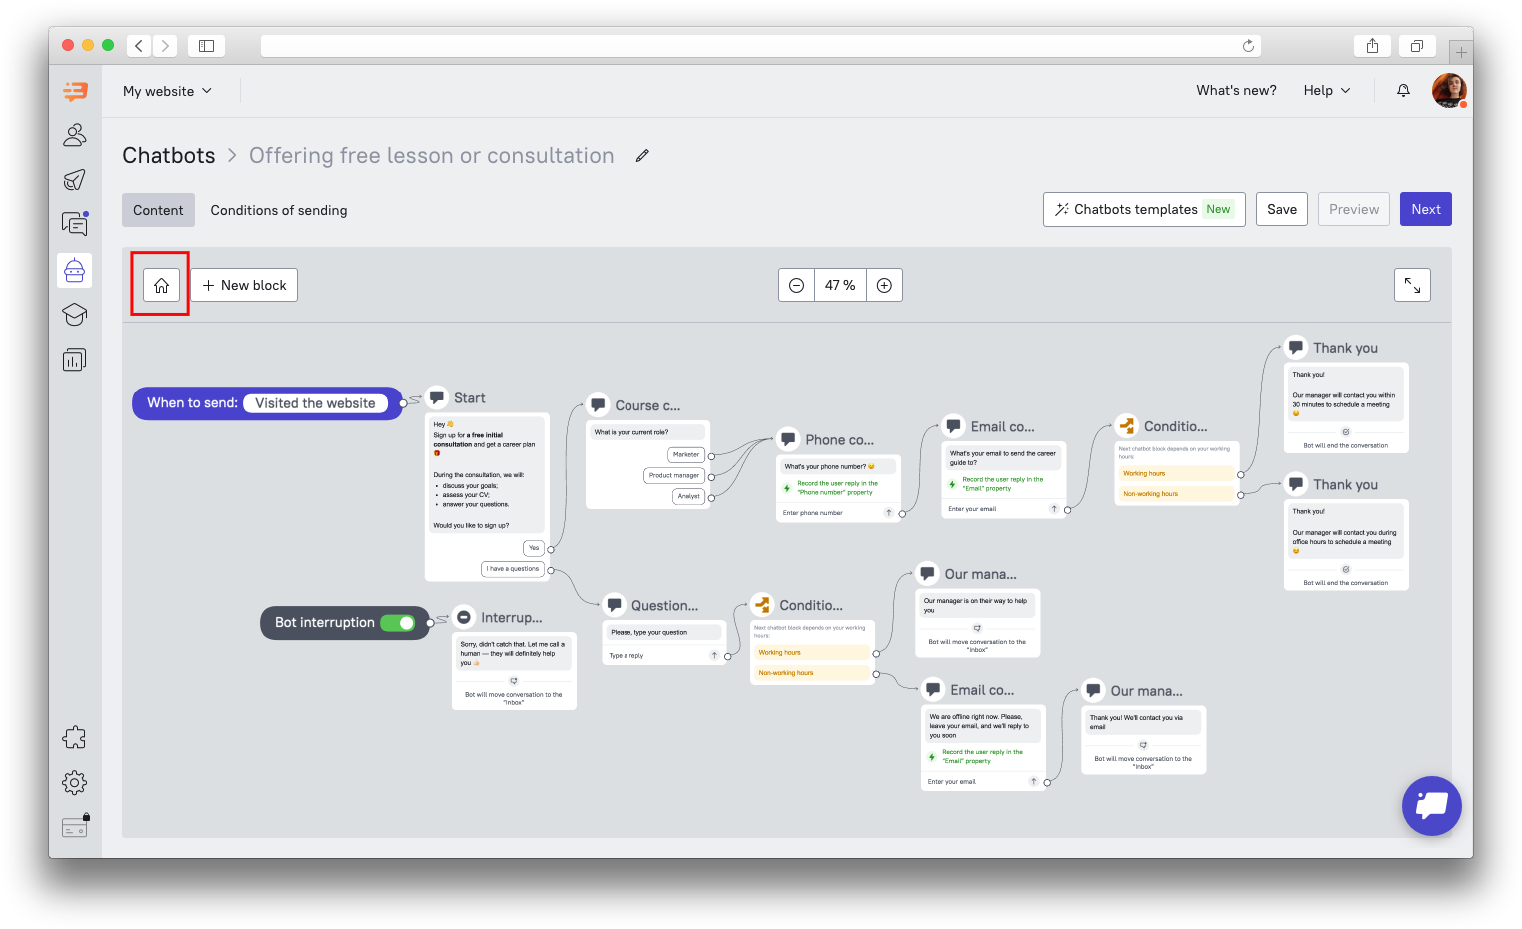 This option will take you back to the very beginning of the bot script.
"Save" and "Preview" buttons
"Save" button allows you to save the bot’s current contents. All the rest steps will have default settings:
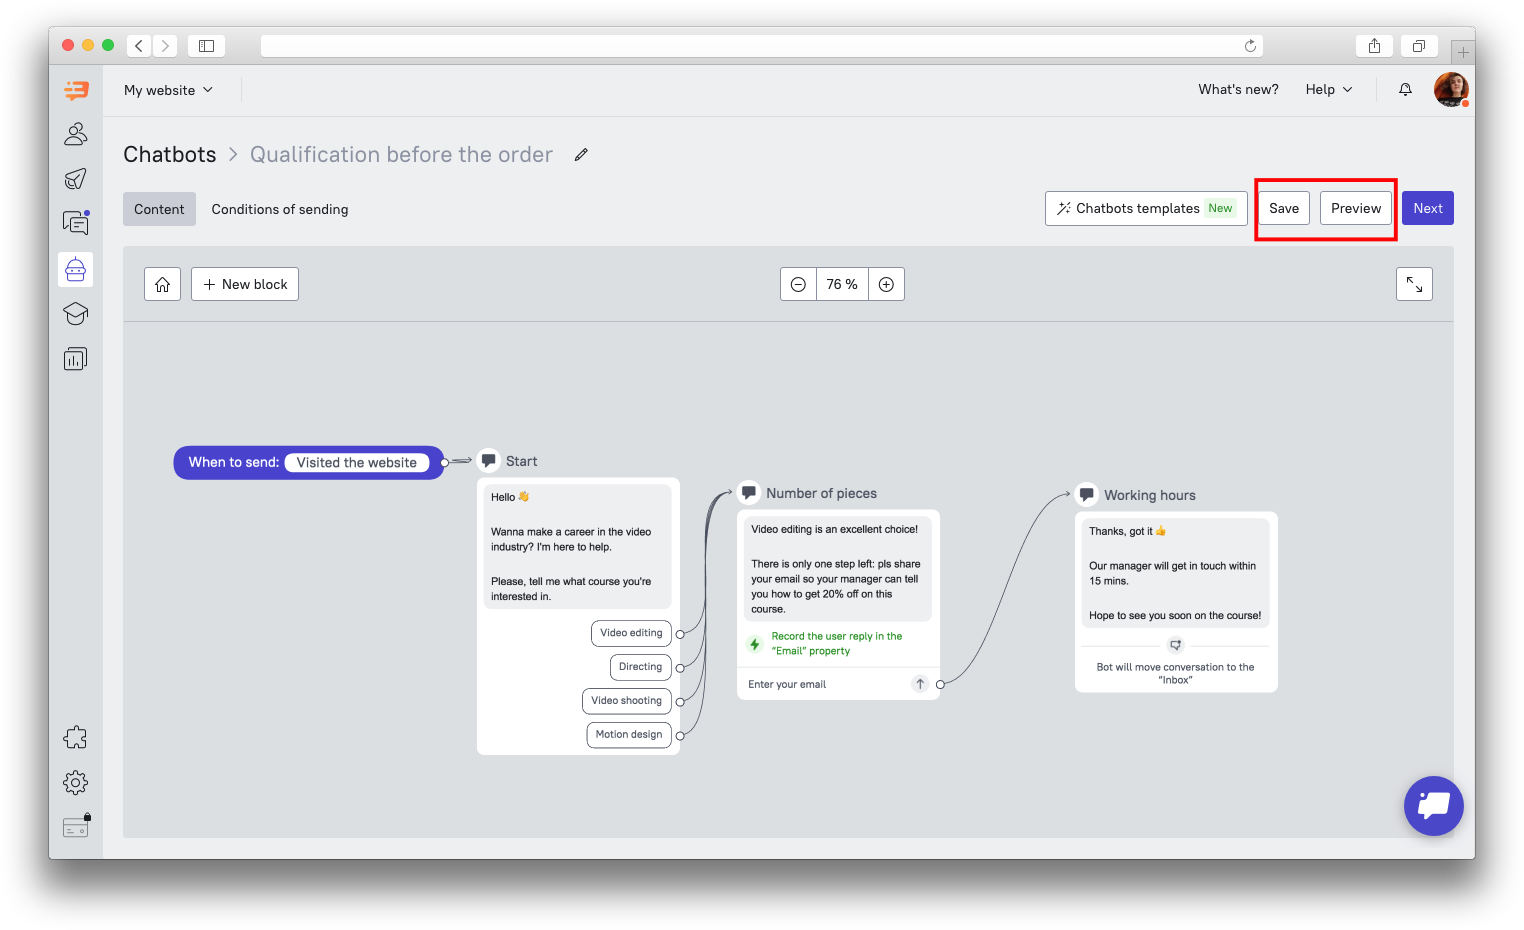 The "Visited the website" event will be selected as a trigger, resending in one day, and the name of the scenario will be filled in as "New bot". The script will be paused. You can change any setting step and activate the lead bot at any time.
The "Preview" button lets you test the bot before launching it on your site.
❗Important: The “Preview” button will only become active once you’ve saved the last changes you’ve added.
After pressing “Preview”, you’ll see a modal window requesting a link to the page you want to test the bot on. The page this link leads to must have your Dashly installation script on it:
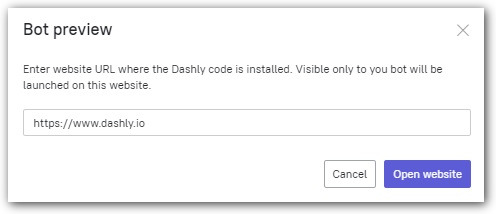
Clicking the “Open website” button will then open your website in a new browser tab, sending you the leadbot message in it, as though you’ve triggered the bot and are compliant to its Audience settings. The leadbot preview will only be visible to you. Testing the leadbot will create a new user card, which will count as a new unique user.
If you’ve set one of the leadbot blocks to assign the bot conversation to a channel or a team member, this conversation will appear in your Dashly inbox, provided you’ve tested this block in the testing tab.
Conditions of sending
After you've finished creating the leadbot, you can move on to the next step, "Conditions of sending". Clicking on the When to send button will also redirect you there.
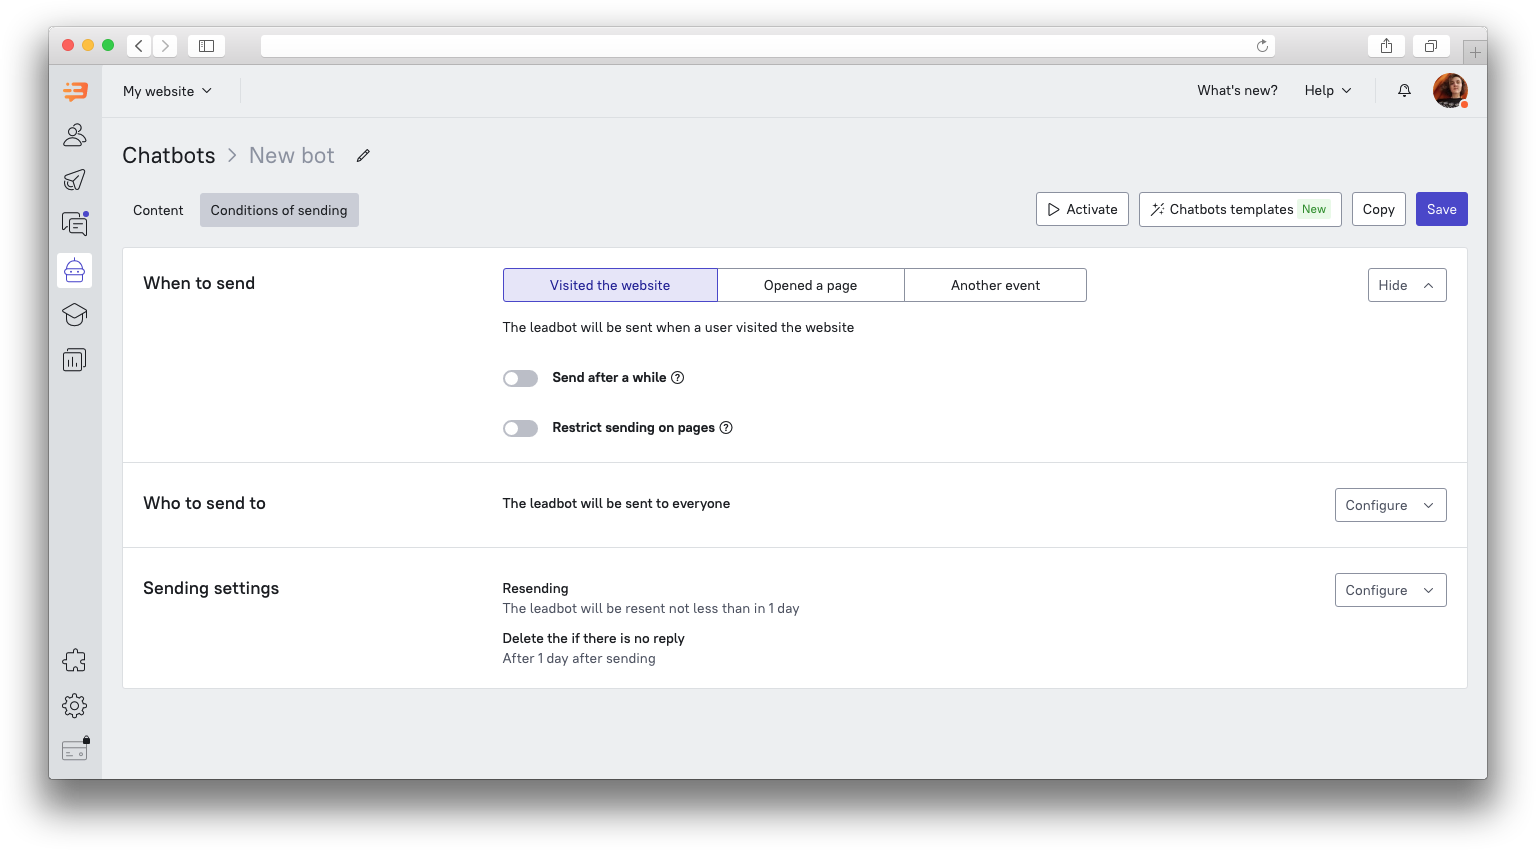
Here you can configure When and Who to send the leadbot to, as well as other Sending settings. All of that is configured the same way as with the Triggered messages (read more here).
Delete the leadbot if there is no reply
You can set this up in the Sending settings:
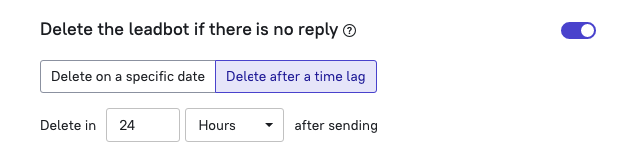
You can decide whether the bot message should be deleted on a specific date, or some time after it was sent. For example, you can set up a bot that grabs the user's attention and deletes itself after 20 minutes if the user doesn't respond to the message in that time.
If you are running a temporary promotion or the bot script is tied to some event (Christmas, scheduled webinar, site maintenance, etc), you can specify the time after which the bot will be deleted in case of no response. By default, the bot is not deleted.
The bot conversation is deleted only for those users who didn't respond to it. It doesn’t matter if they saw the messages or are seeing them right now - it's the reply that matters.
Bot conversations stay in the chat history in the lead card, so that the managers can check whether this bot was sent or not. For example, if a user asks about a New Year's promotion, you can check whether this bot was shown to them to decide whether to resend the promo code.
Leadbot report
You can read more on the statistics of the leadbot in this article.
How bot conversations affect Team performance report
The leadbot conversations will not be counted in the team performance report until the user replies to the bot. If users leave their message in the "Type a reply" field - this is not considered in the report as well.
The response speed in the conversation with the leadbot is calculated between the first real reply of the user and the first reply of the operator, not the bot.