
Welcome-bot
Welcome-bot is a part of Dashly chat widget feature that launches once visitor opens the chat widget. It helps to easily solve users questions even before they contact your support team, qualify leads and collect any required data for the chat agent or sales department.
What can welcome-bot do?
- Easily create and launch with a visual builder. No coding skills required.
- Show welcome messages, buttons as an answer option, share images, attachments, suggest entering users data;
- Record entered data to the user card and assign conversation to any agent or channel.
How to set it up?
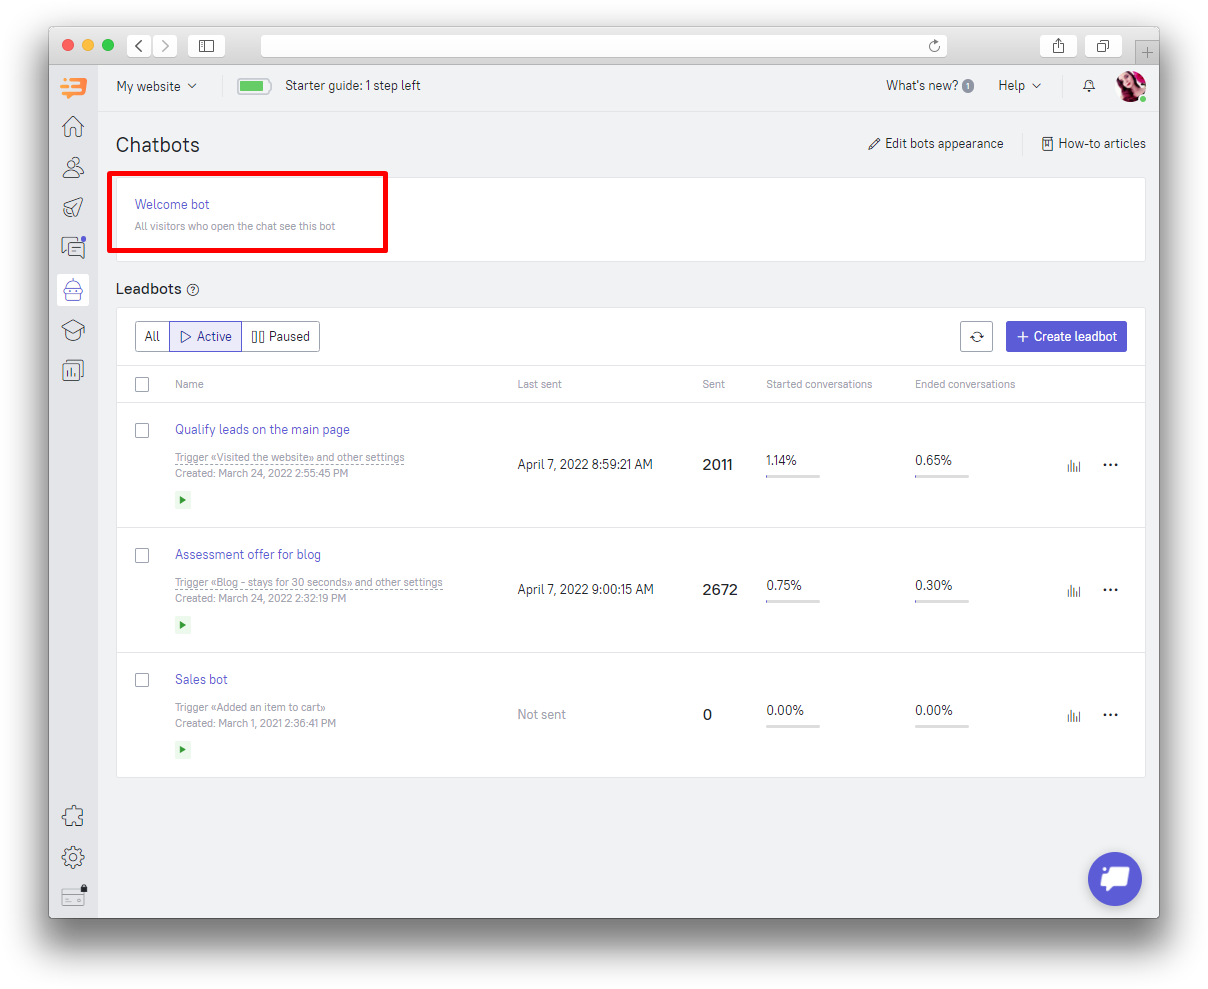
Move to the Chatbots tab. In this section you'll see two types of chatbots: welcome-bot and leadbot. Click on the welcome-bot that is on the top of the page:
Using the chatbot builder, you can craft and customize a bot program without technical or programming knowledge. A comprehensive interface allows creating an online chat bot that answers leads’ questions, suggests solutions for their inquiries, collects user feedback and addresses visitors to customer support or sales department.
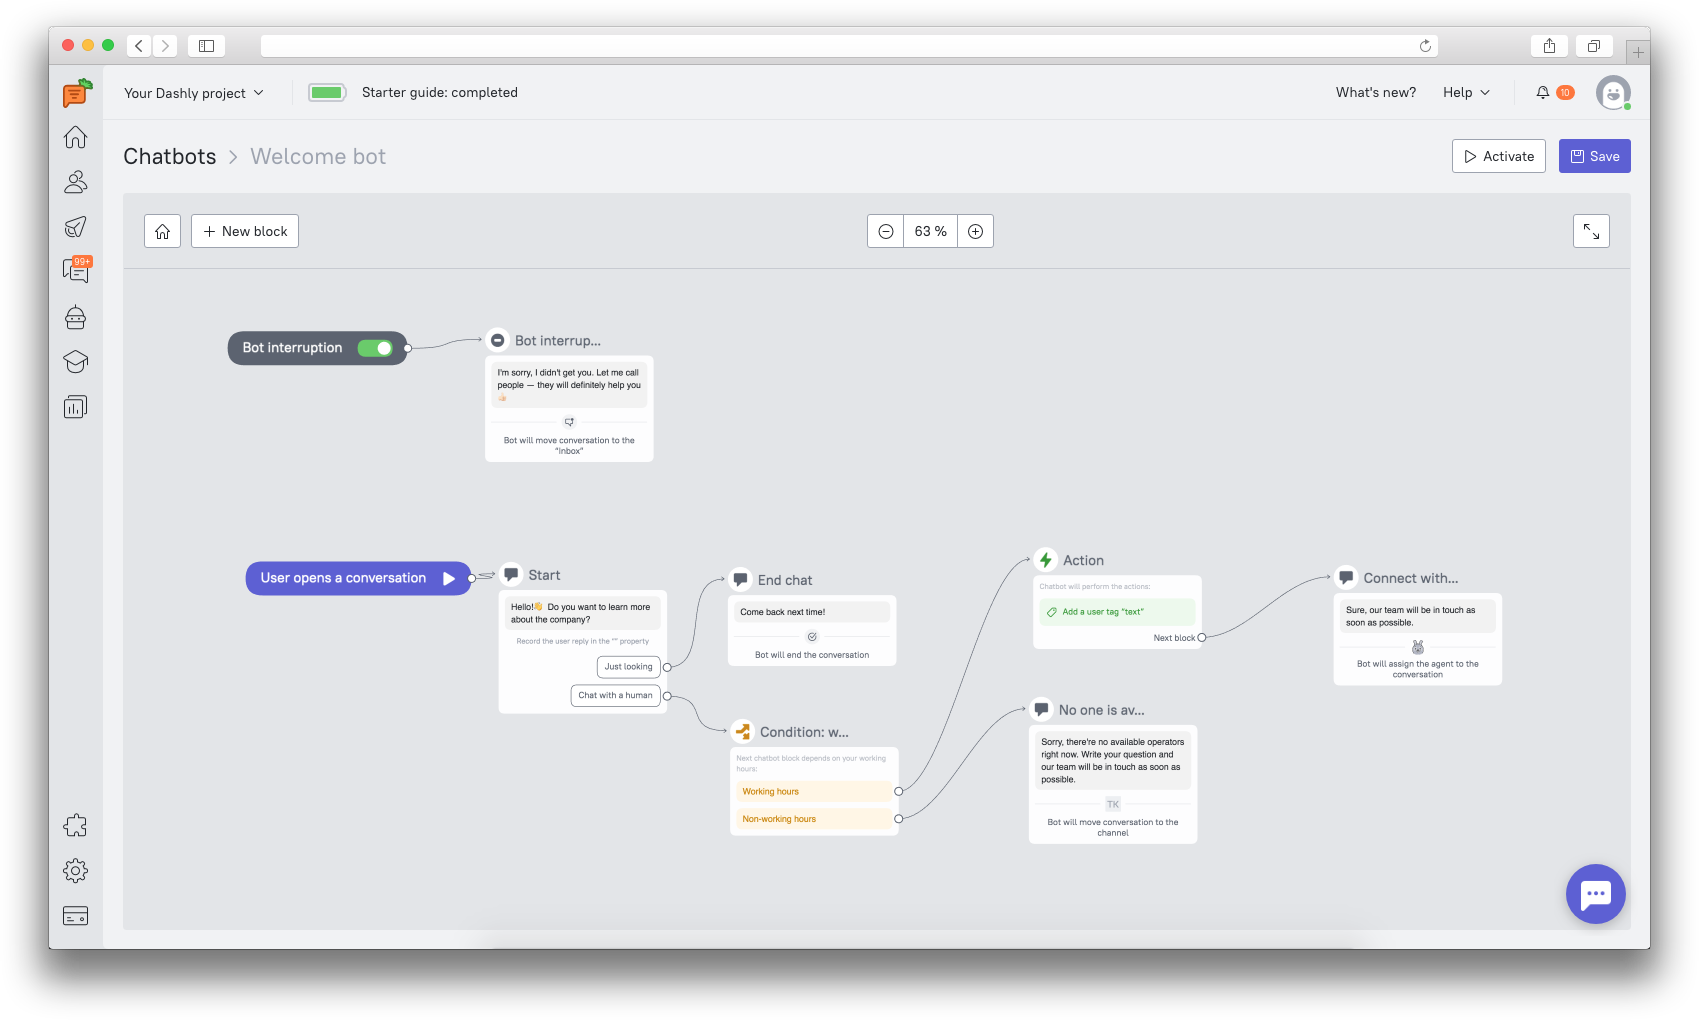
Before the first block there is the "User opens the conversation" button: it shows the event that triggers the bot.
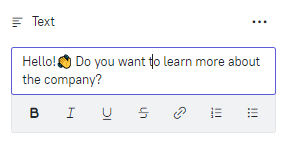
Start creating your welcome-bot with a Start block. It is the very first thing that users will see once they open chat widget. Ask any question, add important information and suggest buttons with answers, so that the user can select the topic of the case or the department they want to contact.
Click on the block to start editing. All available actions and settings will appear in the right menu. The name of the starting block cannot be changed.
Depending on the selected button they will be moved to the next block. It can be created by "+ Block" button at the top of the builder or in the previous block settings ("Add button").
To delete or copy a block just hover a mouse cursor over it and select the action you want to perform with this block.
There are 4 types of blocks available:
- Message
- Condition
- Action
- Audience filter
"Message" block configurations:
- Text
Add a block with a text message that the user will see. Use visual text editor to format the text: add lists, use bold/italics text, underline and add links.
- File or image
Add a file or image to the block to attract attention or share any important information.
Allowed file size that you can add to the block: up to 2 MB.
Allowed extensions: jpg, jpeg, png, gif, pdf, rar, zip, html, csv, docx, doc, xlsx, xls.
With the message block, you can end the conversation (the bot will close the chat or pass it to the operators):
- Move to channel.
The bot can pass the conversation to the agent or assign it to a specific channel, depending on your scenario. Assign conversations to the channel if the bot's conversations are processed by several operators (don't forget to give all the operators access to the channel).
- Mark conversation as unanswered
The conversation will appear in the Inbox section as unanswered, not assigned to an agent or channel.
- Assign to agent
Welcome-bot will assign the conversation to a specific operator, who will find it in the "Open" conversations list and see which answer options the user chose when interacting with the bot.
- Close conversation
The conversation will be closed and won't be seen in the "Open" section of the Inbox. You can find these conversations in the lead card.
You can also choose to continue the conversation (the bot will continue interacting with the user):
- Reply with text.
Use this response to collect contacts or any other information. For example, the bot can specify the user's phone number and pass it to the sales department.
❗With the “Write response to user property” option for response buttons and response input fields, you can choose whether the response entered by the user should be written to a property. You can then use this property to filter leads in the Leads Database section or to segment the audience of other bots or triggered messages.
- Reply with buttons
Buttons can be used to qualify users. Each option selected will lead to the next bot question, where you can record the event. You can select the text for the button, as well as select the next block where the user will be sent to after clicking the button. Each button must link to a block. It can be either a new block or any of the previously created ones.
You can add up to 10 buttons to one block.
"Action" block configurations:
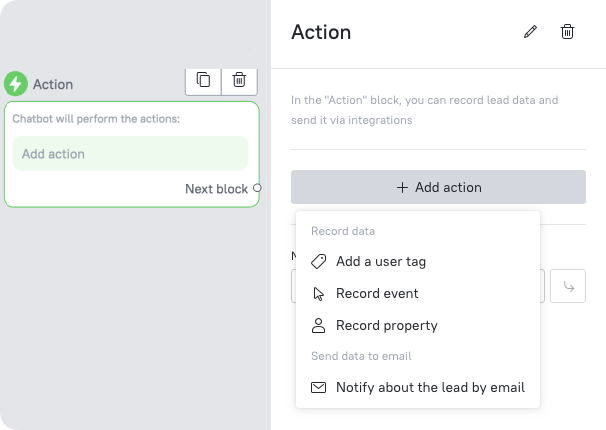 There are two types of target actions in the block:
- Record data (event, property, tag)
For each Welcome bot block, you can set up data recording in the user's card. You can record an event (and then use it as a trigger for sending messages), assign a tag or a user property for later segmentation. Events configured in bot blocks can be used in funnels.
- Send recorded data to email.
"Condition" block configurations:
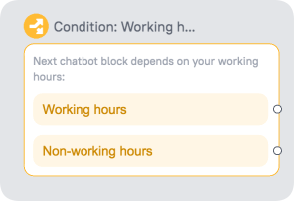 Add this condition to display different blocks depending on the configured working hours.
To add a new block with a condition, click on the "+ New block" - "Condition" button. Select the available options: working hours and non-working hours. For example, you can set up a bot to interact with a user outside of your working hours to collect contact details and pass info to a manager, so you don't lose any leads even when your managers are out of office.
"Audience filter" configurations:
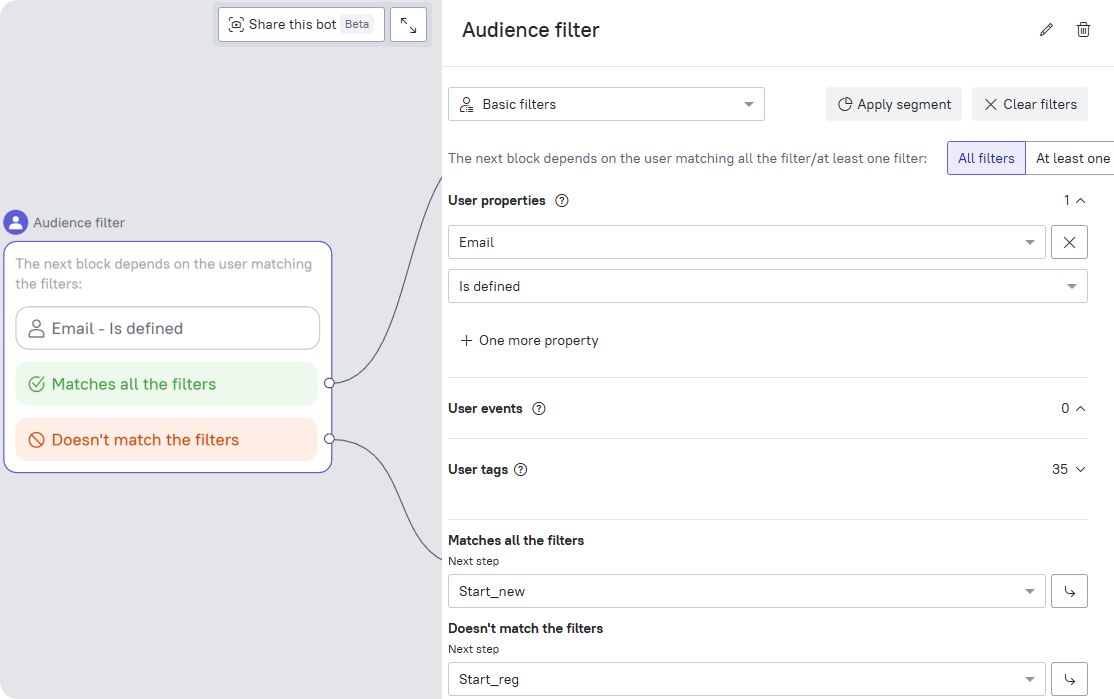
Use this block to segment chatbot's users while the bot's scenario is executed, based on their properties or events. This allows creating different scenarios for different segments.
For example, a Leadbot is launched for all visitors on a specific website page. You can add an audience filter. Depending on whether the user has already submitted their data, the bot will launch different scenarios.
Interruption block
Your users can interrupt the conversation with the bot. To activate this feature, enable the "Bot interruption" badge:

You can edit the content of the interruption block by clicking on it. On the right you will see text block section which can be changed.
❗ "Bot interruption" block is always active, except for branches with a text input field for entering an answer. This means that when the user leaves the reply in this block, the bot won't be interrupted, but will consider it as an answer.
Return to the start block
In case you have created a large number of blocks and decided to go back to the very beginning to check the chain, use the "Return to Start" button:
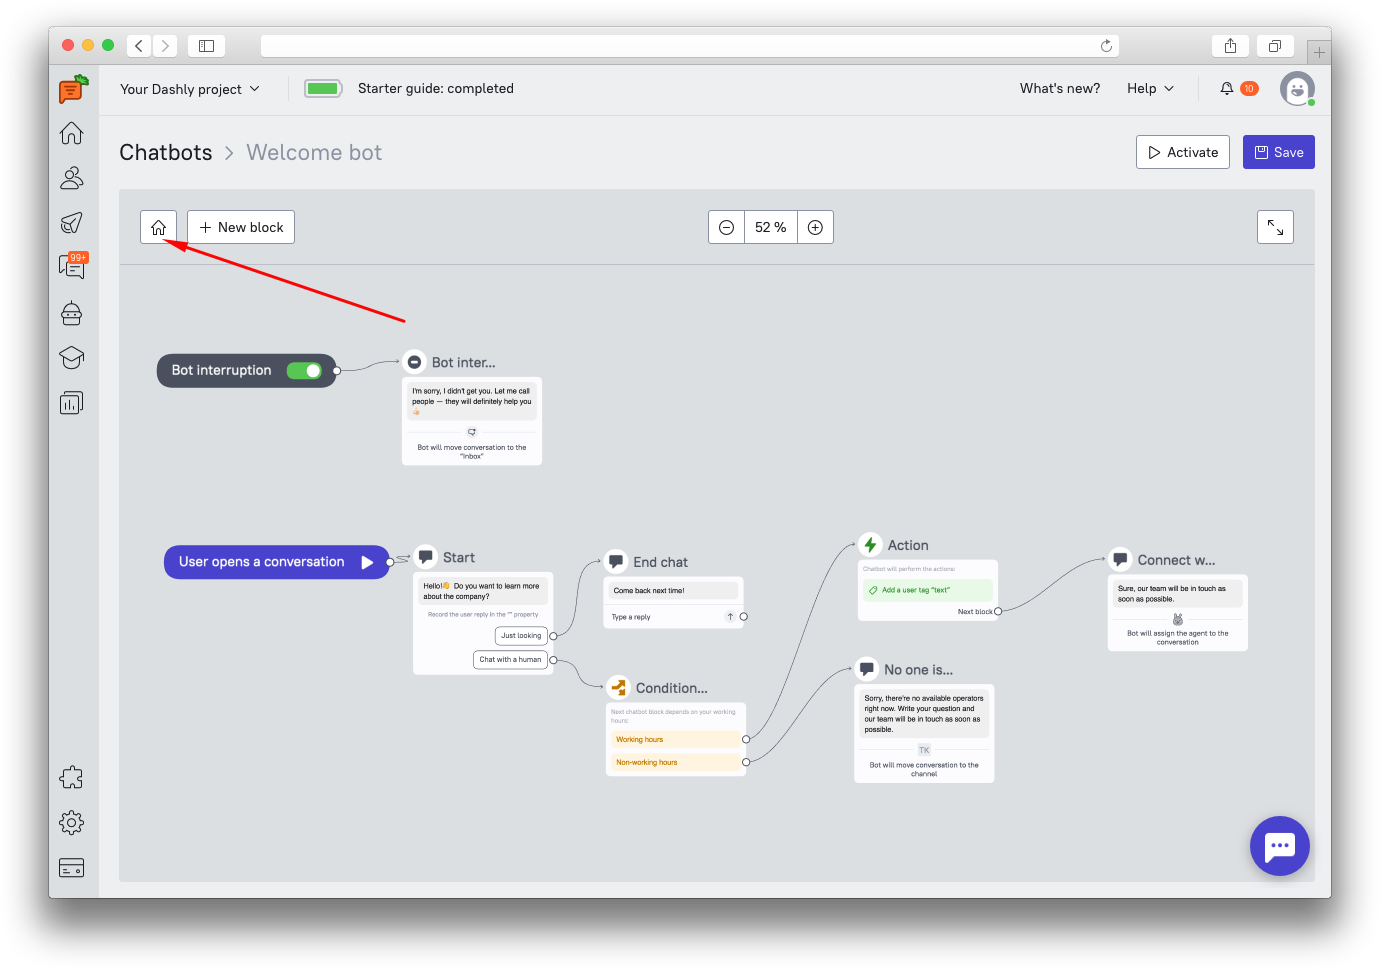
This option will take you back to the very beginning of the bot script.
Once the bot is ready, save the settings and launch it.
Additionally, you can get more info on Welcome bot statistics in this article.