
Manual messages from Leads database section
There are 3 message types:
Chat message
A lead will receive a message into the chat. If a lead is offline, then they will see this message when they return to your site.Pop-up
There are two kinds of pop-up messages: small (shown on the side of a screen) and big (shown in the middle of the screen). Pop-ups have different answer types: text, email, phone number, no reply.Email
Lead gets an email from <sender name><app name>@<App ID>.mail.dashly.ioPlease note: You can send a maximum of 100 000 emails / 10 000 pop-ups at once.
You get two additional types of messages, WhatsApp and Telegram message, if the add-ons are connected.
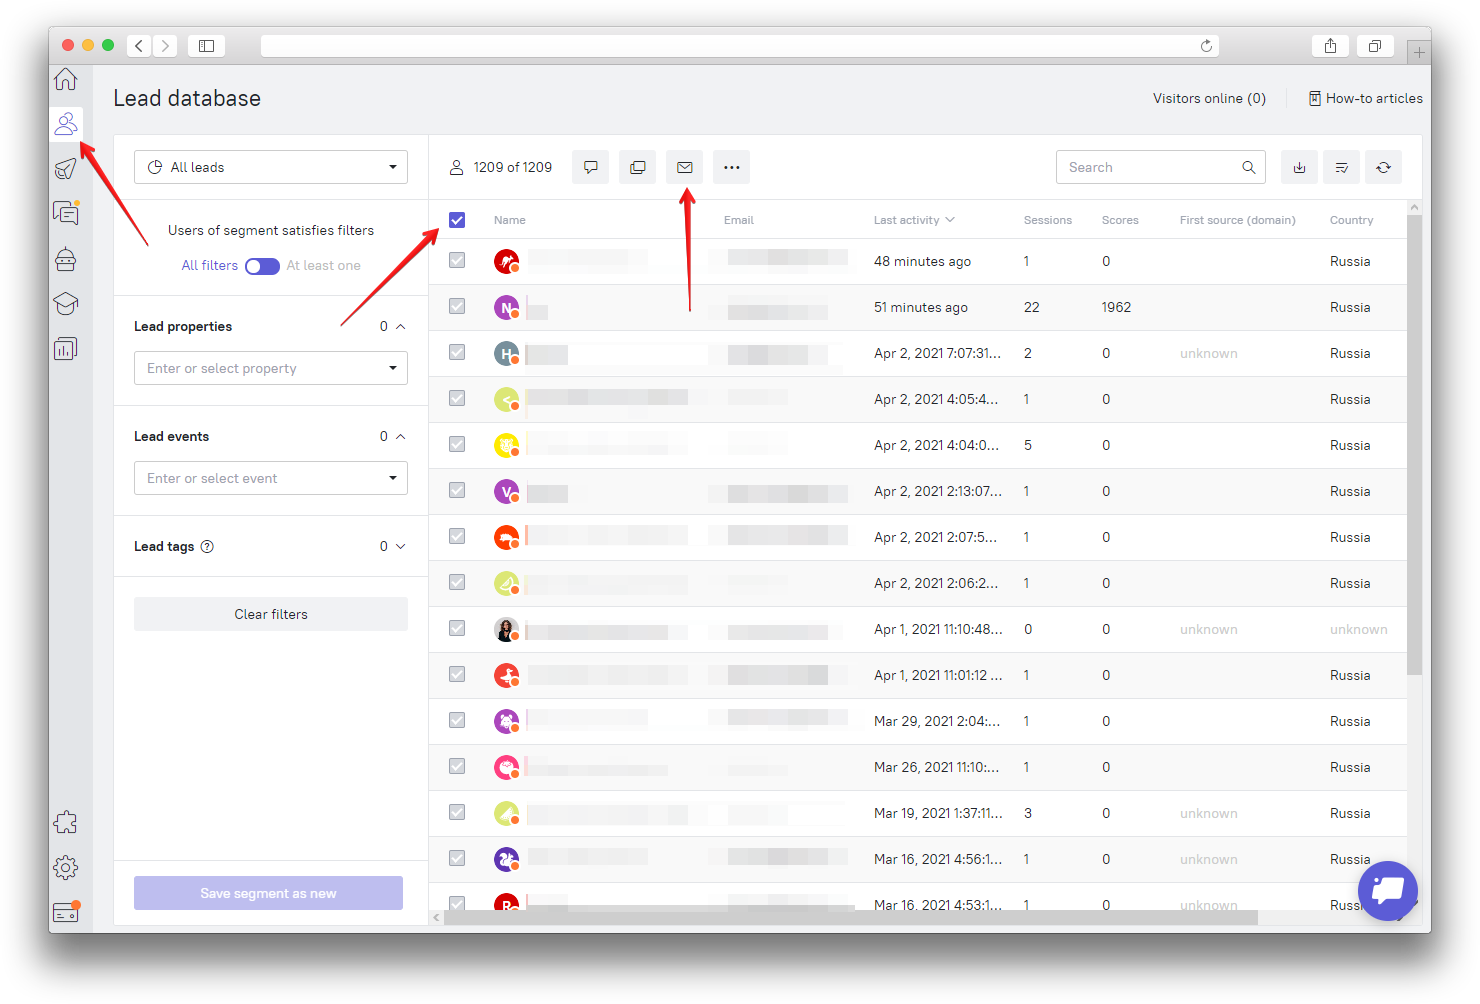
To create a manual campaign, go to the Visitors section, select one or several leads (by means of segmentation, for example) and click on the message type you'd like to send:
Message editor will be opened:
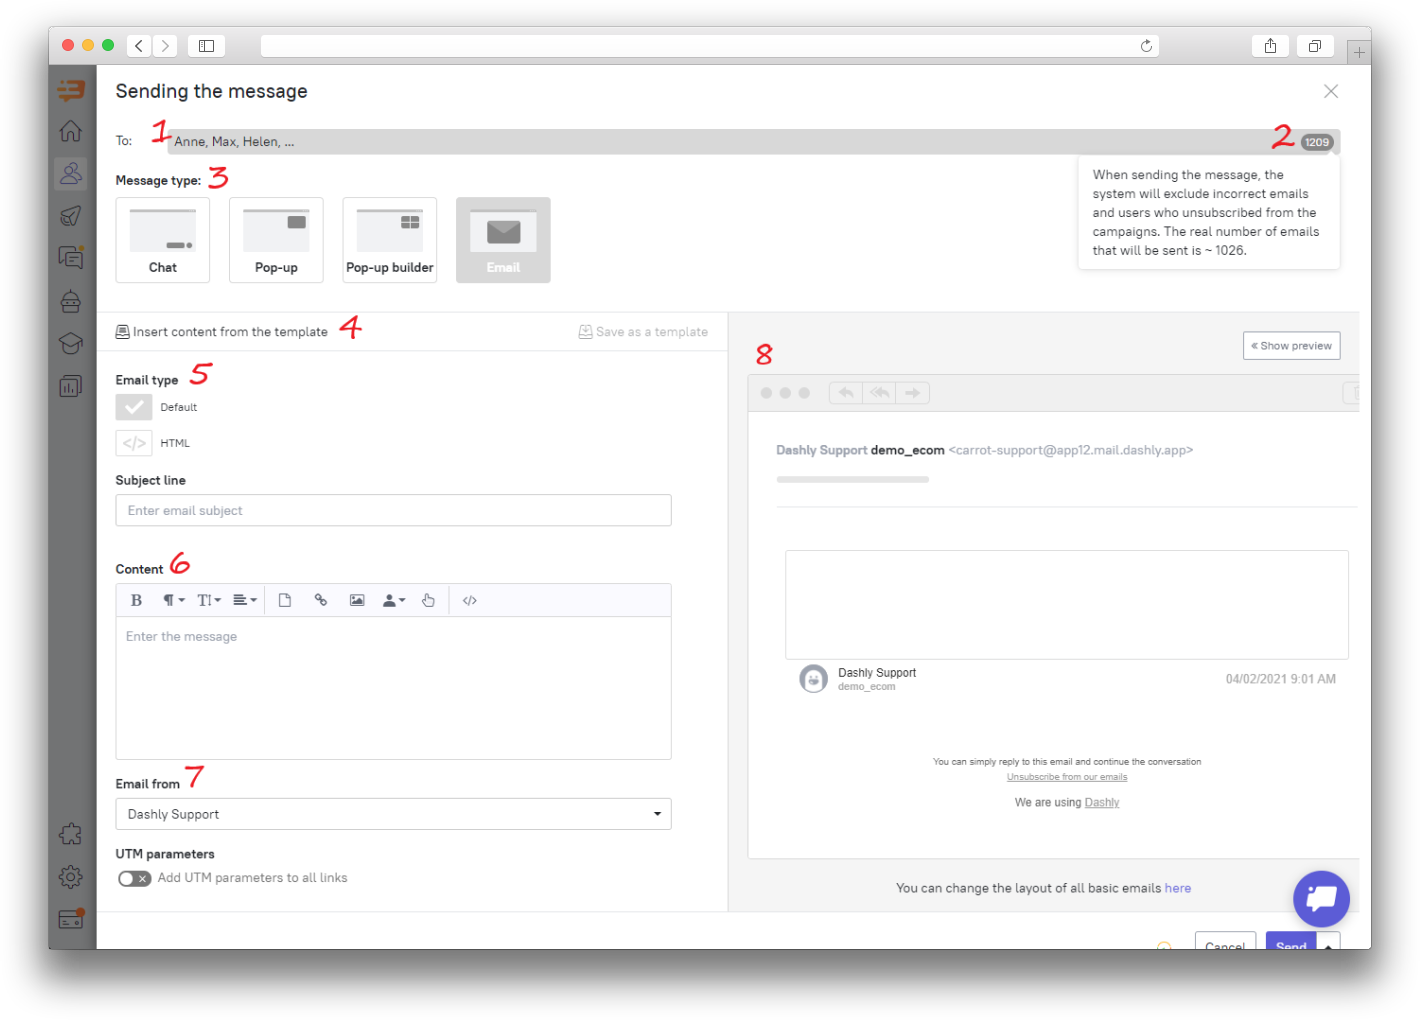
A list of names and number of message recipients.
Check the selected leads:
leads without email address, those who unsubscribed and whose email address is incorrect won't be included in the campaign.You can send these message types: chat, pop-up, email.
Insert content from the template.
Use the message editor. You can also insert a message template via HTML.
Create a content with default editor or HTML.
Sender name. Read more about sender name and address here.
Message preview.
Check message settings and click "Send".
Note: Read more about message personalization here.
How to insert a message template via HTML
If you already have a ready template in some other service (like MailChimp), you can easily send it via Dashly.
Create and save an email in any service you like;
Find it HTML code and copy it;
On Form and content step press "Source code" button and paste this code there;
Don't forget to add the "Unsubscribe" link. Add the following code to your HTML template:
<a href="{{unsubscribe_url}}">Unsubscribe</a>
When a lead clicks on this link, they will be unsubscribed.
You can save this message as a Template. Read more about templates in this article.
UTM parameters
You can easily add UTM parameters to all links in your message to track analytics afterward (for example, in GA) or configure communications according to these parameters.
Under the sender's name, you'll see the field for UTM configuration.
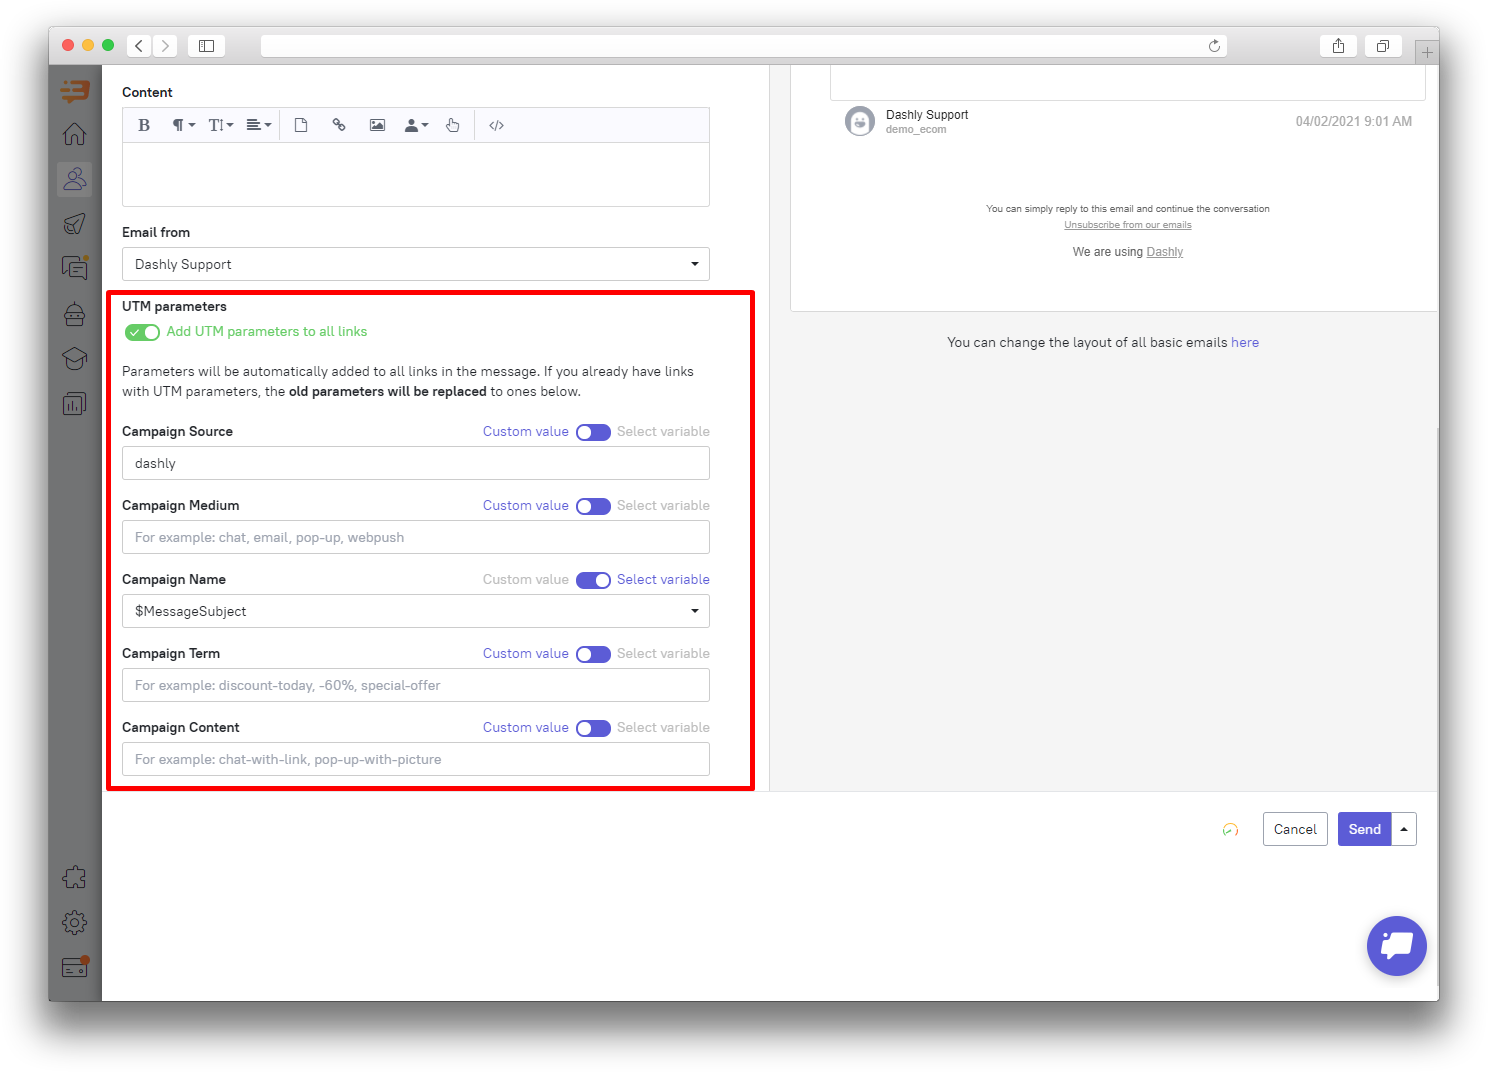
You can configure one of five parameters:
- utm_source (source)
- utm_medium (channel)
- utm_campaign (name)
- utm_term (key word)
- utm_content (additional parameter).
For each of these parameters, you can put your own description or choose from one of ours:
- Subject line
- Message id
- Date of sending
- Dashly id
- User id.
If your email already had UTM parameters, they will be substituted by these once.
Scheduled manual campaigns
You can schedule the launch of your campaign for any time and day. Choose the additional menu near the Send button and "Send with conditions" there.
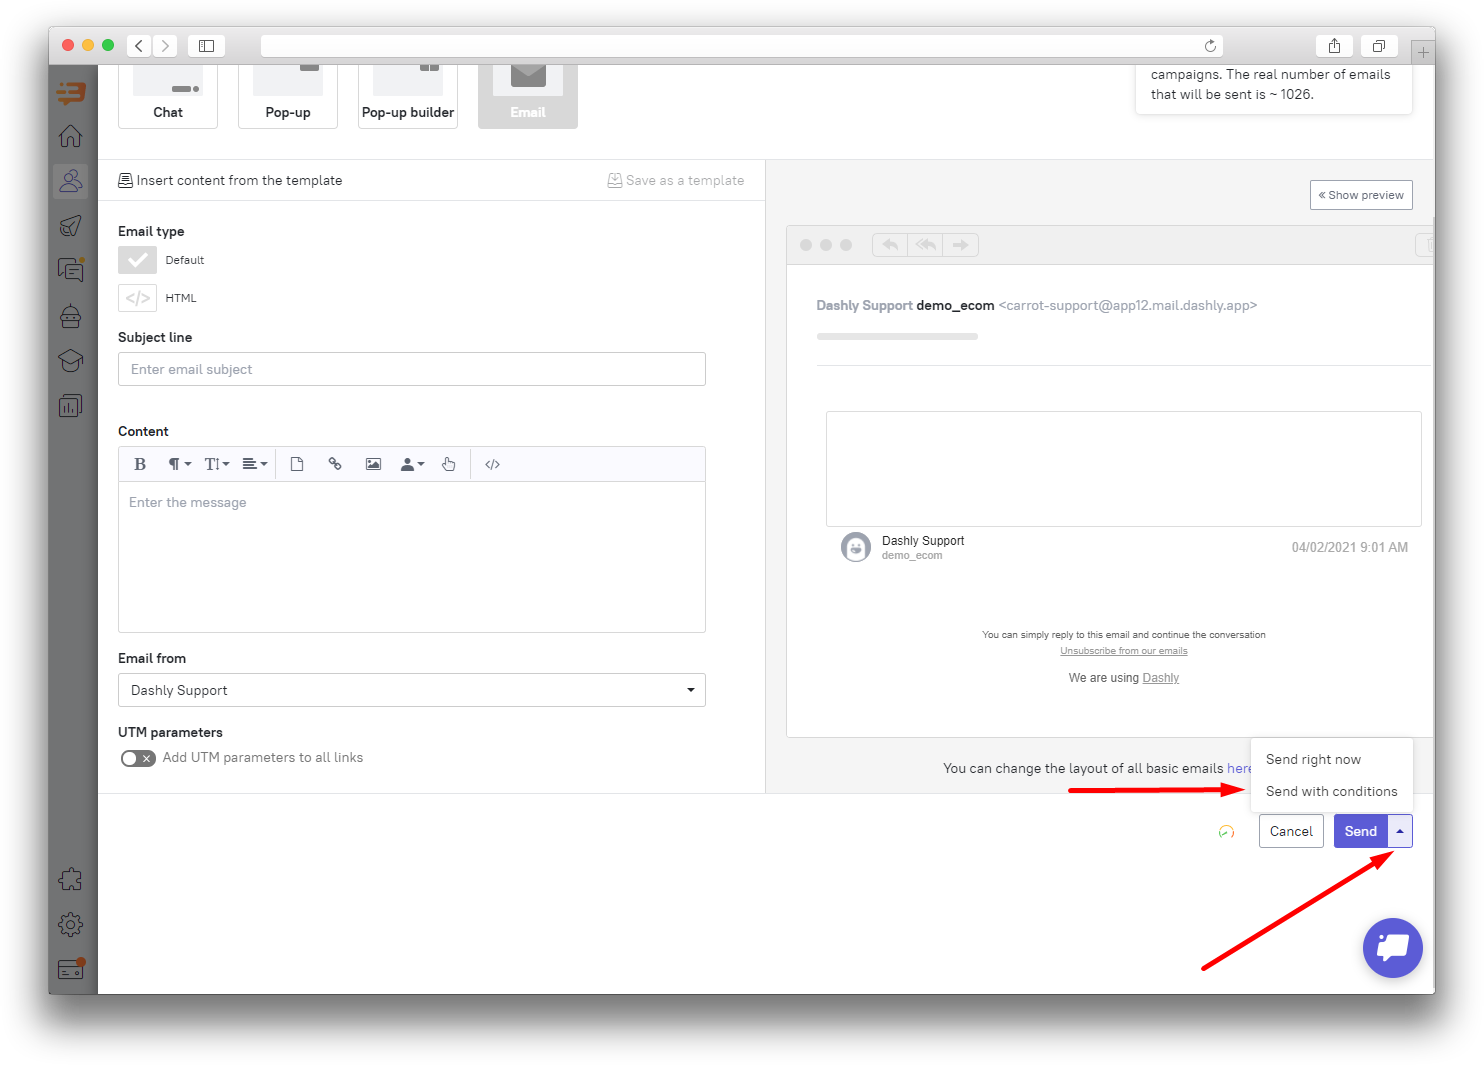
Fix the desired date and time for the campaign launch. Pay attention to the time zone settings.
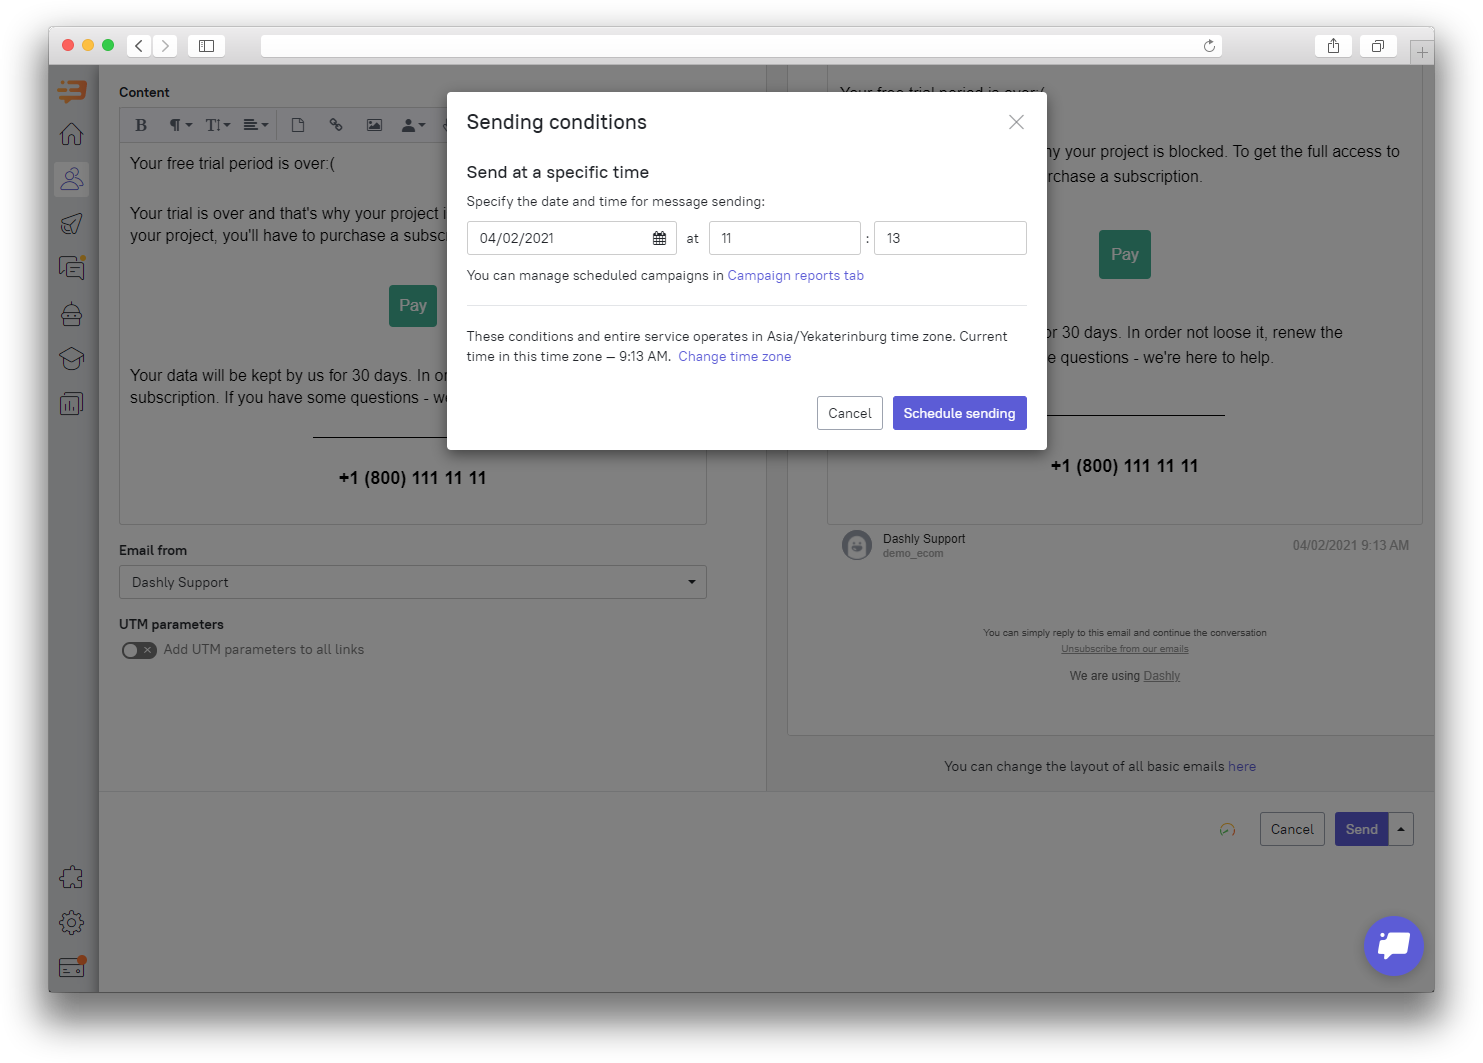
In Reports -> Manual campaign reports you will see the Scheduled status of this campaign.
If you need to make changes before the campaign launch, just cancel this campaign and schedule another one by pressing the Report button near the status.
Delete the message if there is no reply
Let's say you launch some temporary campaign (like New Year's or maintenance works on your website) and you want to send a pop-up about it manually. But what if your target leads come to your website only after New Year? They will get the pop-up, but it won't make sense for them.
To avoid this situation, you can delete the message at some particular time for leads who didn't reply to it.
Press the arrow button in the bottom right corner and then you'll see "Send with conditions" option. In the opened window put a checkmark next to "Delete the message if there is no reply" and choose the time when you want this message to be deleted.
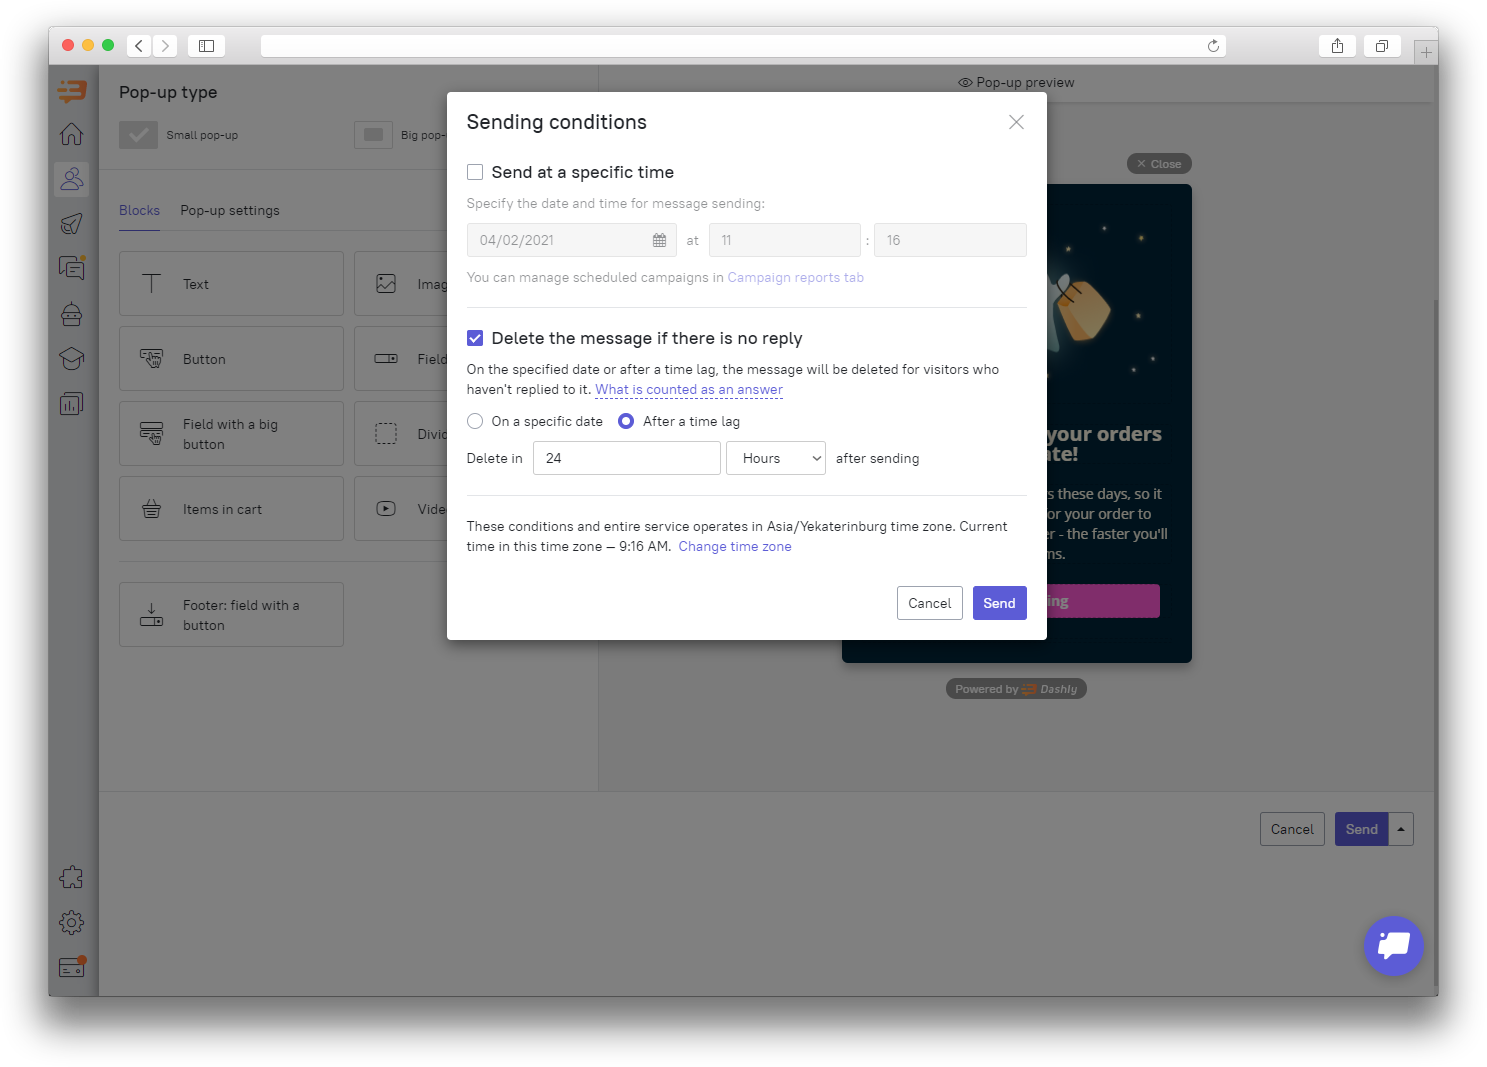
This message will stay in the Lead card in Conversation history for the operator to see if it was sent or not, and have a conversation depending on that.
Important: you can configure this condition only for pop-ups and chat messages.