
Personalizing messages using lead properties
Personalization based on lead properties
To make your messages more personal, add lead properties (such as name, city, etc.) to the message. There are two property types in Dashly: standard properties and custom properties. Standard properties are present in your dashboard by default. You can find the full list of standard properties in our documentation.
You can collect any lead properties via API and “Visitors data tracking” section. You can also add them manually right in the lead card.
💡Personalization based on user properties
To make messages more personal, you can insert various user properties into the text: name, city, etc.
Dashly has two types of properties: standard and custom. The entire list of standard properties can be found here. If any property that is recorded on your website / app is not in this list, it is considered a custom property.
In some types of messages (manual and automatic), you can add personalization by name, email, and phone number using the button in the content settings.
These types of messages include: chat message, pop-up, and email (standard editor).
Click on the button with the personalization icon and select the desired parameter:
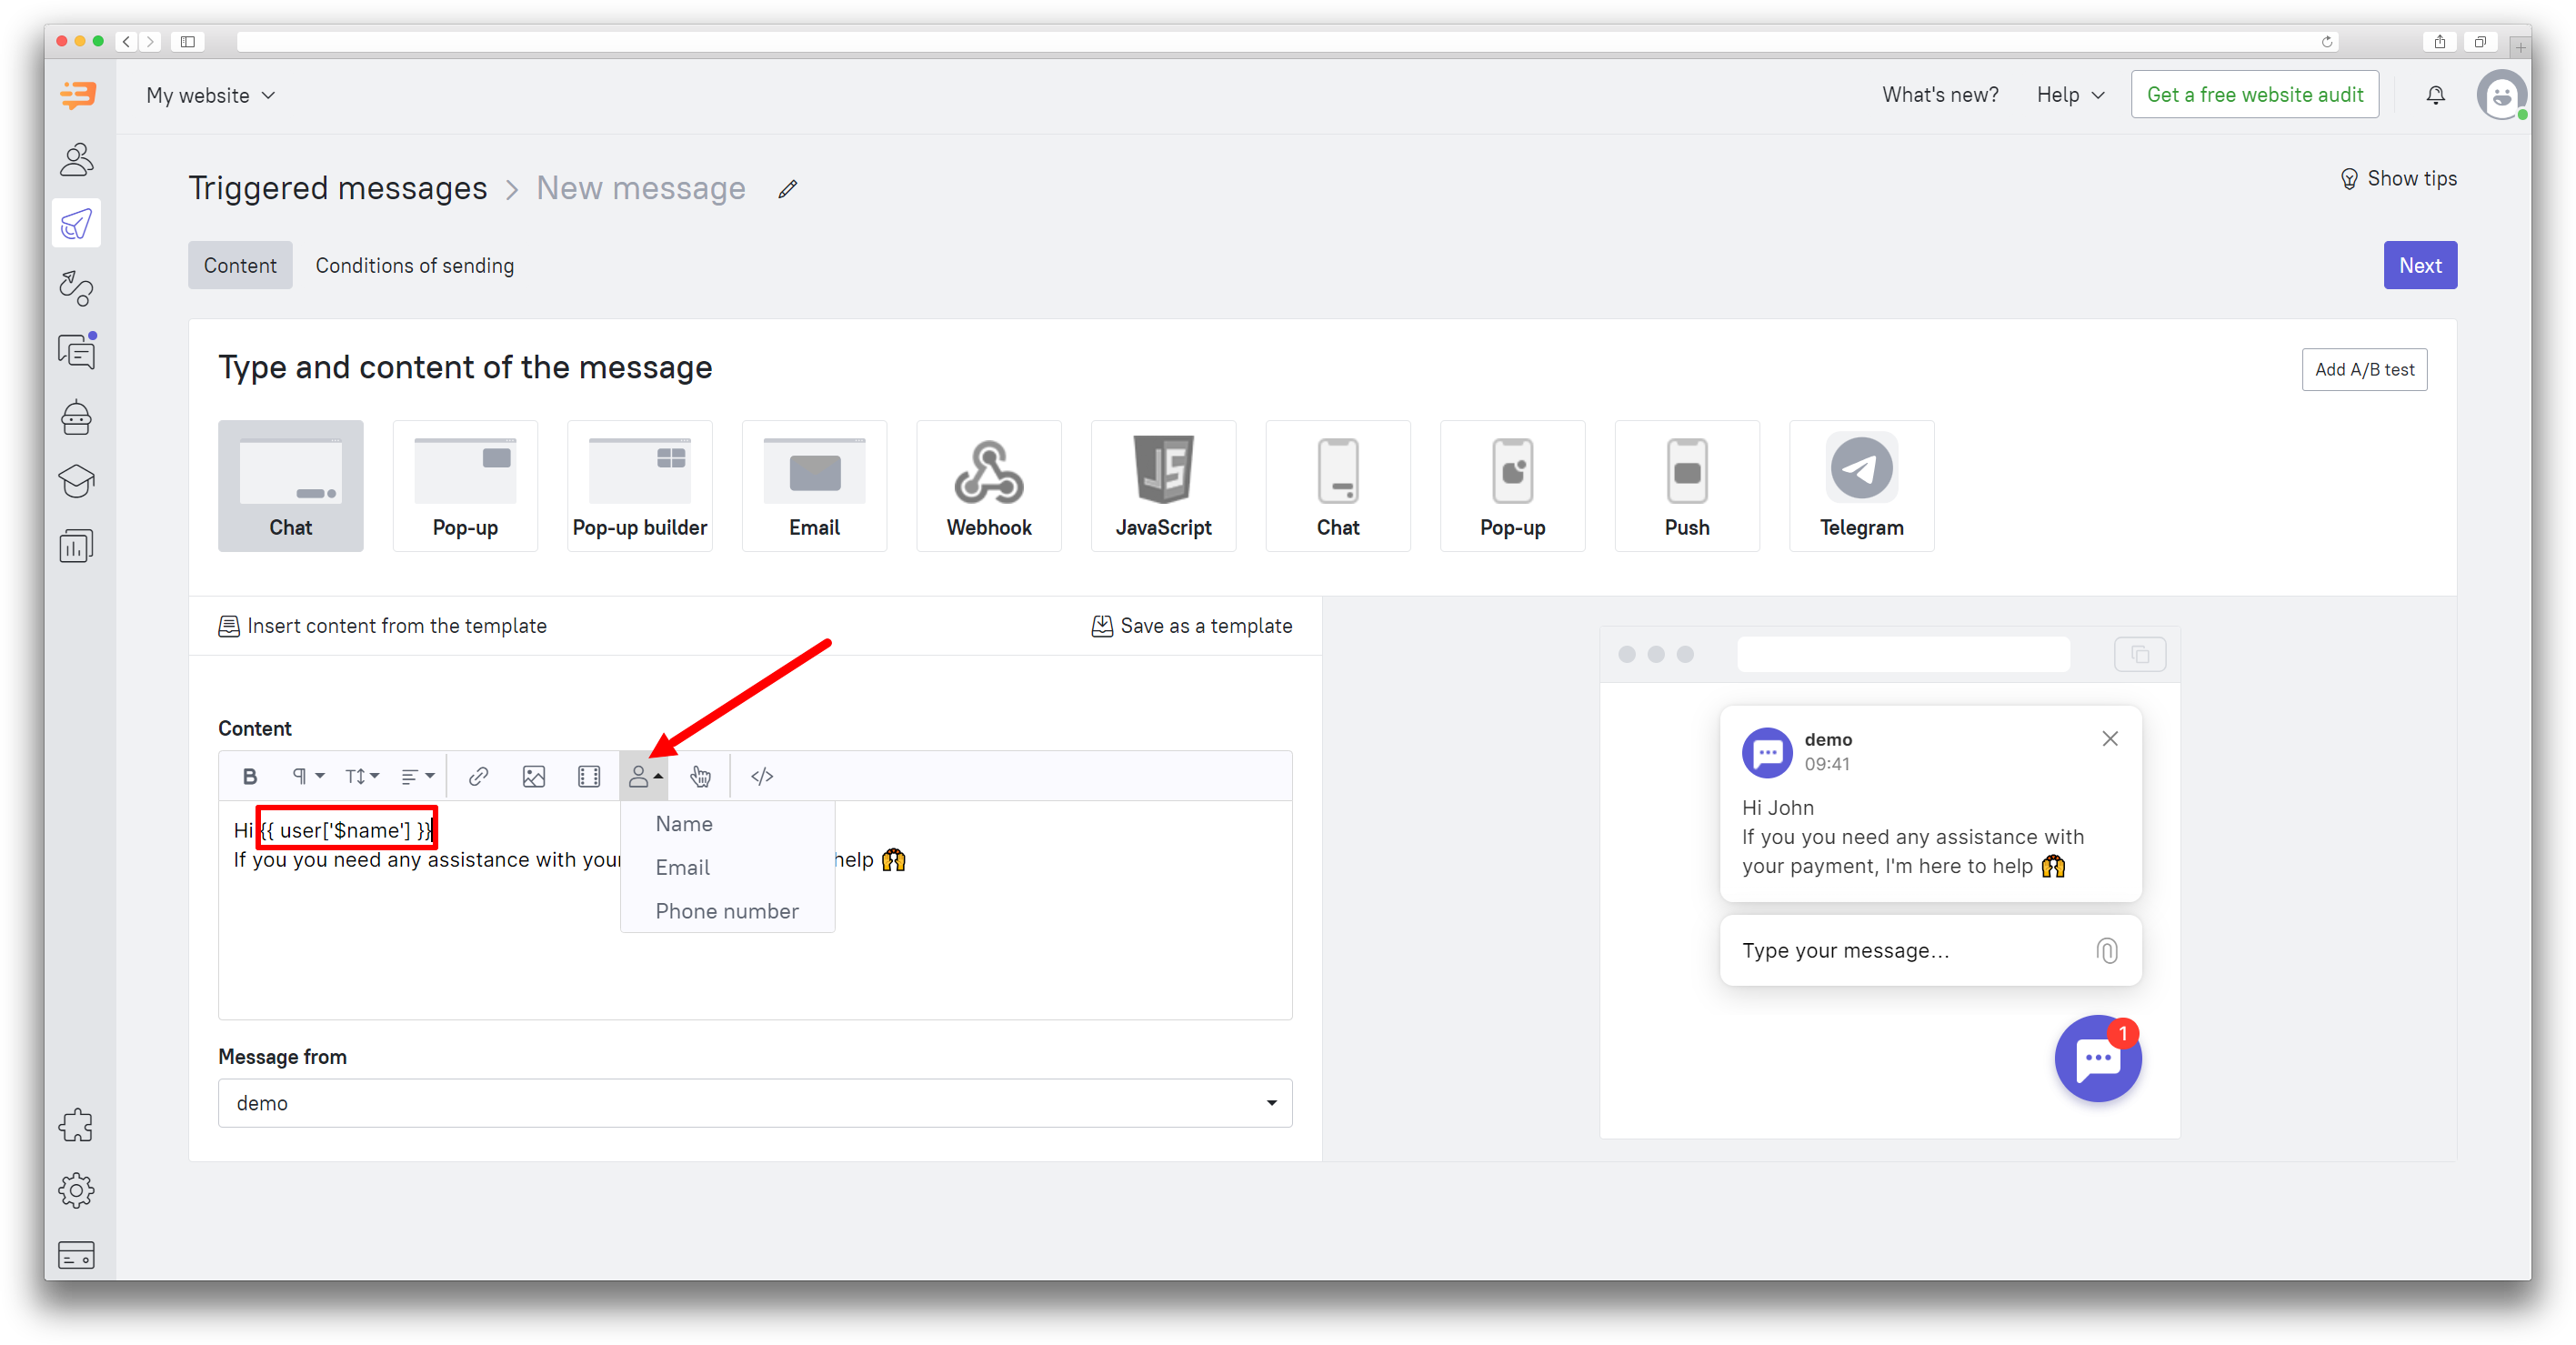
The message body will contain a code that adds the selected property from the lead card.
❗ The name John in the message preview is displayed as a placeholder. It will be replaced by the name the user has in their lead card.
Personalization based on user properties in the subject line
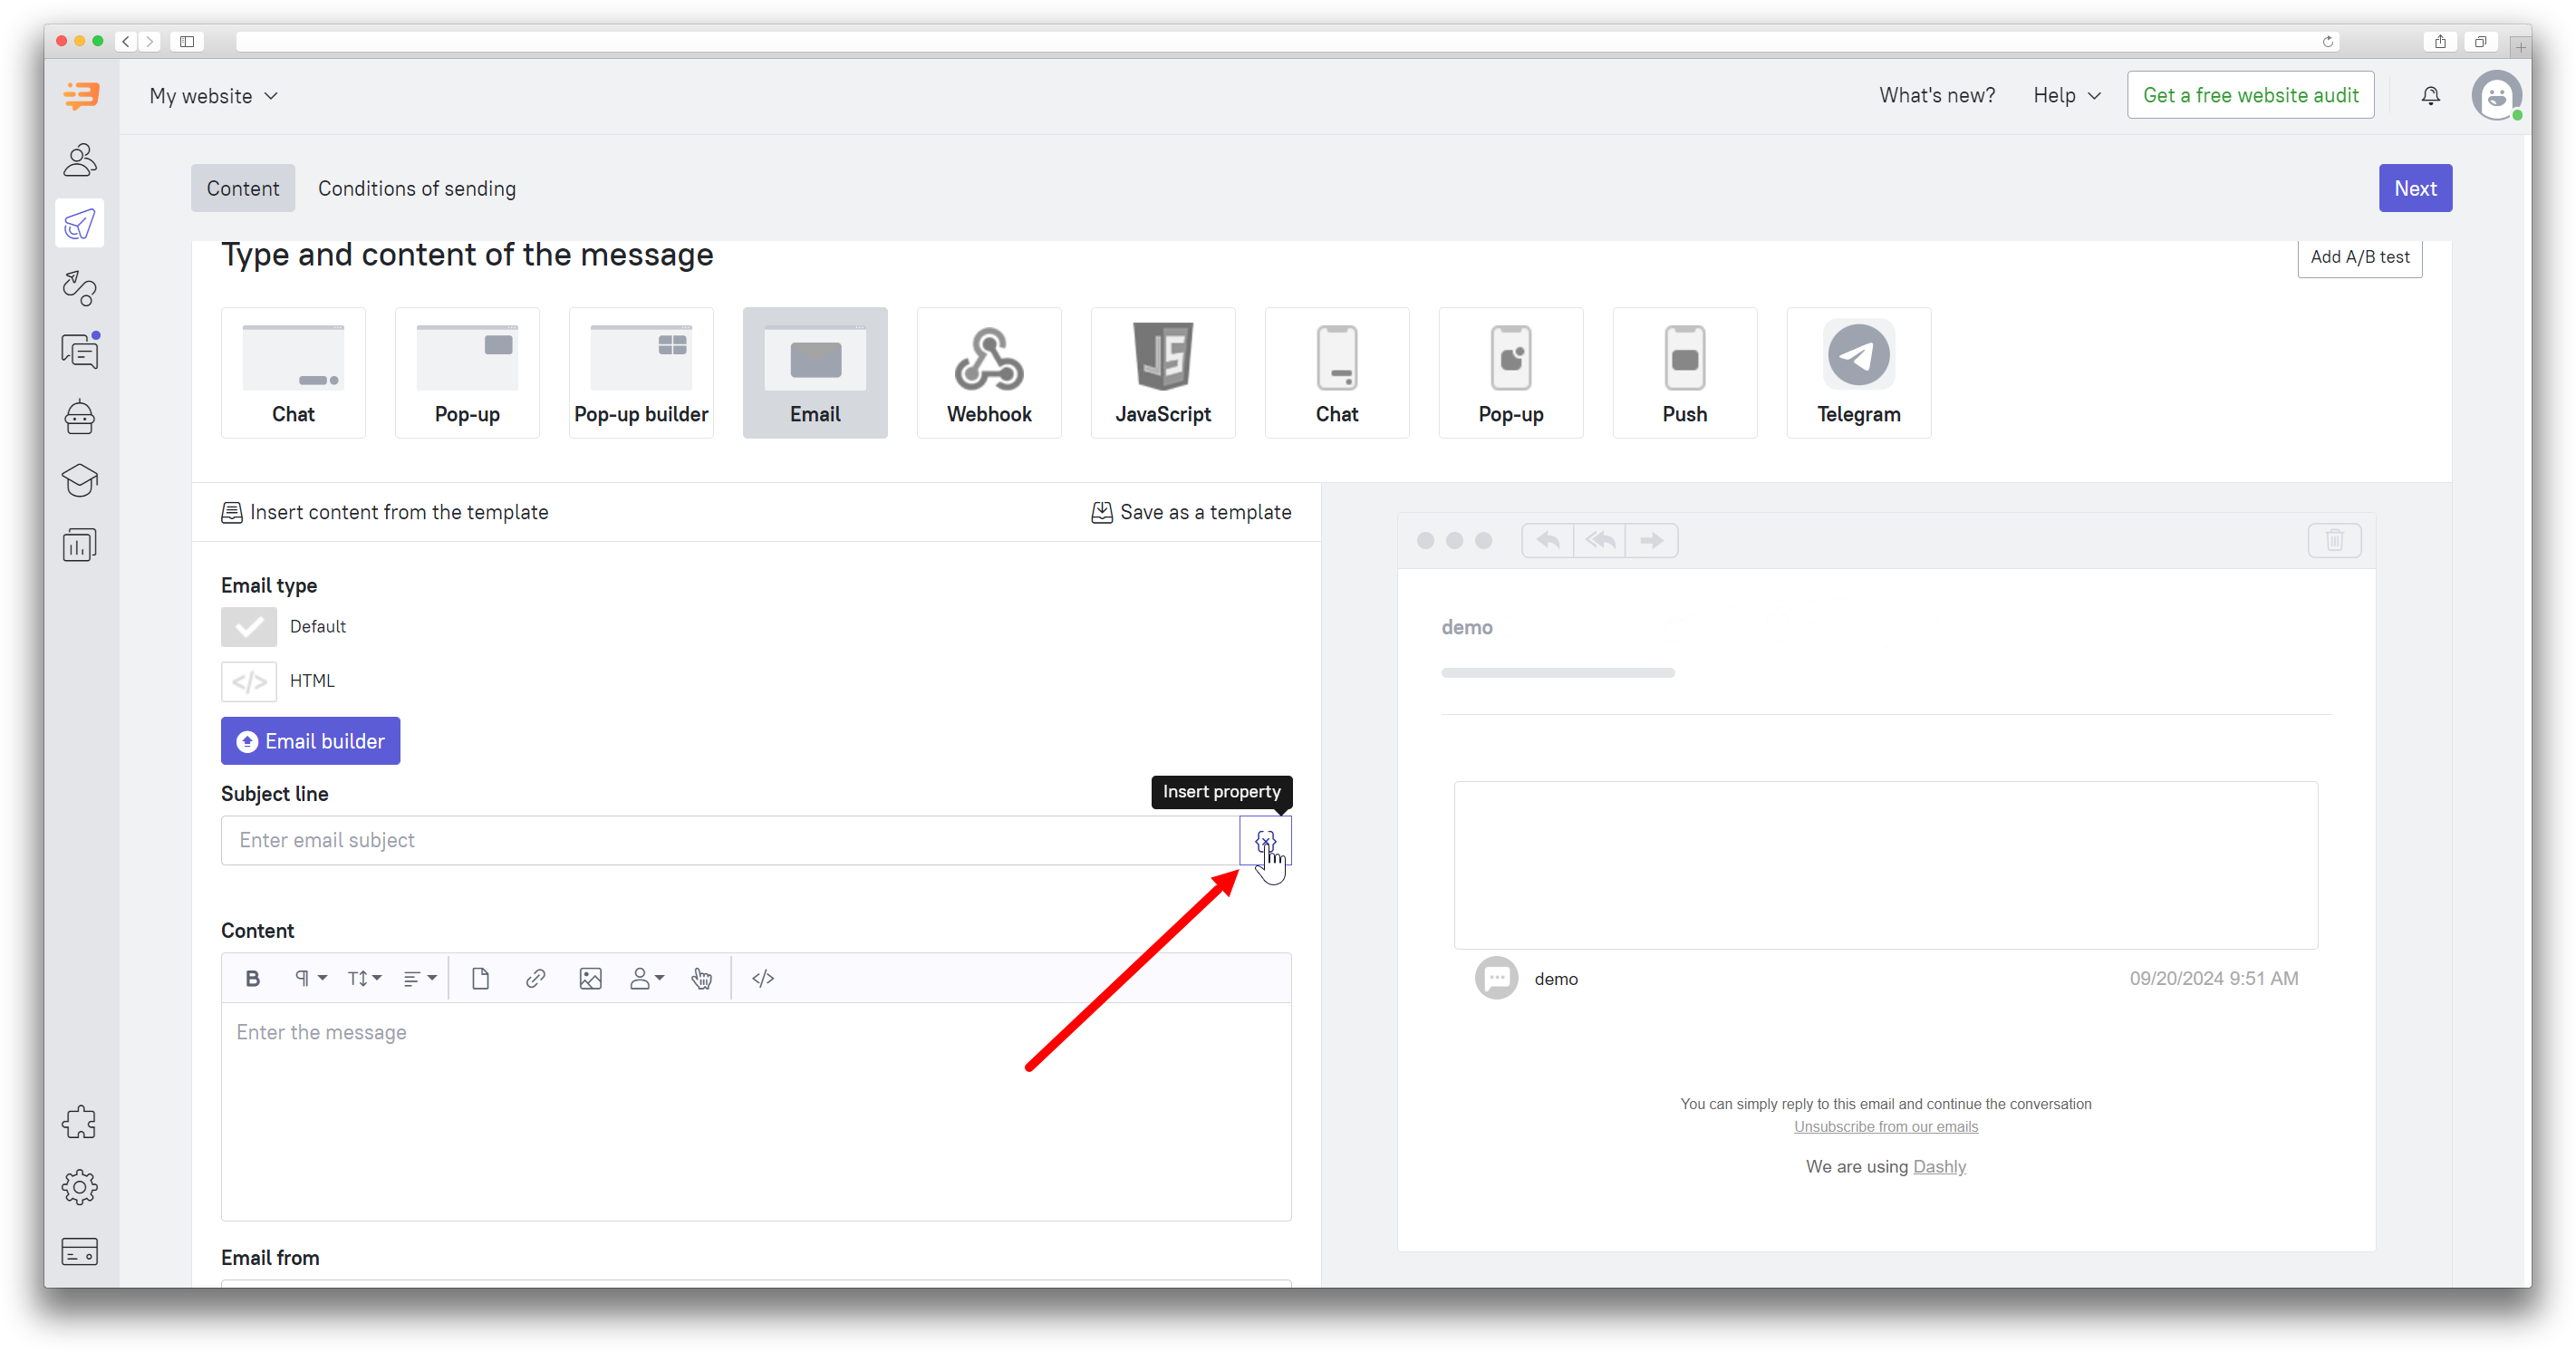
You can place user data directly in the subject line to draw attention to the email and increase open rate. This doesn't require using code.
When setting up an email, on the right next to the subject line you will see a button that allows you to add a property:
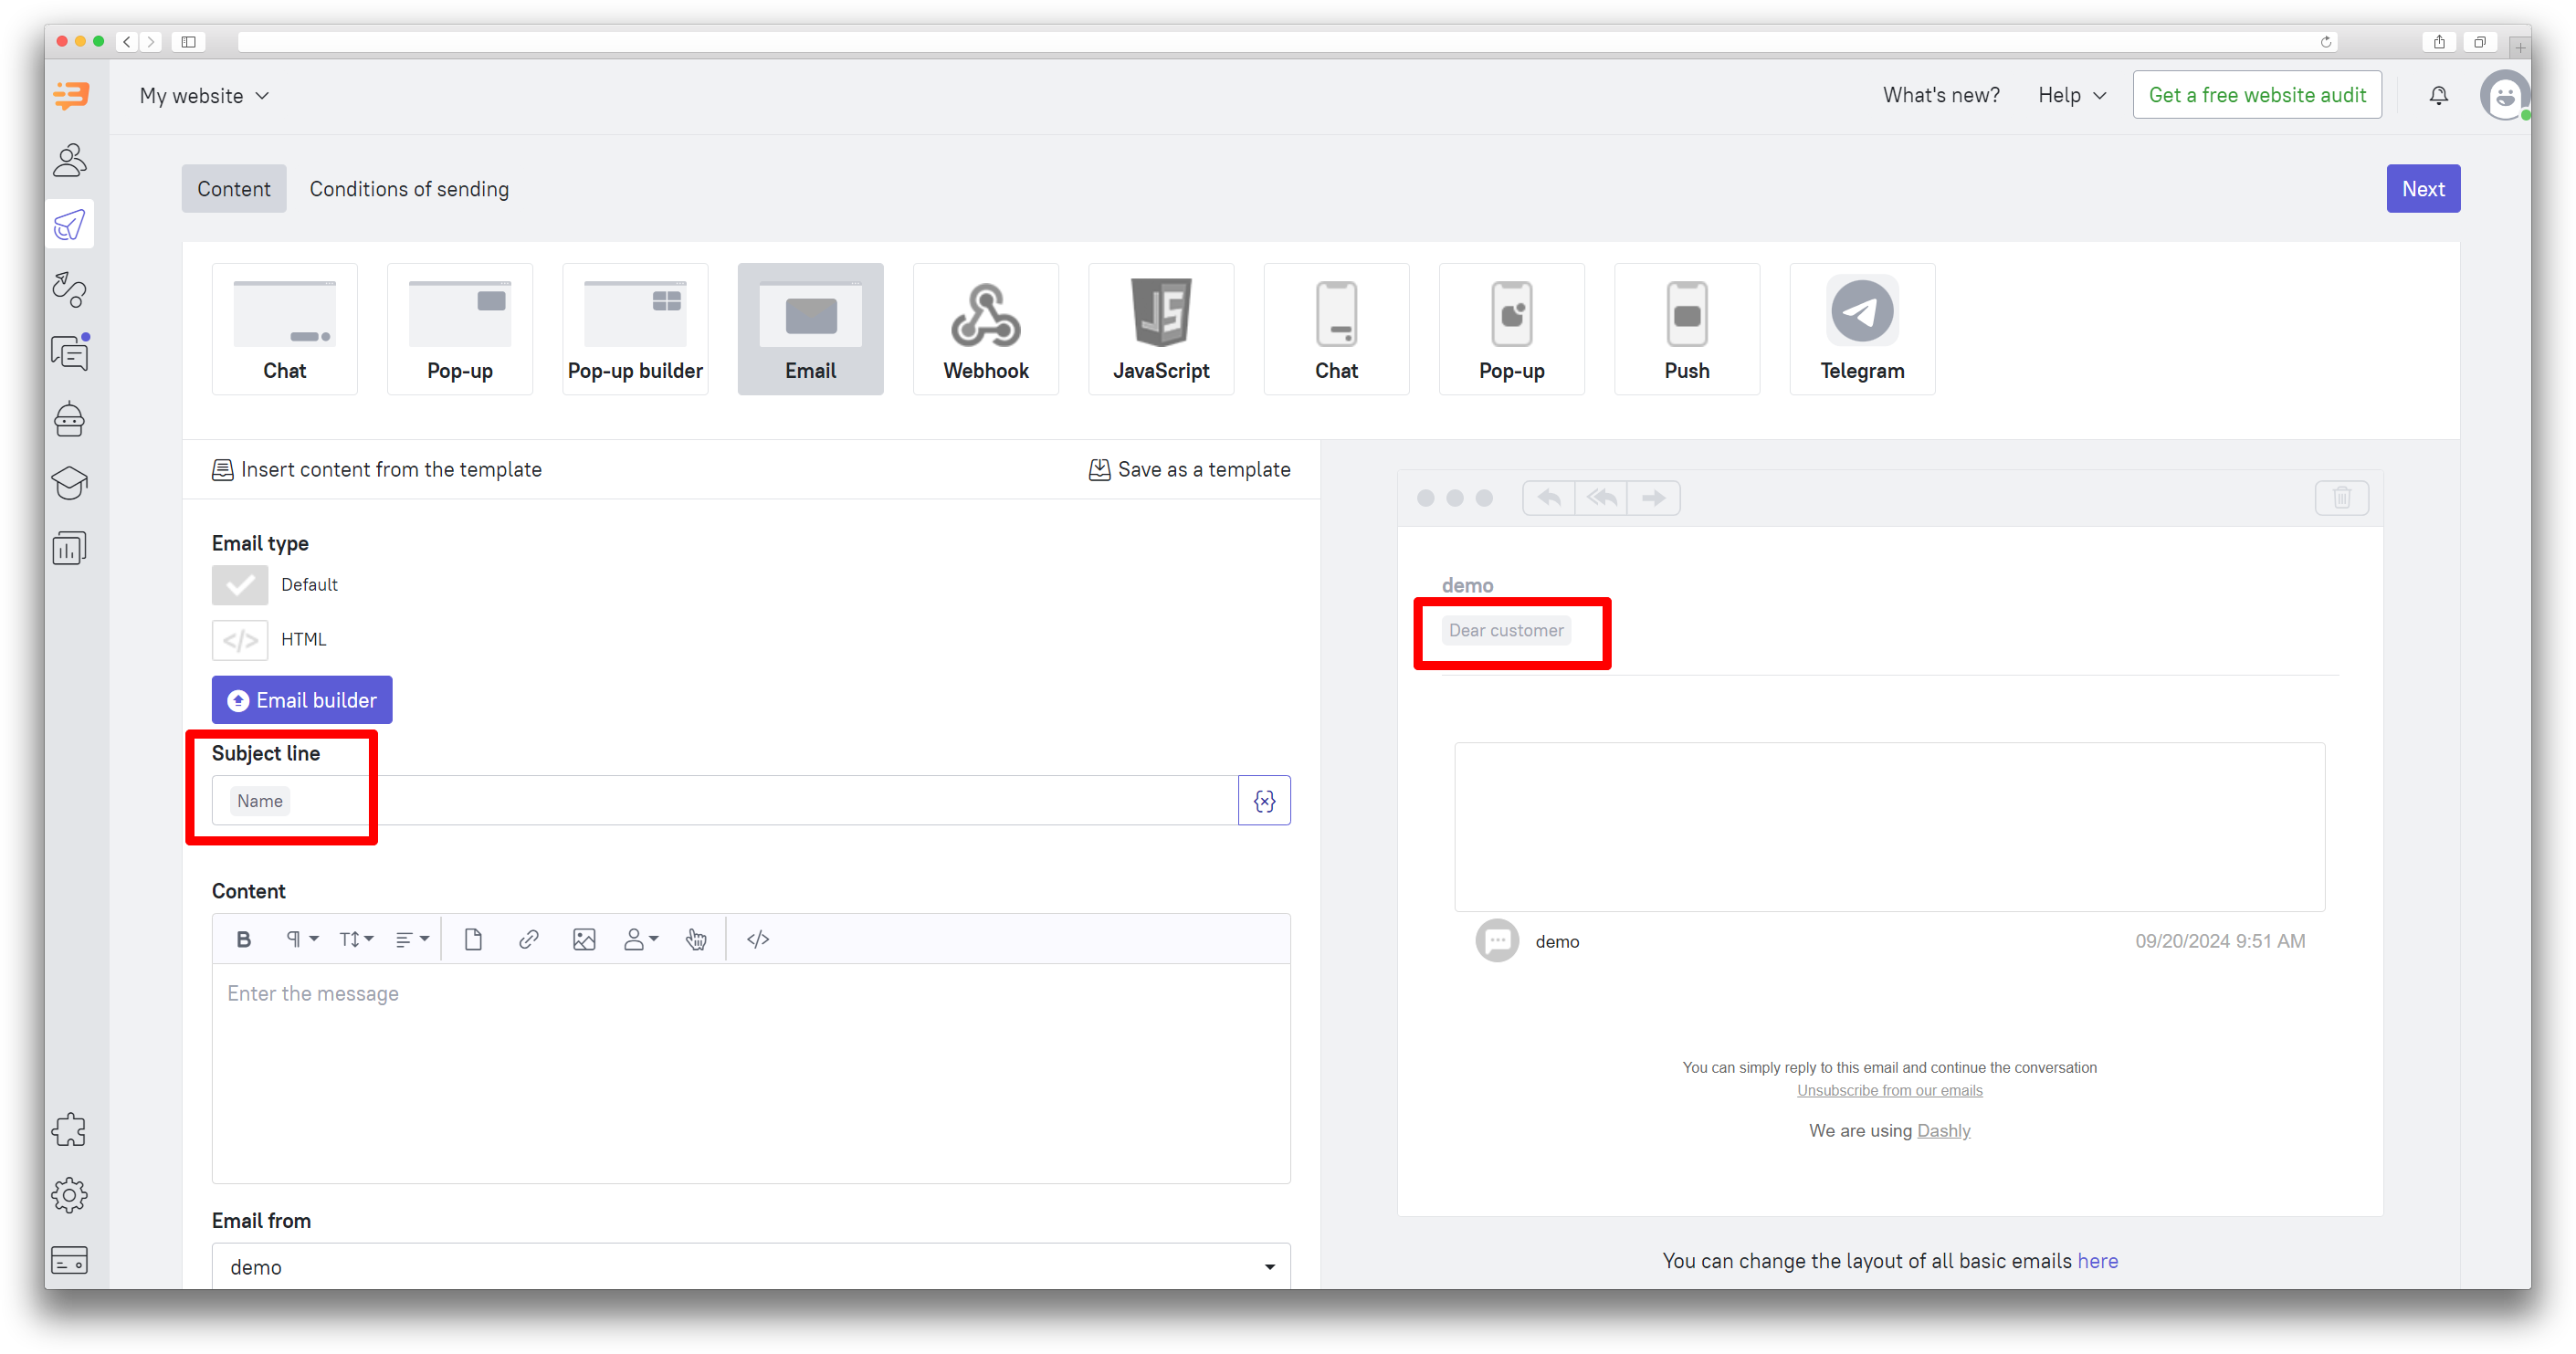
Clicking this will open a window for selecting the property you want to place in the subject line. You can also add an alternative text - it will be used if the recipient's leadcard doesn't contain the selected property:
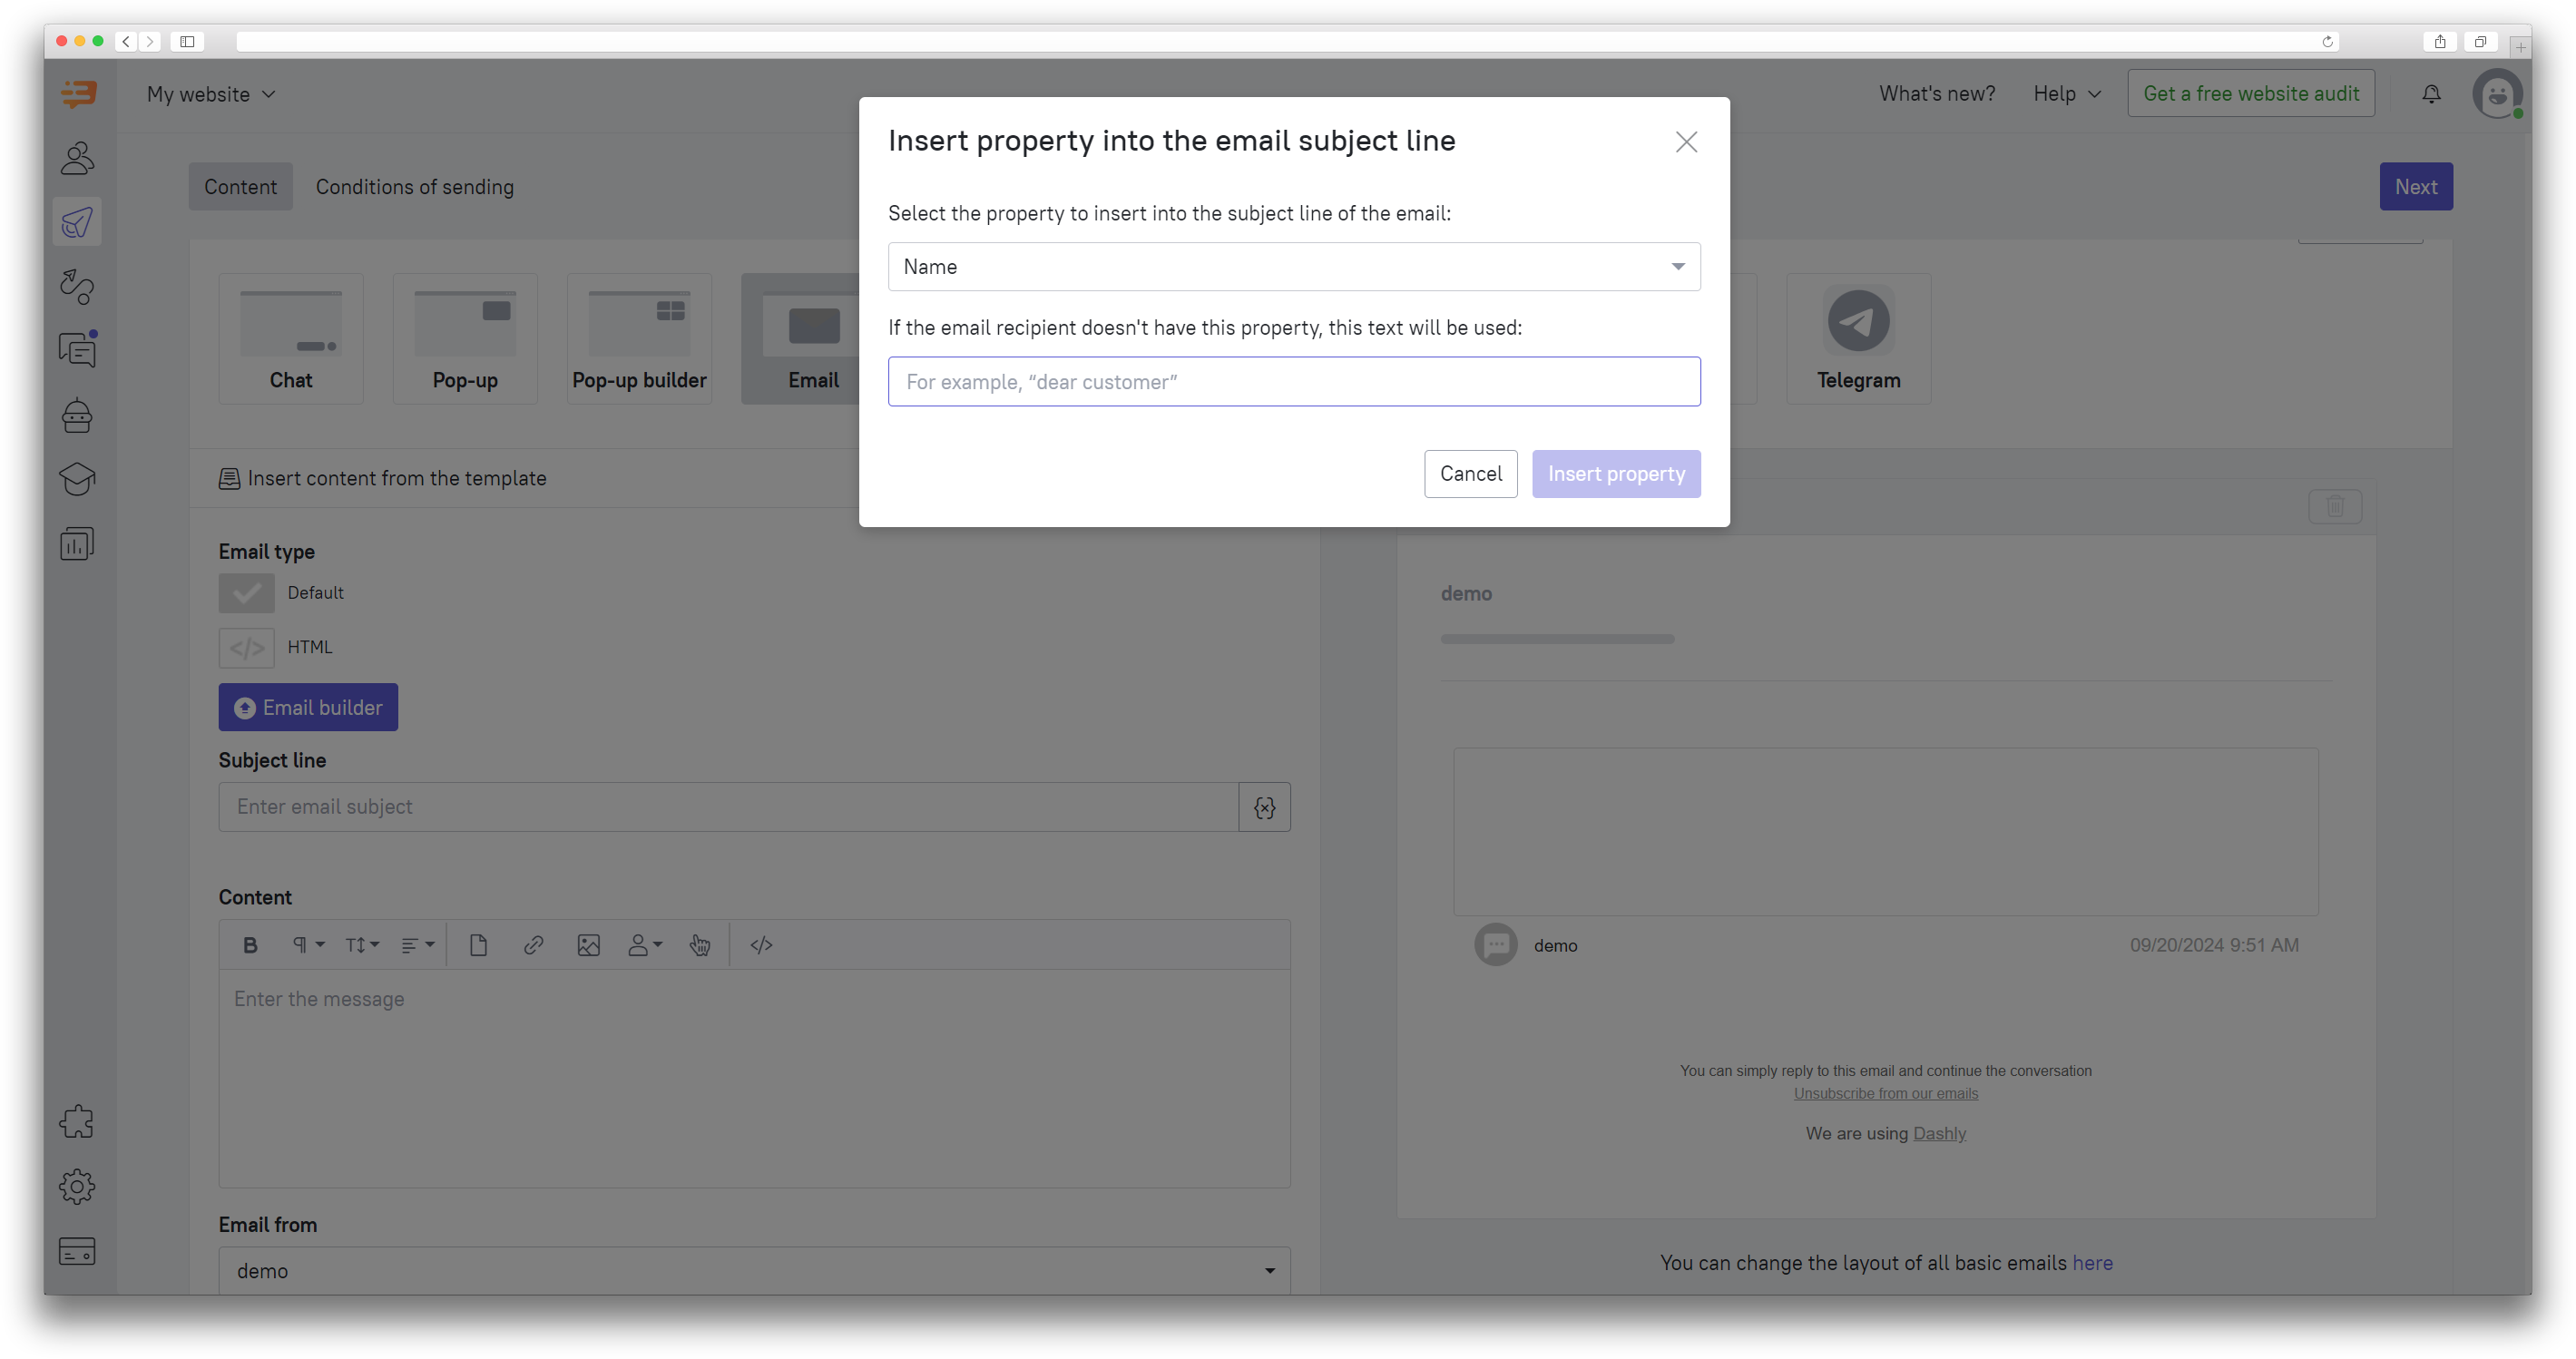
In the message preview, you will see the subject with the alternative text. The email recipient will see either the data from their lead card (if any) or the alternative text.
Personalization based on user properties using code
❗Keep in mind: personalization using standard properties may require data collection. This primarily concerns properties such as "Cart", "Cart Amount", etc. Make sure that all necessary data is collected to lead cards before using them in personalization.
To add any property to the message body or chatbot block, use this structure:
{{ user['Property name'] }}Replace 'Property Name' with any property you want to display in the message. If the property is a standard property, select it from this list. If it is a custom property, add the name as it's used in your system.
Here are some personalization examples:
1) Hello, {{ user['$name'] | default('Dear customer') }}
The user['$name'] part of the code inserts the value of the “Name” property into the text of your message. Notice the default('Dear customer') part of the code. It inserts “Dear customer” into the text if the “Name” property is not defined in a recipient lead card.
2) Your order amount is $ {{user ['cart amount']}} . Do you wish to finish your order?
If the order amount is $100, the lead will see the following text: "Your order amount is $100. Do you wish to finish your order?"