
Basic terms
Events
Events are actions visitors commit on your website, in an application, or on a server. You can record any event of a visitor or a lead you want to capture (visited a page, clicked on a button, made an order, etc.).
Tracking events will help you easily achieve your tasks in lead segmentation, building analytics and marketing automation.
This is how events in a lead card look like:
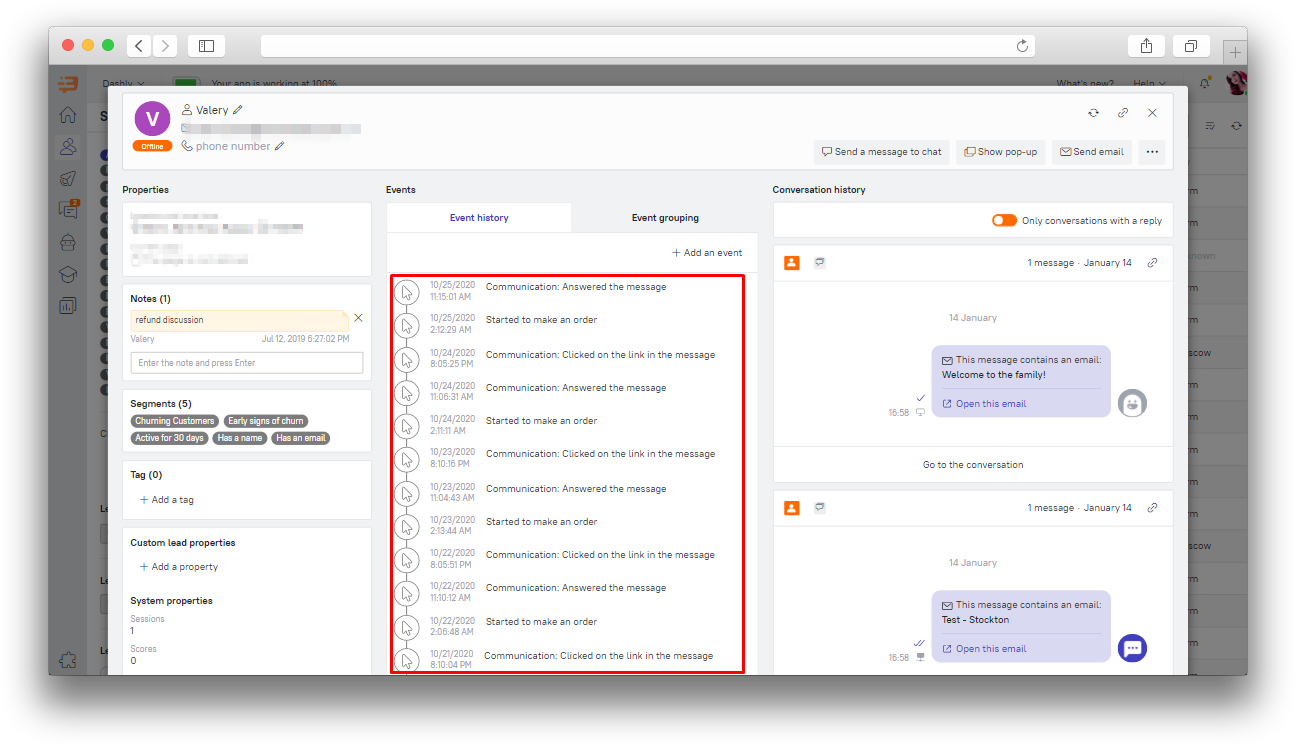
Some visitors’ events are automatically tracked right after you install the Dashly script to your website. These include:
Visited the website
UTM parameters detected
Conversations: User started a chat conversation
Communication: Message sent
Communications: Message read
Communication: Message replied
Communications: Clicked on a link in the message
Unsubscribed from the email-campaign
All standard events can be found in the "Developers" section.
You can also create and track custom events.
What events can be tracked?
Dashly has 4 basic types of events:
Page visit
Scroll to the bottom of a page
Click on an element
Input field filling
You can also create and track custom events: viewing catalog items, starting an order, trying to leave the page, etc. – all of them can be created in Dashly.
How to create these events?
There are several ways an event can be created:
You can create basic events (page visit, page scrolled to the bottom, click on an element and input field filling) using tracking master without developers’ help.
Through the API. The most flexible way, but requires programming skills. You can read more about this method in the developer section.
Via JavaScript. Its advantage is in flexibility, and the disadvantage is the need to write a code. This method of data collection is described here.
Event parameters
Dashly automatically records the date of the first and last instance of events, as well as the number of instances. These parameters can be used to segment leads by events.
Event attributes
Each event can have attributes. They complement events in order to give you a better understanding of the context they were recorded in.
Here is an example of "Visited the website" event attributes:
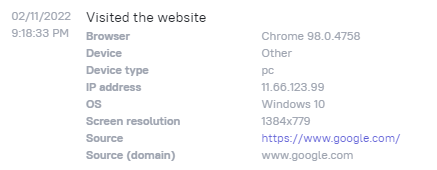
Important! Do not confuse these with lead properties! Read about lead properties below.
Lead properties
Lead properties are parameters such as name, email address, phone number, city, UTM tags, viewed items, cost of the items in the cart, etc.
Dashly distinguishes two types of properties: system properties and custom properties. System properties are collected automatically. You can find the full list of system properties here.
To collect custom properties, you’ll need to set them up first. You can collect any user properties via API, with advanced tracking master, or create them manually in a lead card – just click “Add a property” button.
Some user properties are collected automatically:
Country
City
First source (referrer)
First source (domain)
First UTM Campaign Parameter
First UTM Source Parameter
First UTM Medium Parameter
First UTM Content Parameter
First UTM Term Parameter
These are basic general user properties for any kind of website:
Name
Email
Phone
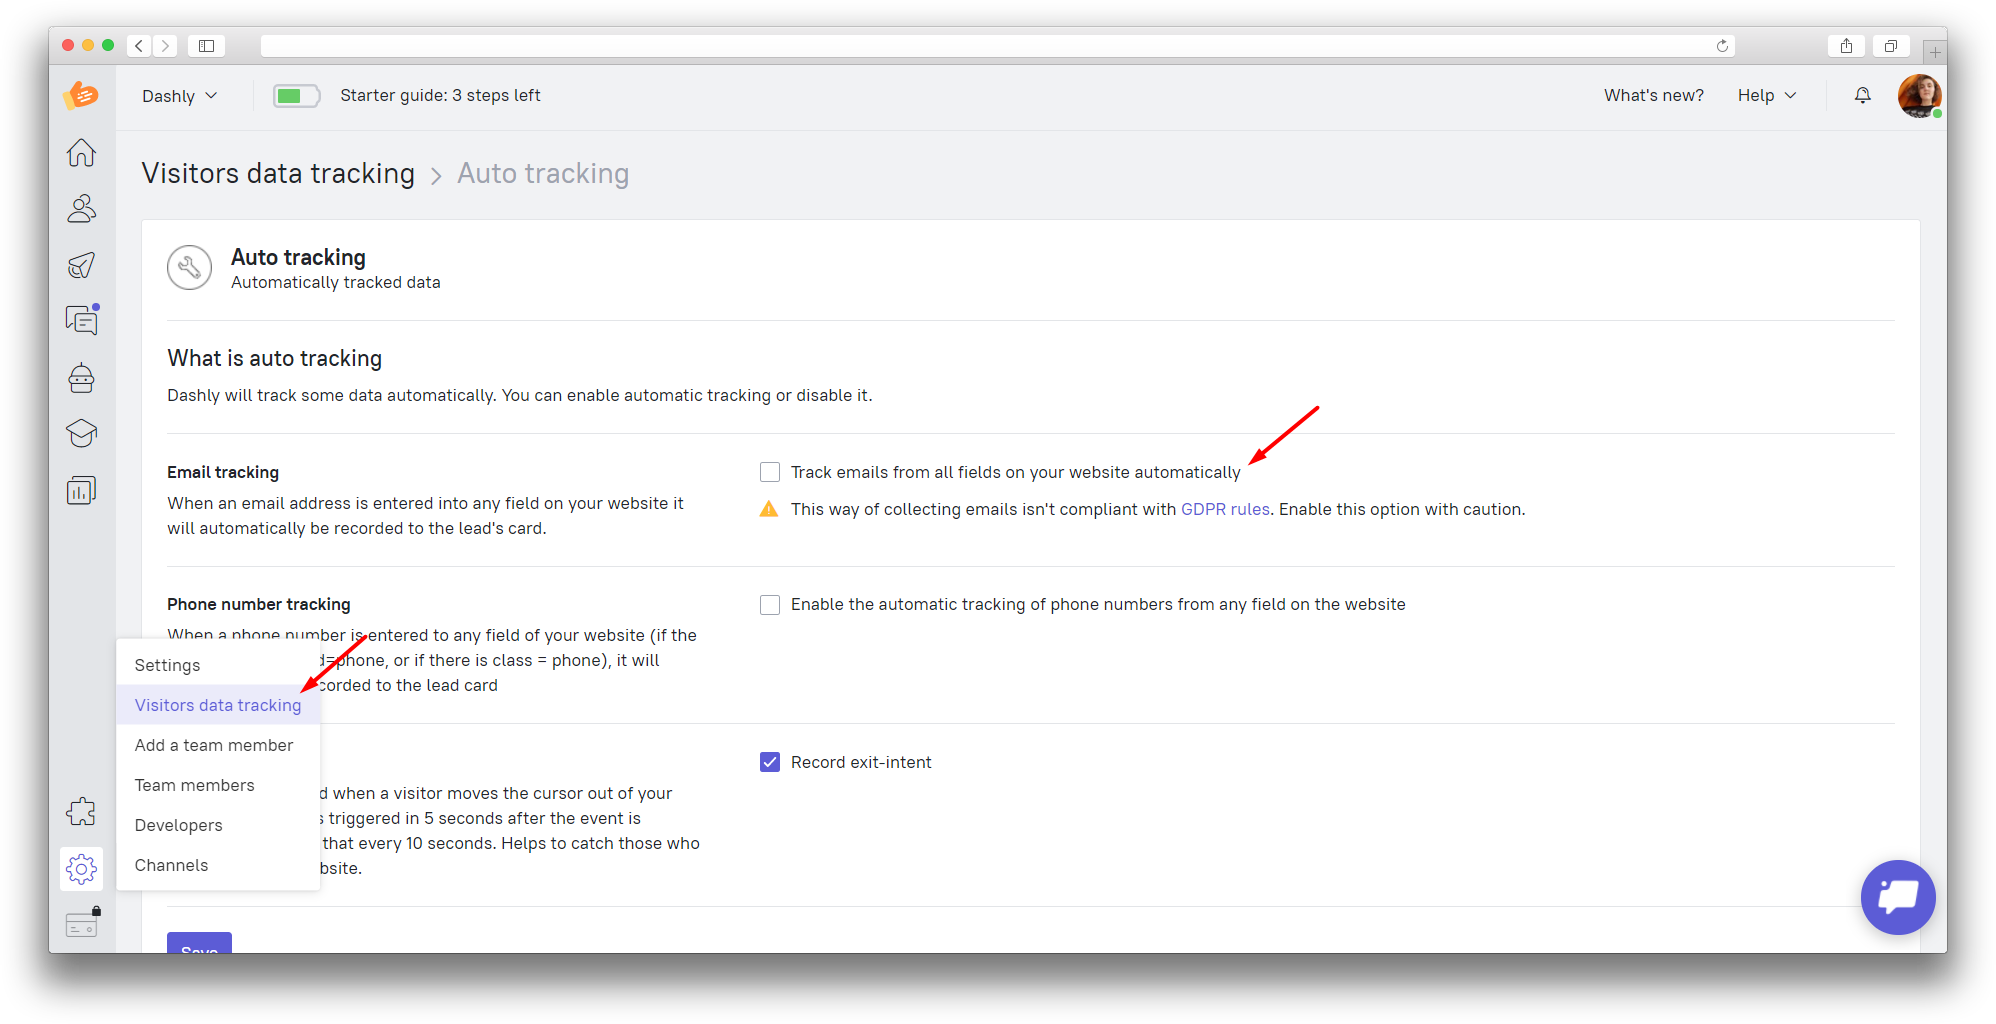
The email can be collected automatically from all fields on the website if the "Auto tracking" setting is turned on.
A complete list of properties and events can be found in the documentation.
Trigger
Triggers are events users commit on your website, which are used to initiate auto message sending.
Any lead event can be a trigger. For example: Visited the website, entered the sign up page or clicked the "Checkout" button.
Timeout
Timeout is a sending delay.
Example: you want to send a promo code to leads who’ve been visiting your website for more than 30 minutes. In this case you may pick "Visited the website" as a trigger and set a 30 minute timeout.
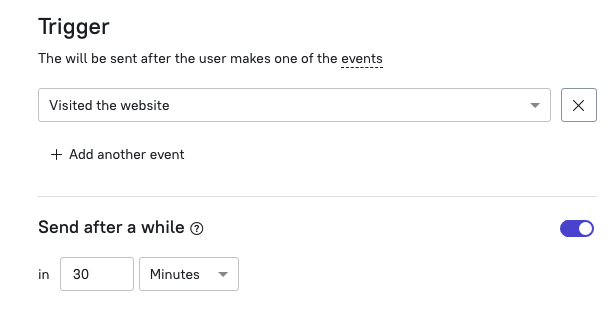
It is important to note that if your auto message has a timeout, then lead properties and events will be verified once this time passes: Auto message gets triggered – The timeout passes – Lead segment is verified – Message is sent.
Now you are able to send auto messages to the desired lead segment when it’s needed (with the help of a trigger event and the timeout).
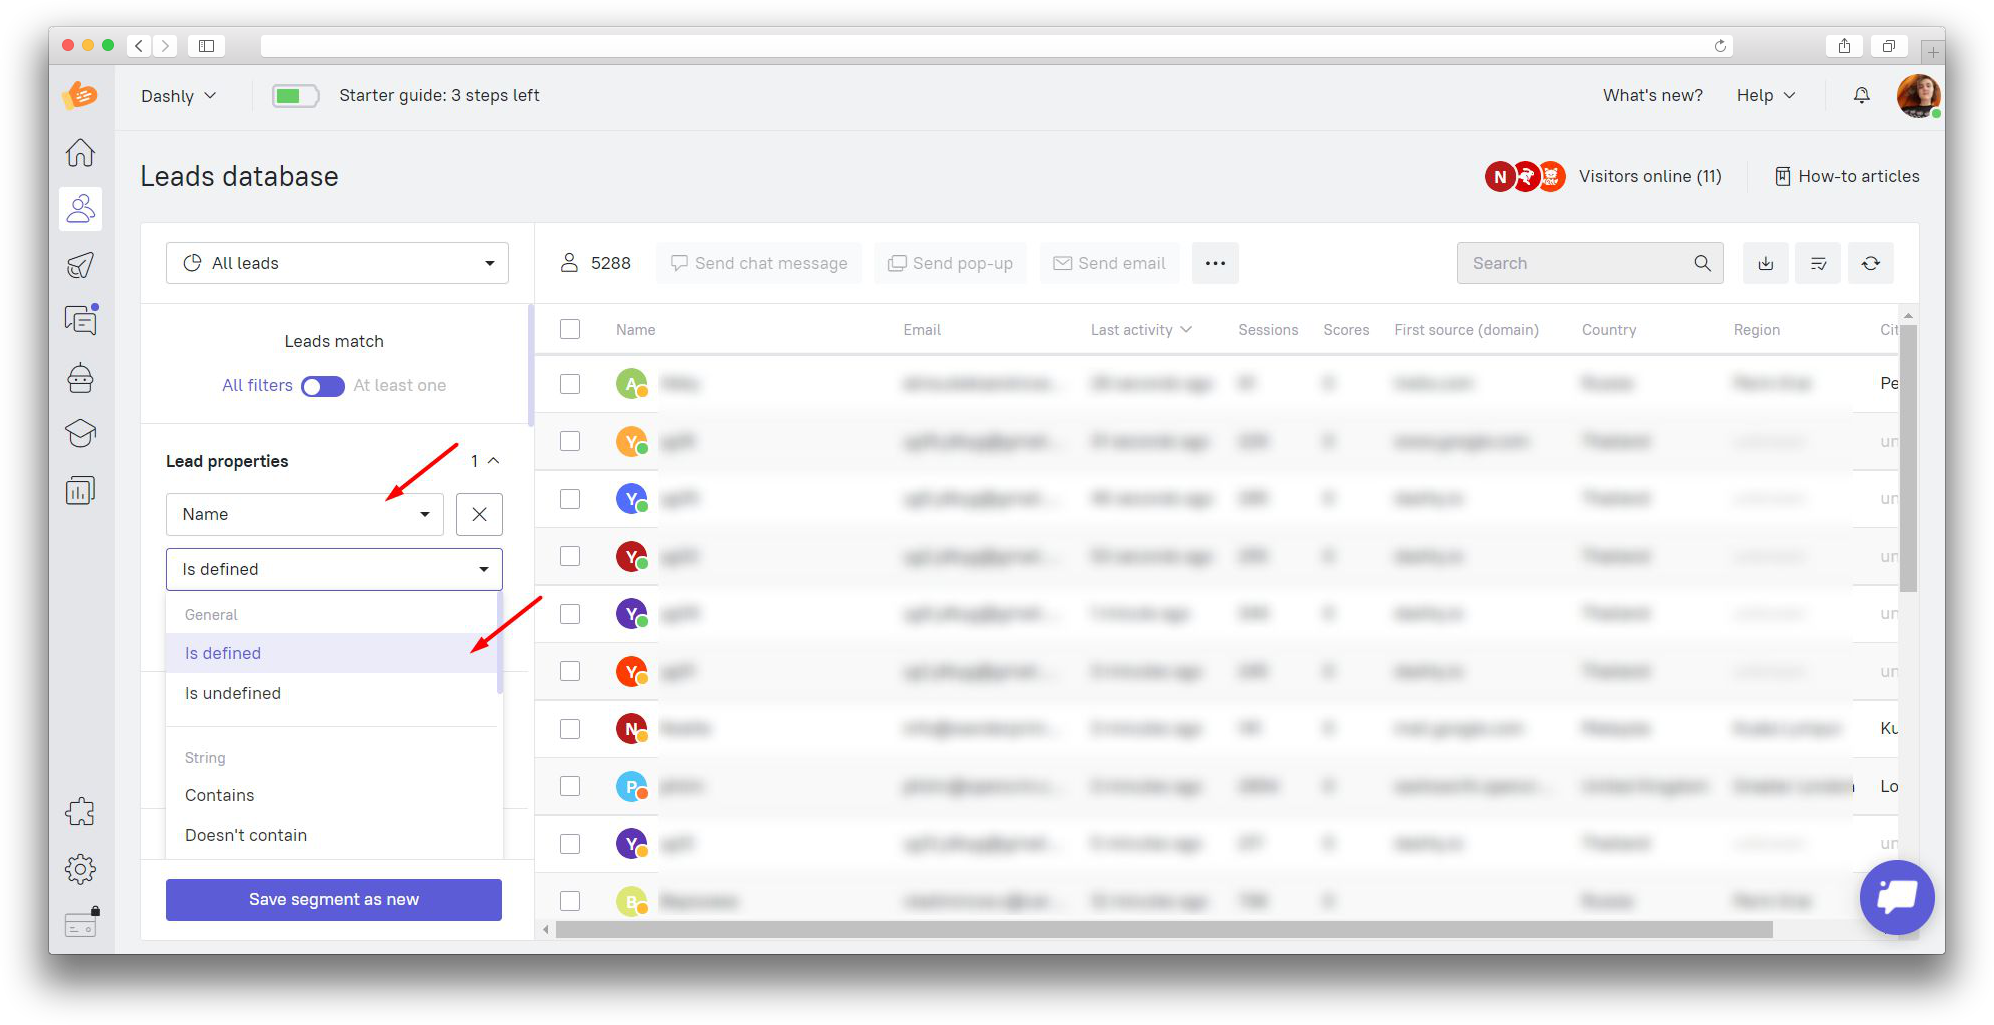
Segment
Divide your leads into segments in order to send different messages and pop-ups. A segment is a group of leads allocated by the same properties or events.
Since lead properties can have different values (number, line, date, boolean variables or list), you can segment leads by their content.
Example:
Let’s say we need leads which we have names of in order to send them a personalized email – we choose Name – Is defined.
Events can be filtered by the number of times they were recorded and by the dates they were first and last recorded.
You can select all leads who have visited your website for more than 5 times or find everyone who hasn’t used any discounts on your website or those who entered their email within the last 5 days (last event date set to “less than 5 days ago”). Basically, it all depends on your purposes.
Read more about segmentation here.
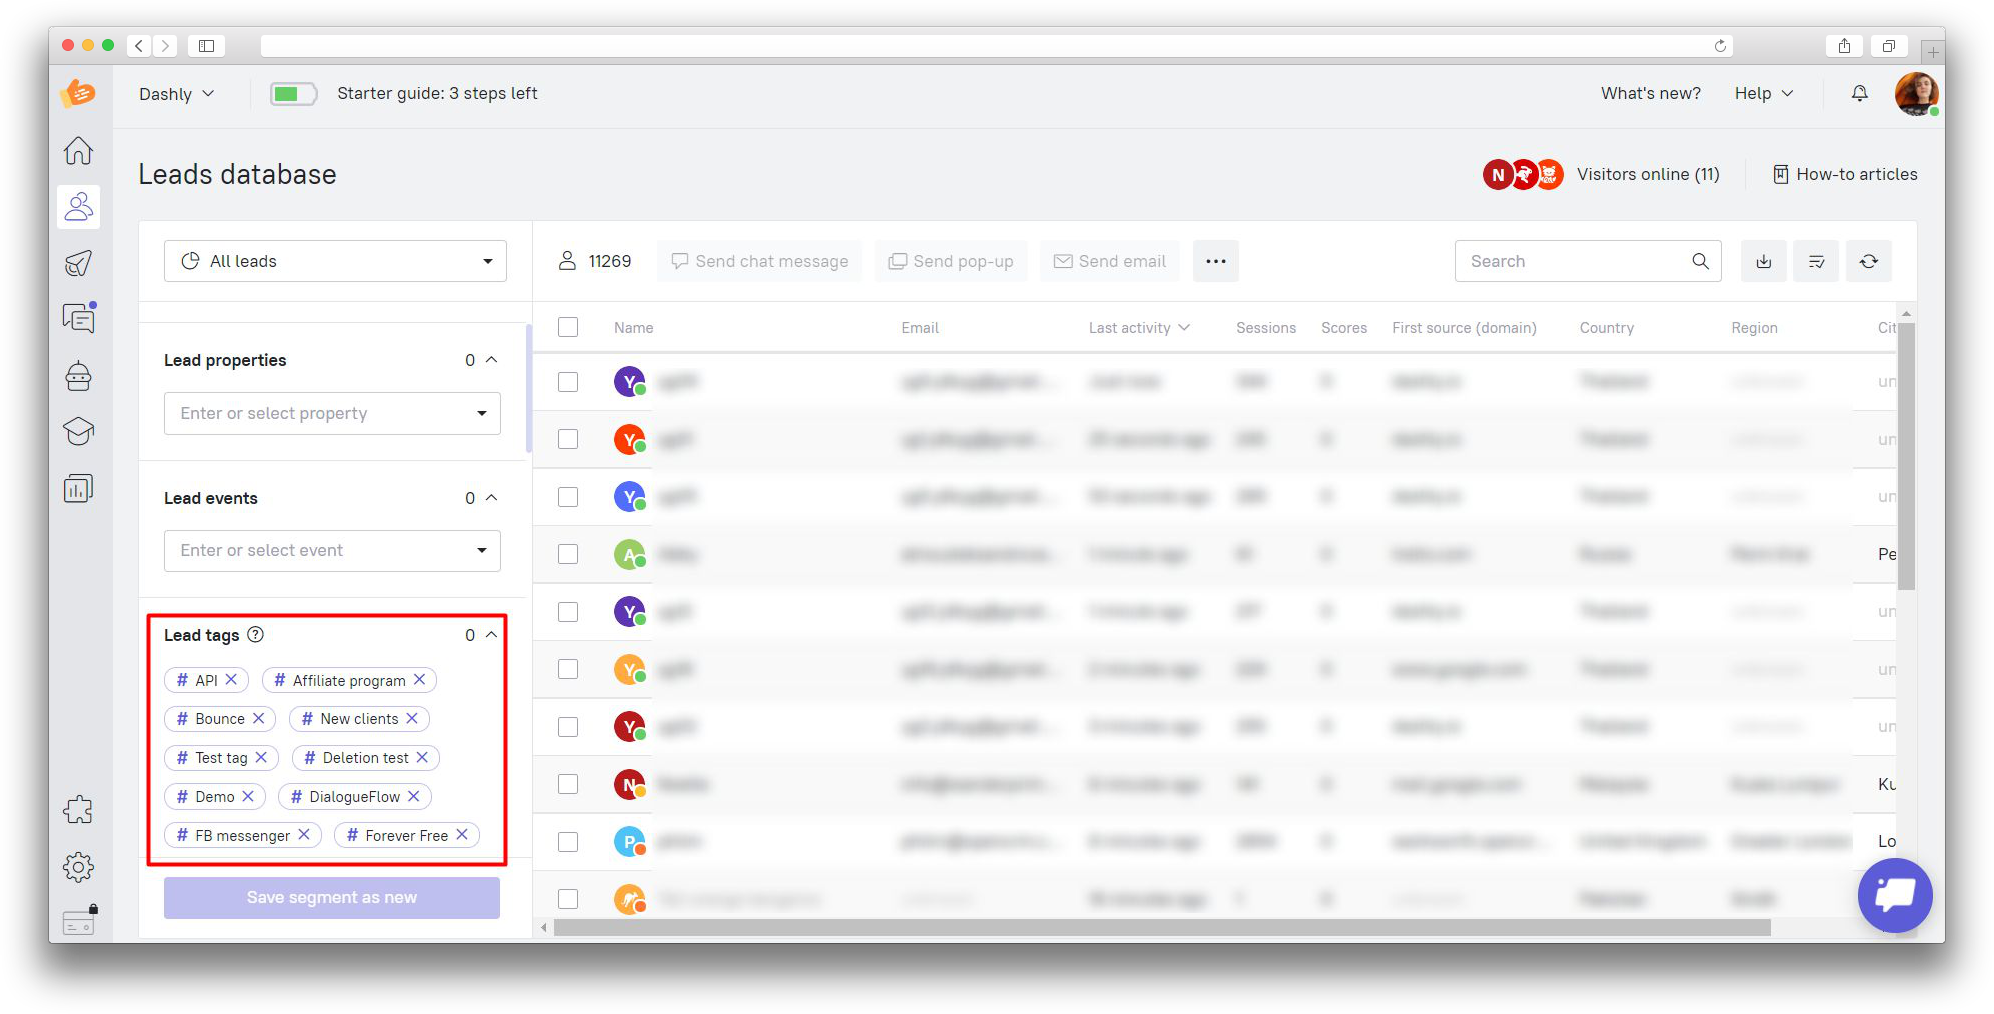
Lead tags
Tag is a special mark that you can add to a lead or a group of leads so you can easily find and segment them in the future.
How tags are different from properties?
Lead properties are dynamic. For example, you have the "Inactive for more than 30 days" segment.
Naturally, as soon as a lead from this segment enters your website, they will stop belonging to this segment.
Tags can be set and removed manually, which will let you find particular leads anytime. Example: you can add "loyal" or "waiting for an update" tags to quickly find these leads.
Segmentation and tags
You can easily find tagged leads and highlight them as a segment. Tags take a part in the segmentation process. Click a tag to select all leads with this tag. Note that the "+" sign appears on the left from the tag's name. It means that you’ve selected all leads with this tag.
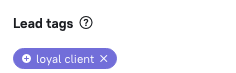
Example 1: Select all leads with "loyal client" tag:
Click on the # sign to include the tag. The # sign will be replaced with the + sign and you will see all leads who are assigned to this tag:
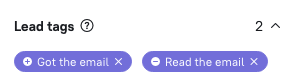
Example 2: Select all leads who didn't read the previous newsletter to send a new one to them.
Combine enabled and disabled tags for the most flexible segmentation. You can add a tag to a group of leads who performed an action with a manual campaign (read more about it here). Use the tags to send the next campaign only to those who didn't read the previous newsletter. Select the tag for the whole leadbase and exclude the tag that those who read the letter have:
Read more about adding lead tags in this article.
How can this help me?
Example: let’s say you’re making a manual newsletter as a part of a New Year campaign. Some of the leads read it, and some don't. Go to the “Manual campaign reports” in order to find leads who’d read it and add a tag to them.
Add the "Read newsletter - test" tag in order to send these leads a new letter. Now you can select all leads who don't have this tag and send them another letter.
Another example:
You’re adding a new feature and you want to test it out. Before officially announcing it, you can ask your most loyal clients to test it and leave some feedback. They will help you understand whether there are any mistakes or bugs left fixing and if there is anything worth adding.
You can learn more information and feedback from private conversations. Add the tag "Loyal" to this lead card (and always remember that lead tags are different from conversation tags).
All you have to do now is select these leads with the tag in the “Lead database section” and send them a manual message.