
Your customers may send an email message to your company's email address (for example, support@mycompany.com). These messages can be automatically duplicated into the Dashly Inbox, so you can reply to these emails straight from the “Inbox” section of Dashly.
You can create different channels for forwarding emails from different addresses - read about how you can do it in this article.
Setting up forwarding is easy, just follow the steps below:
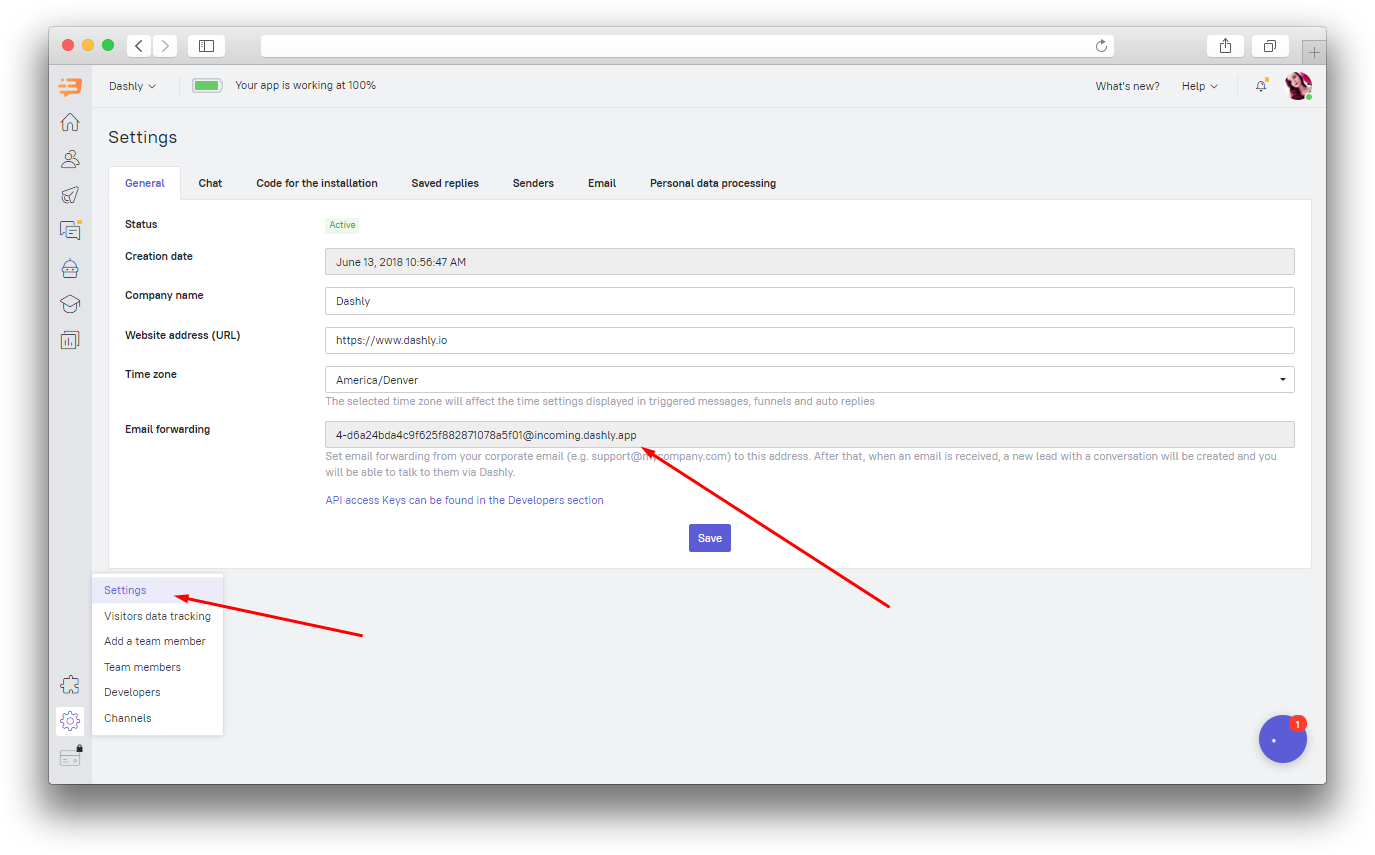
1. Copy the "Email forwarding" address from the “Settings” – “General” section of Dashly:
2. Enter the technical email to the email forwarding settings of your email provider. The examples of Gmail email forwarding settings are below.
Important: don’t forward emails from the addresses of operators who receive email notifications about the conversation updates to Dashly as these notifications will get looped into your Dashly inbox.
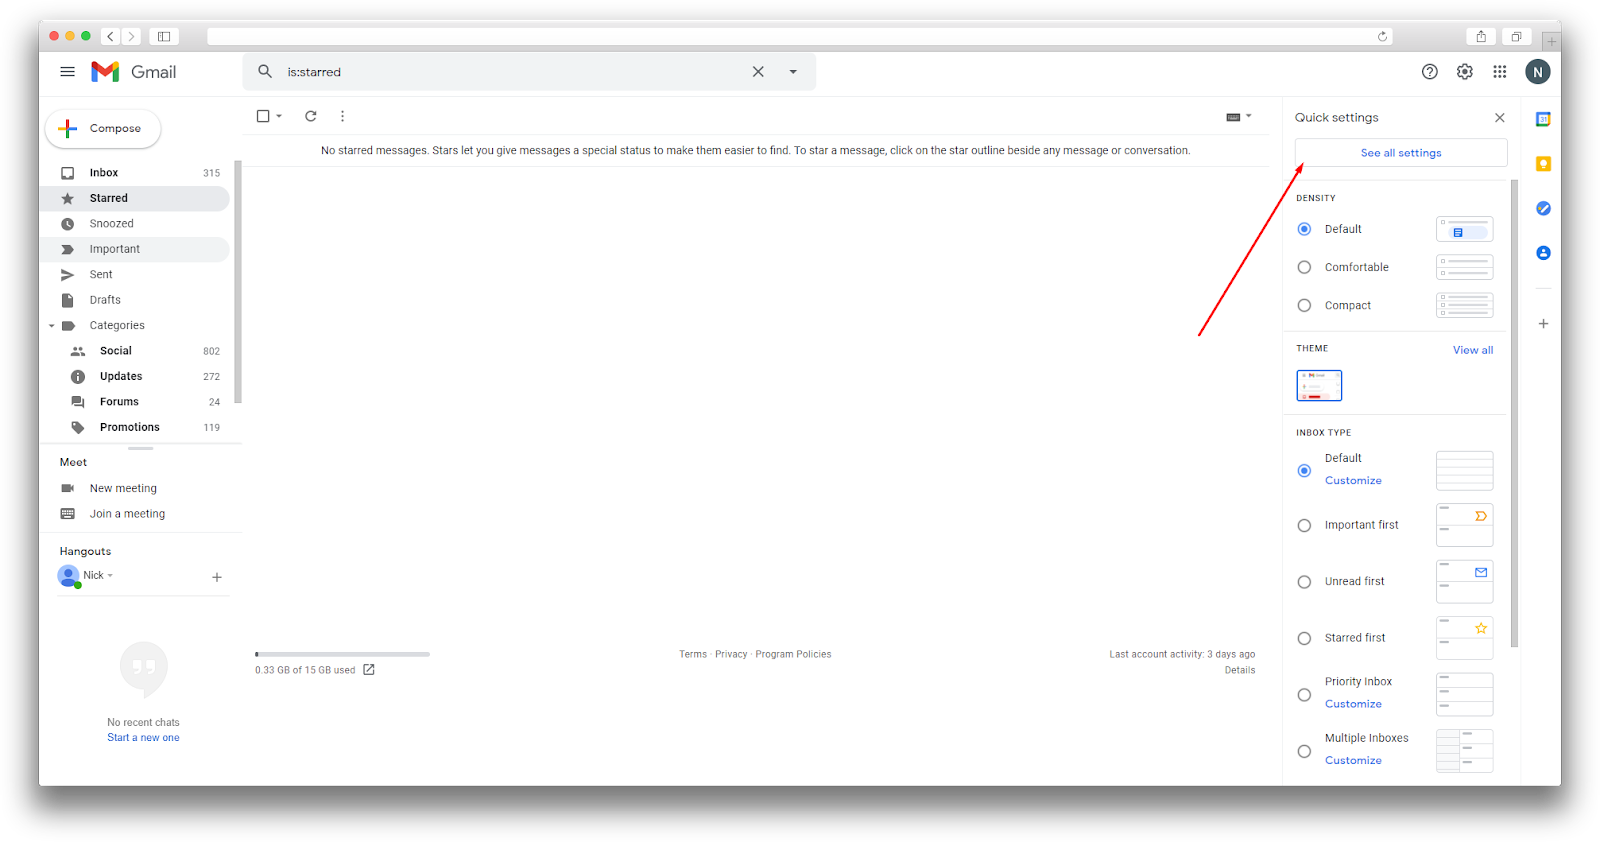
The example of email forwarding from Gmail
Go to the Gmail settings:
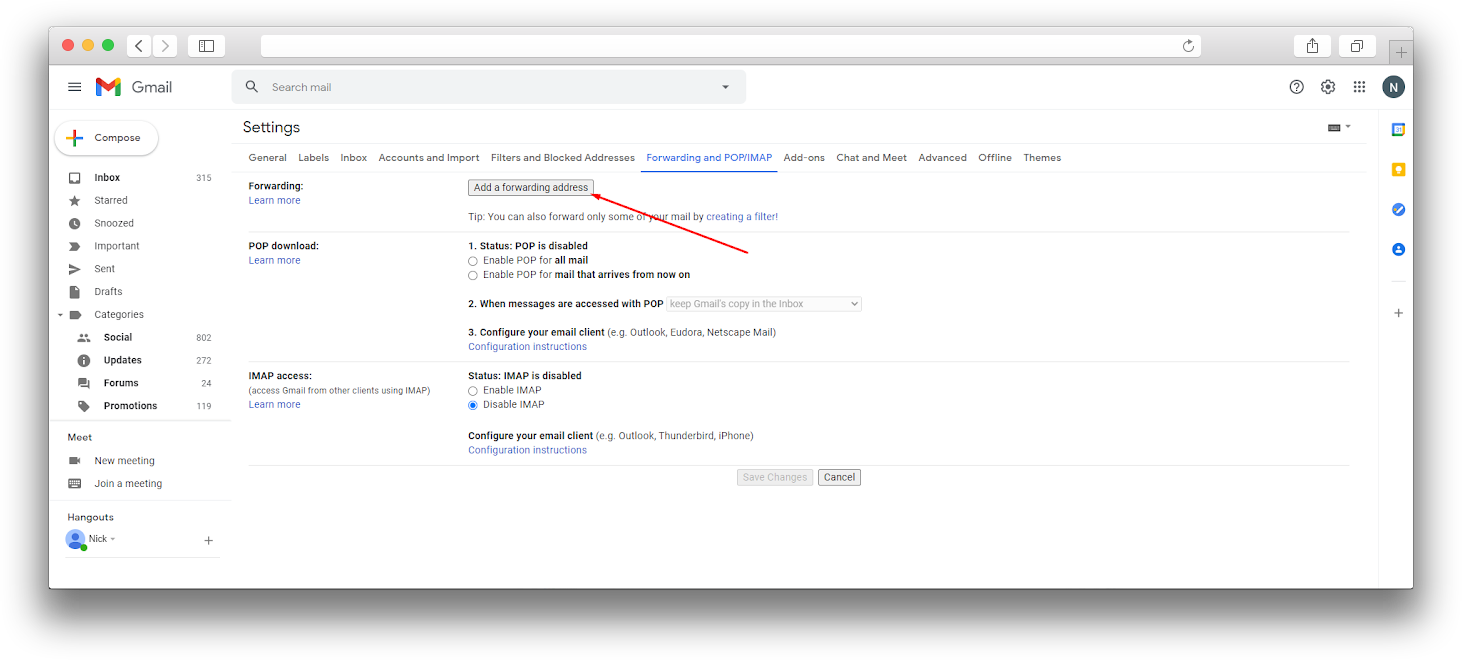
Go to the "Forwarding and POP/IMAP" section. In the "Forwarding" field, add the technical email you've copied from the Dashly settings section:
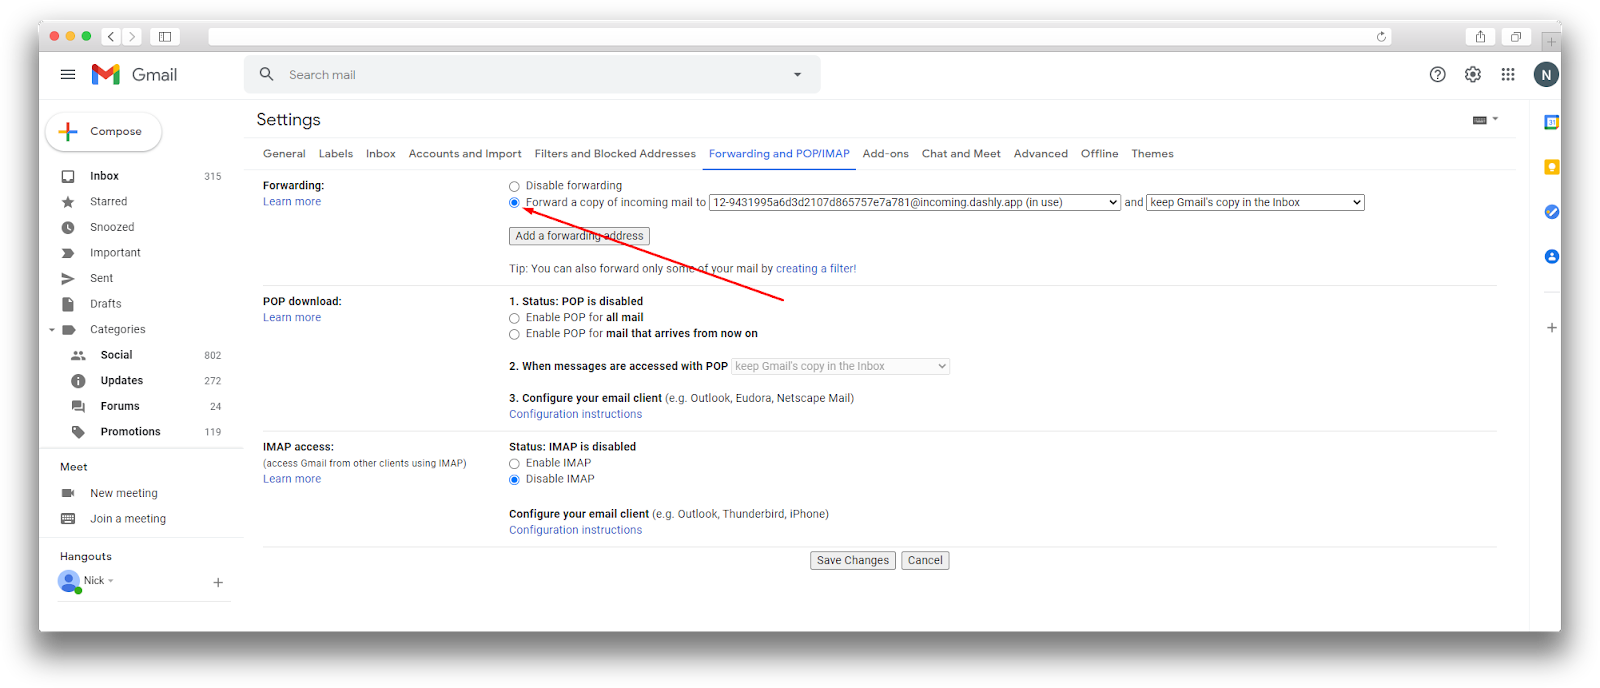
Wait for the Gmail notification in the Dashly “Inbox” section and confirm the email.
After the email confirmation, check the "Forward a copy of incoming mail to" and save changes.
Custom sender domain
Emails sent via Dashly are sent from support@app.mail.dashly.io by default. If you want to send emails from your domain address, add this extra option with the “No Branding” add-on. This option is paid additionally every month. Read this article to learn how to connect your custom sender domain: https://help.dashly.io/article/2104.