Using the Instagram integration, you can answer messages sent to your Instagram Direct. All of the messages sent to your Instagram account will appear in your Dashly Inbox and the users who send messages to your Instagram Direct will be added to your lead database. Their Dashly user card will contain their Instagram profile picture and the name they've set up in Instagram.
You can tag any conversation started from Instagram and see analytics on them in the Team performance report section.
You can create several Inbox channels to accept messages from different Instagram accounts. It will help your chat managers quickly identify which one of your Instagram Direct accounts new messages come from.
The Instagram integration is made with Instagram API, which keeps your Instagram account safe from getting blocked for using our integration.
How the integration works
1. User sends a message to your Instagram Direct, reacts to your Story or mentions your business account in a Story;
2. This gets sent to your Dashly Inbox as a message;
3. You reply in your Dashly Inbox;
4. User receives your reply in Instagram Direct, they will see it as a message sent from your Instagram Direct account.
❗ Important: Instagram has a limit on receiving messages from API integrations. The number of messages you can send to a user during the first 24 hours after their last message is unlimited, but you can only send them one message after the 24 hour period has passed.
Integration features
Replying to messages sent to your Instagram Direct with text
Replying to messages sent to your Instagram Direct with images and emoji
A separate channel for messages received from Instagram Direct in your Dashly Inbox
Replying to Instagram Stories
Receiving reactions to your Instagram Stories
Receiving tags applied to Instagram Stories
Receiving posts sent to your Instagram Direct
Setting up the integration
❗Important: The Facebook account you're using to set up the integration must have a verified email address used as its main contact email.
In Instagram:
Connect your Instagram business account with your Facebook business page. You can read about it in this article.
In case you don’t have an Instagram business account yet, you can create it by following this instruction.Allow integration access in Instagram. Press the
 button and go to the
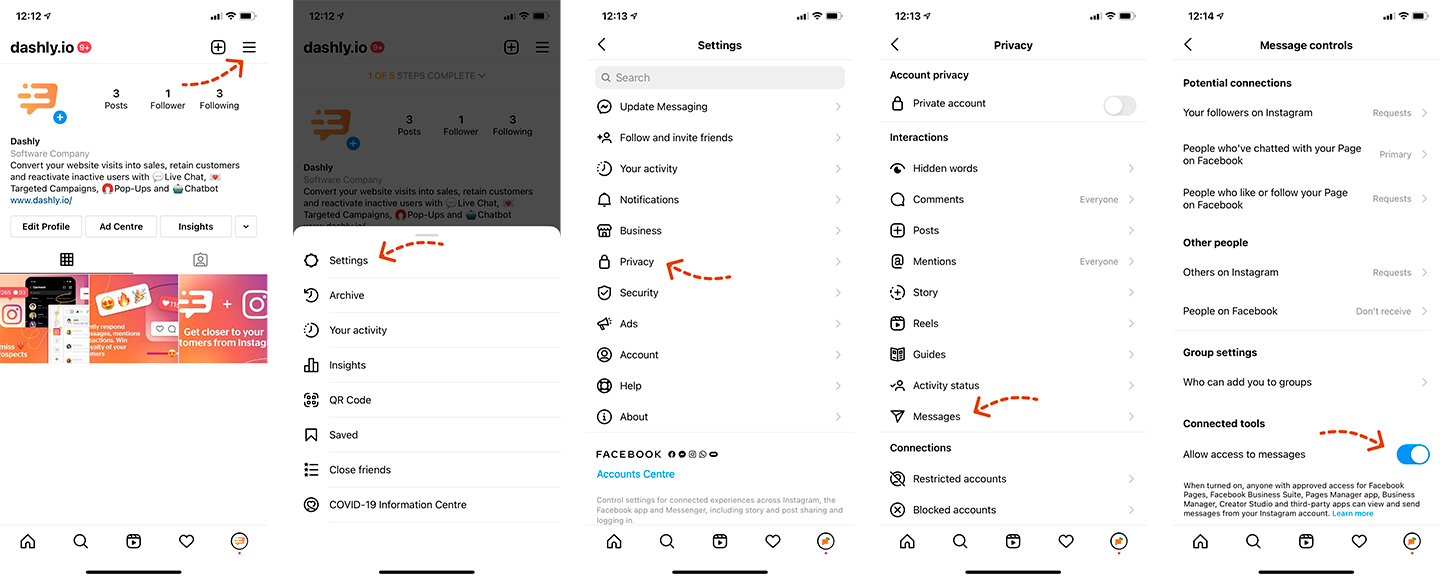
 Settings -> Privacy-> Messages. Switch on the “Allow access to messages” option. You can read about managing access to Instagram messages in this article.
In Dashly:
Go to the “Integrations” section and create an Instagram integration
Enter the integration name
Click “Authorize via Facebook” and log into your Facebook account
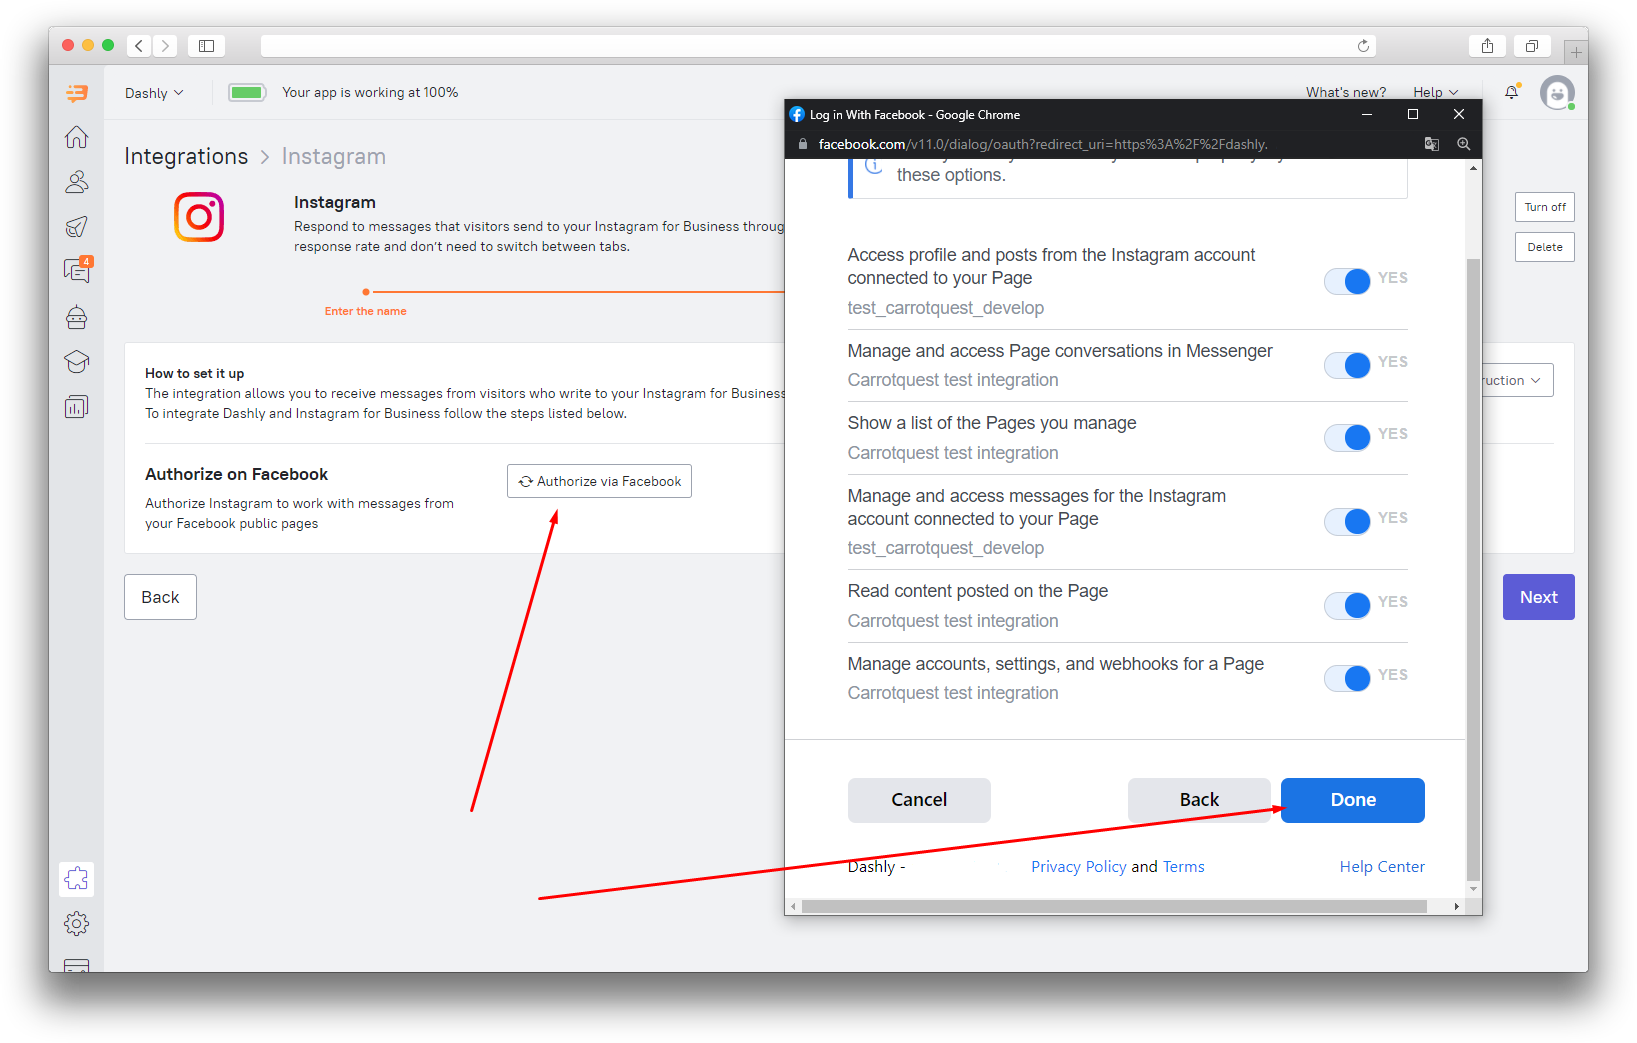
Once you’ve logged in, you’ll see a list of pages available for integration. Choose pages you want to integrate Dashly with and select the messages you want to receive in the Inbox section.

When is my integration all set?
Check if you can see all the connected Facebook pages here. Activate the ones connected to your Instagram account: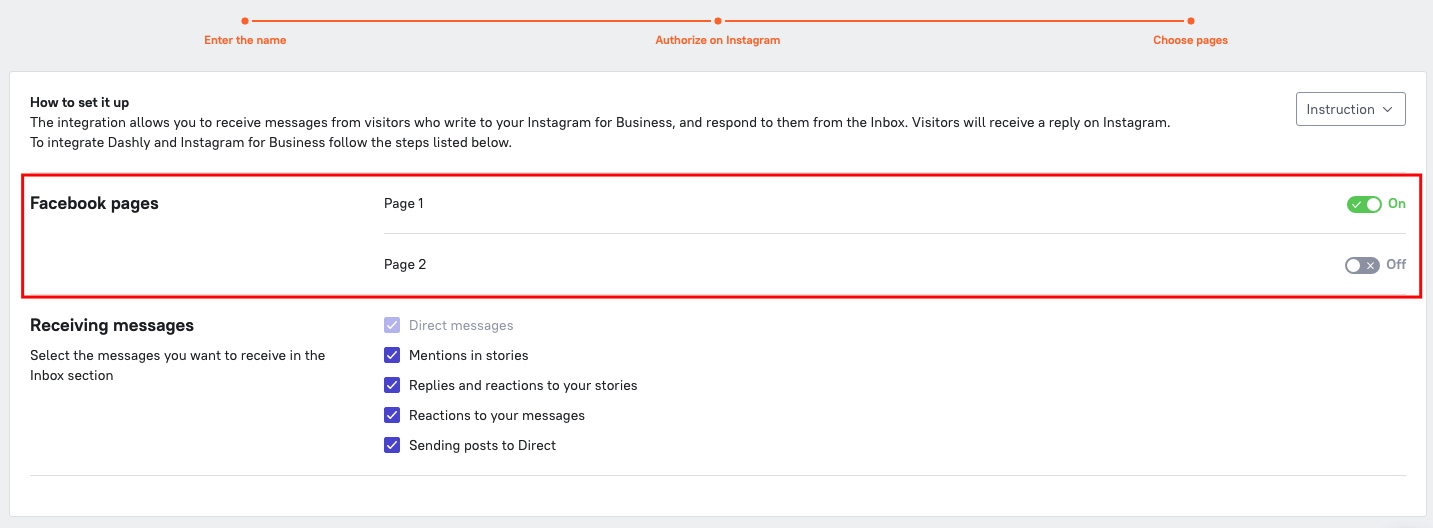
If the integration is not sending messages to / from Dashly:
1. Make sure your Instagram page is allowed to send messages to other systems (check out step 2).
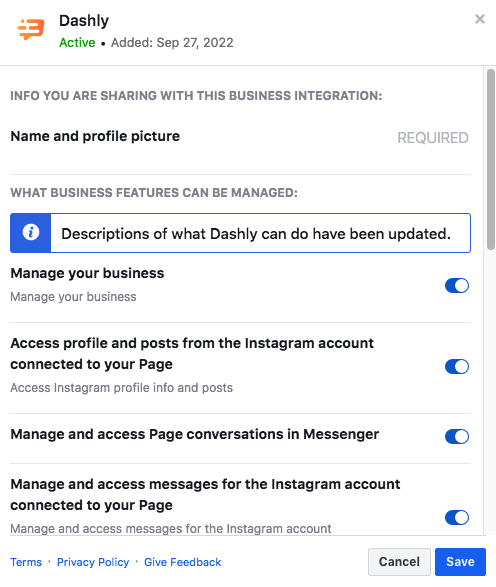
2. Check if you've provided all the permissions when authorizing via Facebook. Go to Settings and Privacy -> Business Integrations:

Dashly should have all of the available permissions:
3. Go to the General Page settings -> New pages experience -> Advanced messaging. Make sure Dashly is selected as a Primary receiver for handover protocol.
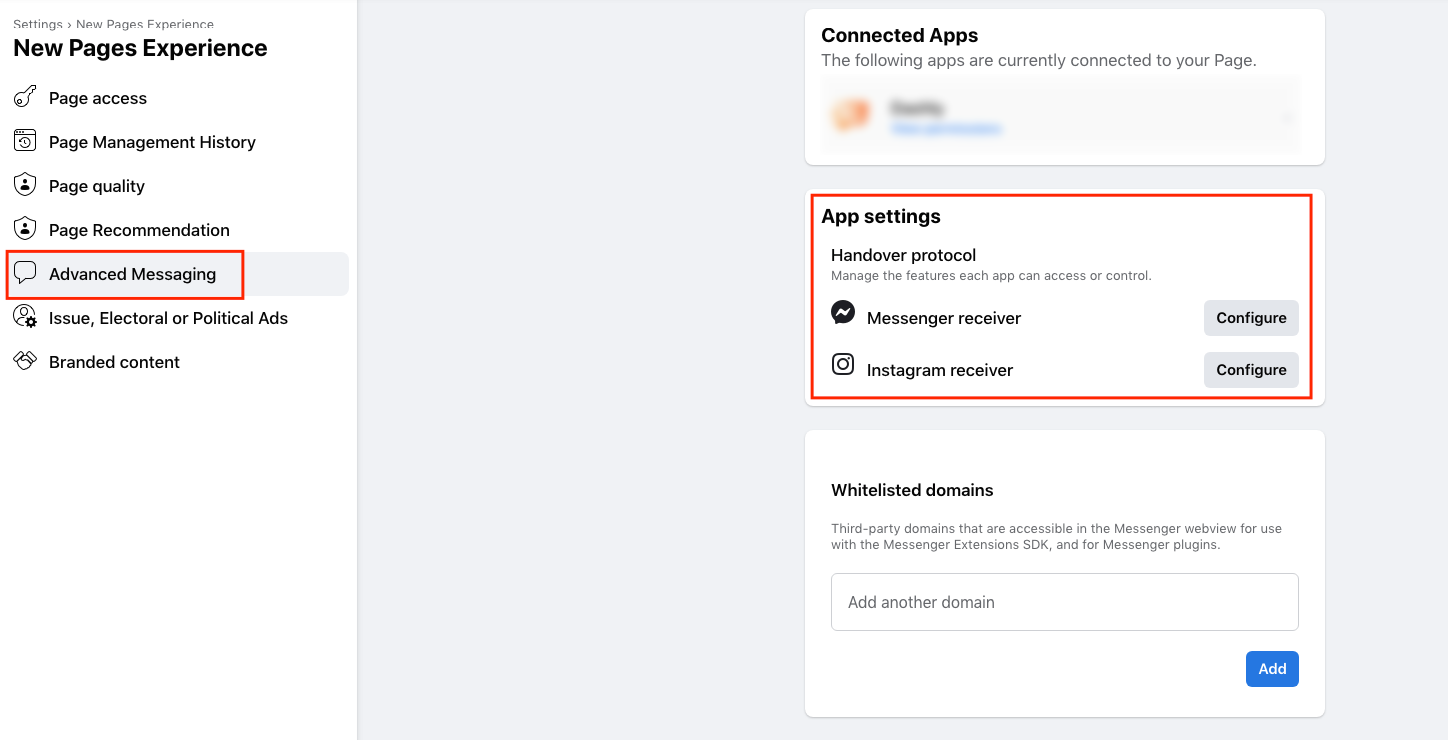
Click Configure and then Select (it will provide you with a list of the apps you have connected).

If you've checked everything and the integration still doesn't send any messages in or out, please contact our support team.
