
Inbox notification about a filled pop-up form
This scenario might be useful for you in case you want to timely react to information your visitor enters in a pop-up from the pop-up builder.
For instance, you have an triggered message asking your visitors to leave their phone number. Considering the fact that the information a user enters in that pop-up (made in the pop-up builder) gets recorded into their user card and doesn't get send anywhere else, it will be hard for your operator to contact this visitor.
As a solution to this problem, it's possible to automatically send a set message to the Inbox section as this user. Your operator will see this message so they can contact this user. If none of your operators is online at the moment this message gets send, they can get an email or mobile app notification about it.
🧙 Follow these steps to build this scenario:
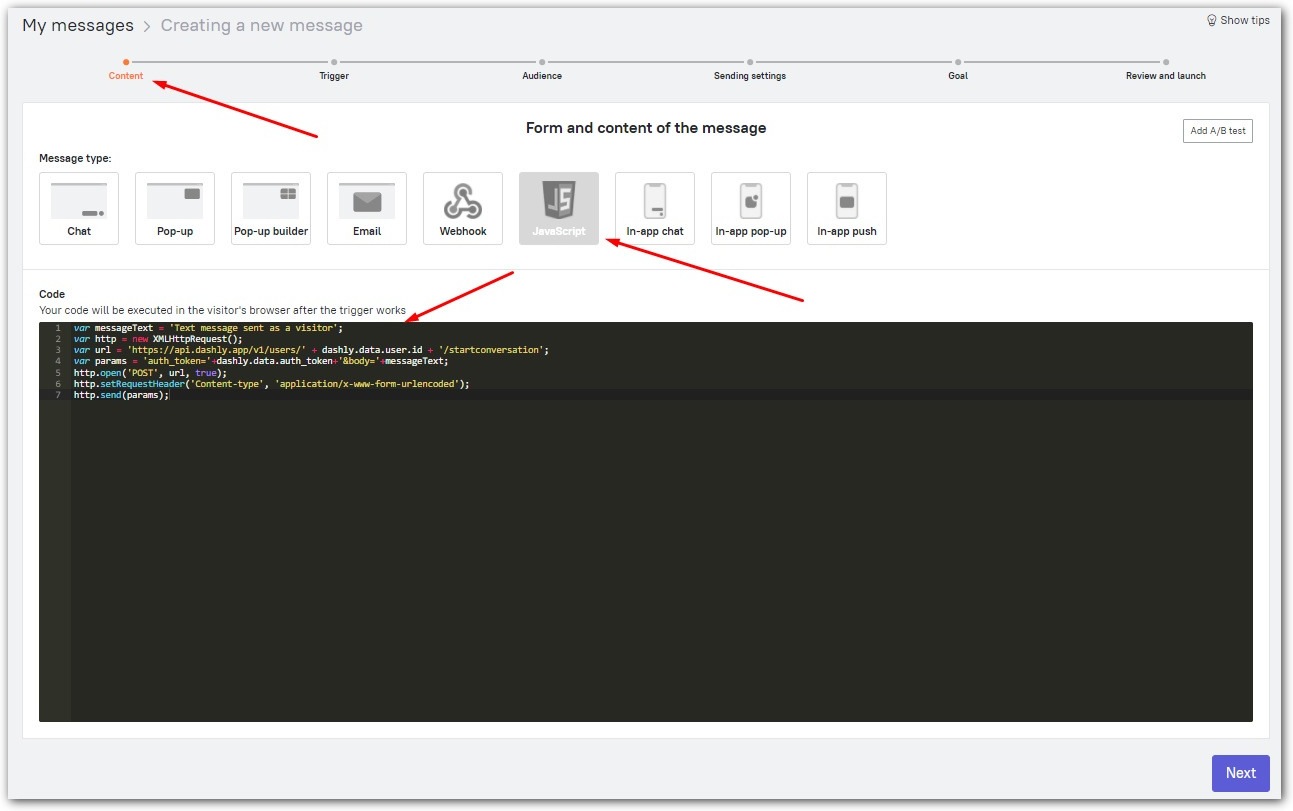
1. Make a JavaScript-type triggered message. You can do it in the "Triggered messages" – "Create new triggered message" section. You can read in more detail about how to make an triggered message of this type in this article.
2. Place this script in the input field of the Content tab:
var messageText = 'Text message sent as a visitor';
var http = new XMLHttpRequest();
var url = 'https://api.dashly.app/v1/users/' + dashly.data.user.id + '/startconversation';
var params = 'auth_token='+dashly.data.auth_token+'&body='+messageText;
http.open('POST', url, true);
http.setRequestHeader('Content-type', 'application/x-www-form-urlencoded');
http.send(params);
You might want to add your own message in place of 'Text message sent as a visitor'. You can personalize this message by adding properties like {{ user['$phone'] }} to it to display your visitor's phone number they've entered in that pop-up.
Here are some other examples of personalizing a message:
{{ user['$email'] }} displays visitor's email
{{ user['$name'] }} displays visitor's name
{{ user['property name'] }} displays any custom property
Here's what our scenario looks like so far:
3. Set a desired event as a trigger for this triggered message. In our case, we'll set click on a button from this pop-up as a trigger.
You can add this event in the Content tab while editing this triggered message: click a block with a button. Available actions for this block will appear in the menu on the left part of the editing window if you choose Additional settings – Button event. Make a new event or choose an existing one from the drop-down list.
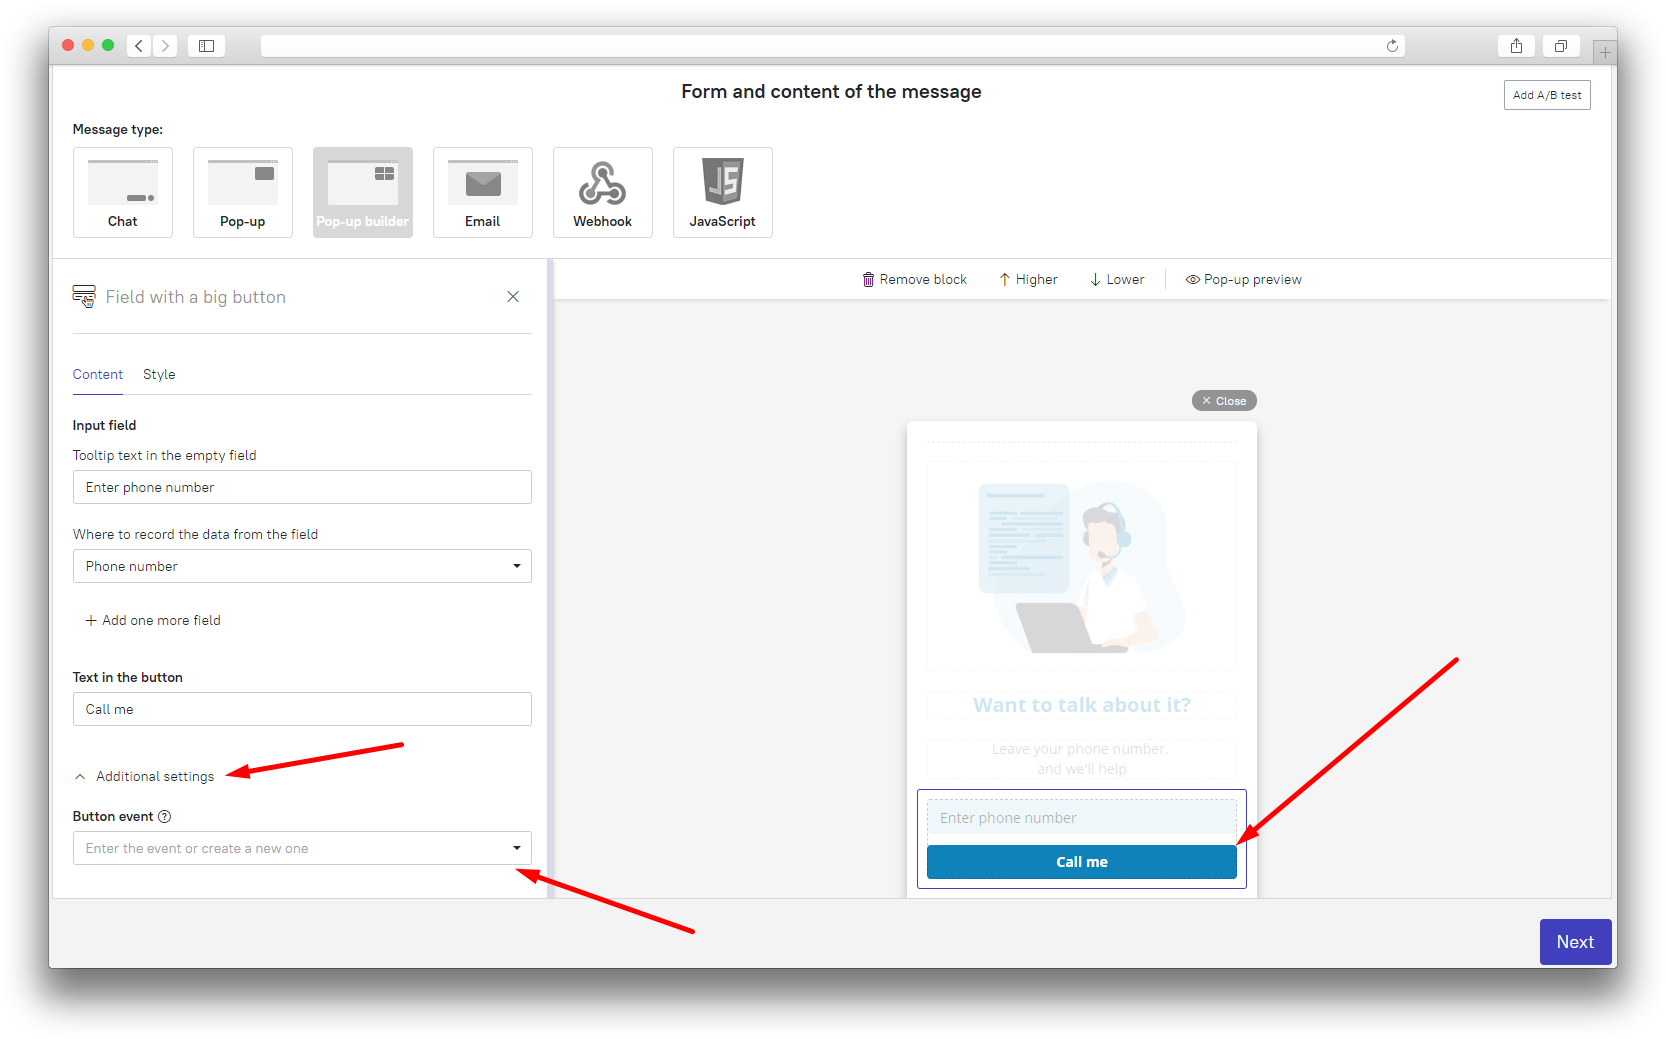
❗ It's important: We don't recommend using default events like "Phone number - defined or changed", "Name - defined or changed" or "Email - defined or changed" as they get recorded regardless of whether or not this pop-up was filled.
4. Finish the triggered message setting. Set Resending to 30 seconds to make sure this message gets sent in case a visitor fills this pop-up again.
Save the triggered message.
Then, set notifications about new conversations in the Notifications section.