Personalizing messages using event attributes
In Dashly, you can use data from user event attributes to personalize the content of your messages based on the data and actions of a specific user. You can use event attributes to display them in the messages (and the content will be different for different users), or you can display only some text based on what attributes the user has or hasn't got.
At the moment, personalization by event attributes can be used in the body of a triggered / manual pop-up, email, and chat message. With future updates, it will be possible to use such personalization in chatbots and email subject.
Read more about personalization based on user properties in different messages and chatbots.
- Dashly has two types of events: standard events and custom events. Event attributes are also divided into standard ones and custom ones. The full list of standard events and attributes can be found here. If any event that is recorded in your project is not included, then it's considered custom.
- You can set up personalization by the attribute of any event. This event doesn't have to be a trigger for the message. To display the necessary data in the text of the message, you need to place a special script in its contents.
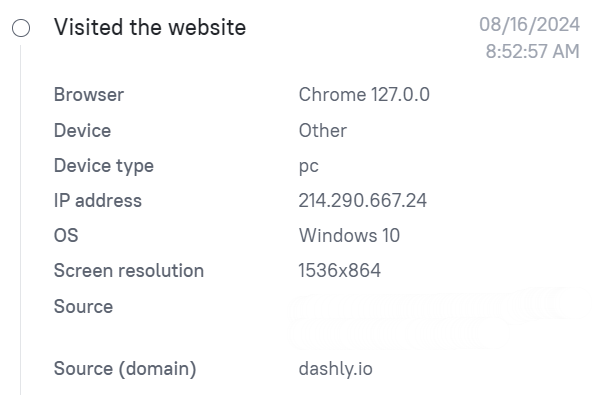
Let's say you created a message with the "Visited the website" event as its trigger. This event has the following system attributes:

To place one of these attributes into a message, use the following script:
{{event['Attribute name']}}So if you created a message with the "Visited the site" trigger and put "Download the application for {{event['$os']}}" in its contents, then the user will see "Download the application for Windows 10".
- You may also need to use attributes of an event that isn't set as a trigger. To let the system know what event the attributes should be pulled from, we specify the event name in the first line:
{% set lastEvent = get_last_events('Event name')[0] %}In this line, 0 means that the data of the most recent event in the lead card will be used. Putting 1 would mean the attributes of the second-to-last event are going to be used, and so on.
The next line specifies which event attributes should be used as substitution in the message:
{% set lastEventProp = lastEvent.props['Attribute name'] %}Here instead of lastEventProp you need to specify the name of the attribute so that its value is used in the message.
💡Let's see how it works using an example. In Dashly, at the end of the subscription period, an event is sent to the lead card, with the attributes that indicate the client's project number and its name:

At this point, we send a message reminding the user that the project's subscription has to be renewed. To do this, we use the following script:
{% set lastEvent = get_last_events('subscription_renewal_reminder')[0] %}
{% set name = lastEvent.props['app_name'] %}
{% set id = lastEvent.props['app'] %}

Hello! 👋
A new subscription invoice was formed for {{ name }}.
The invoice can be found in the Payment section. You have 7 days to pay by any preferable means...
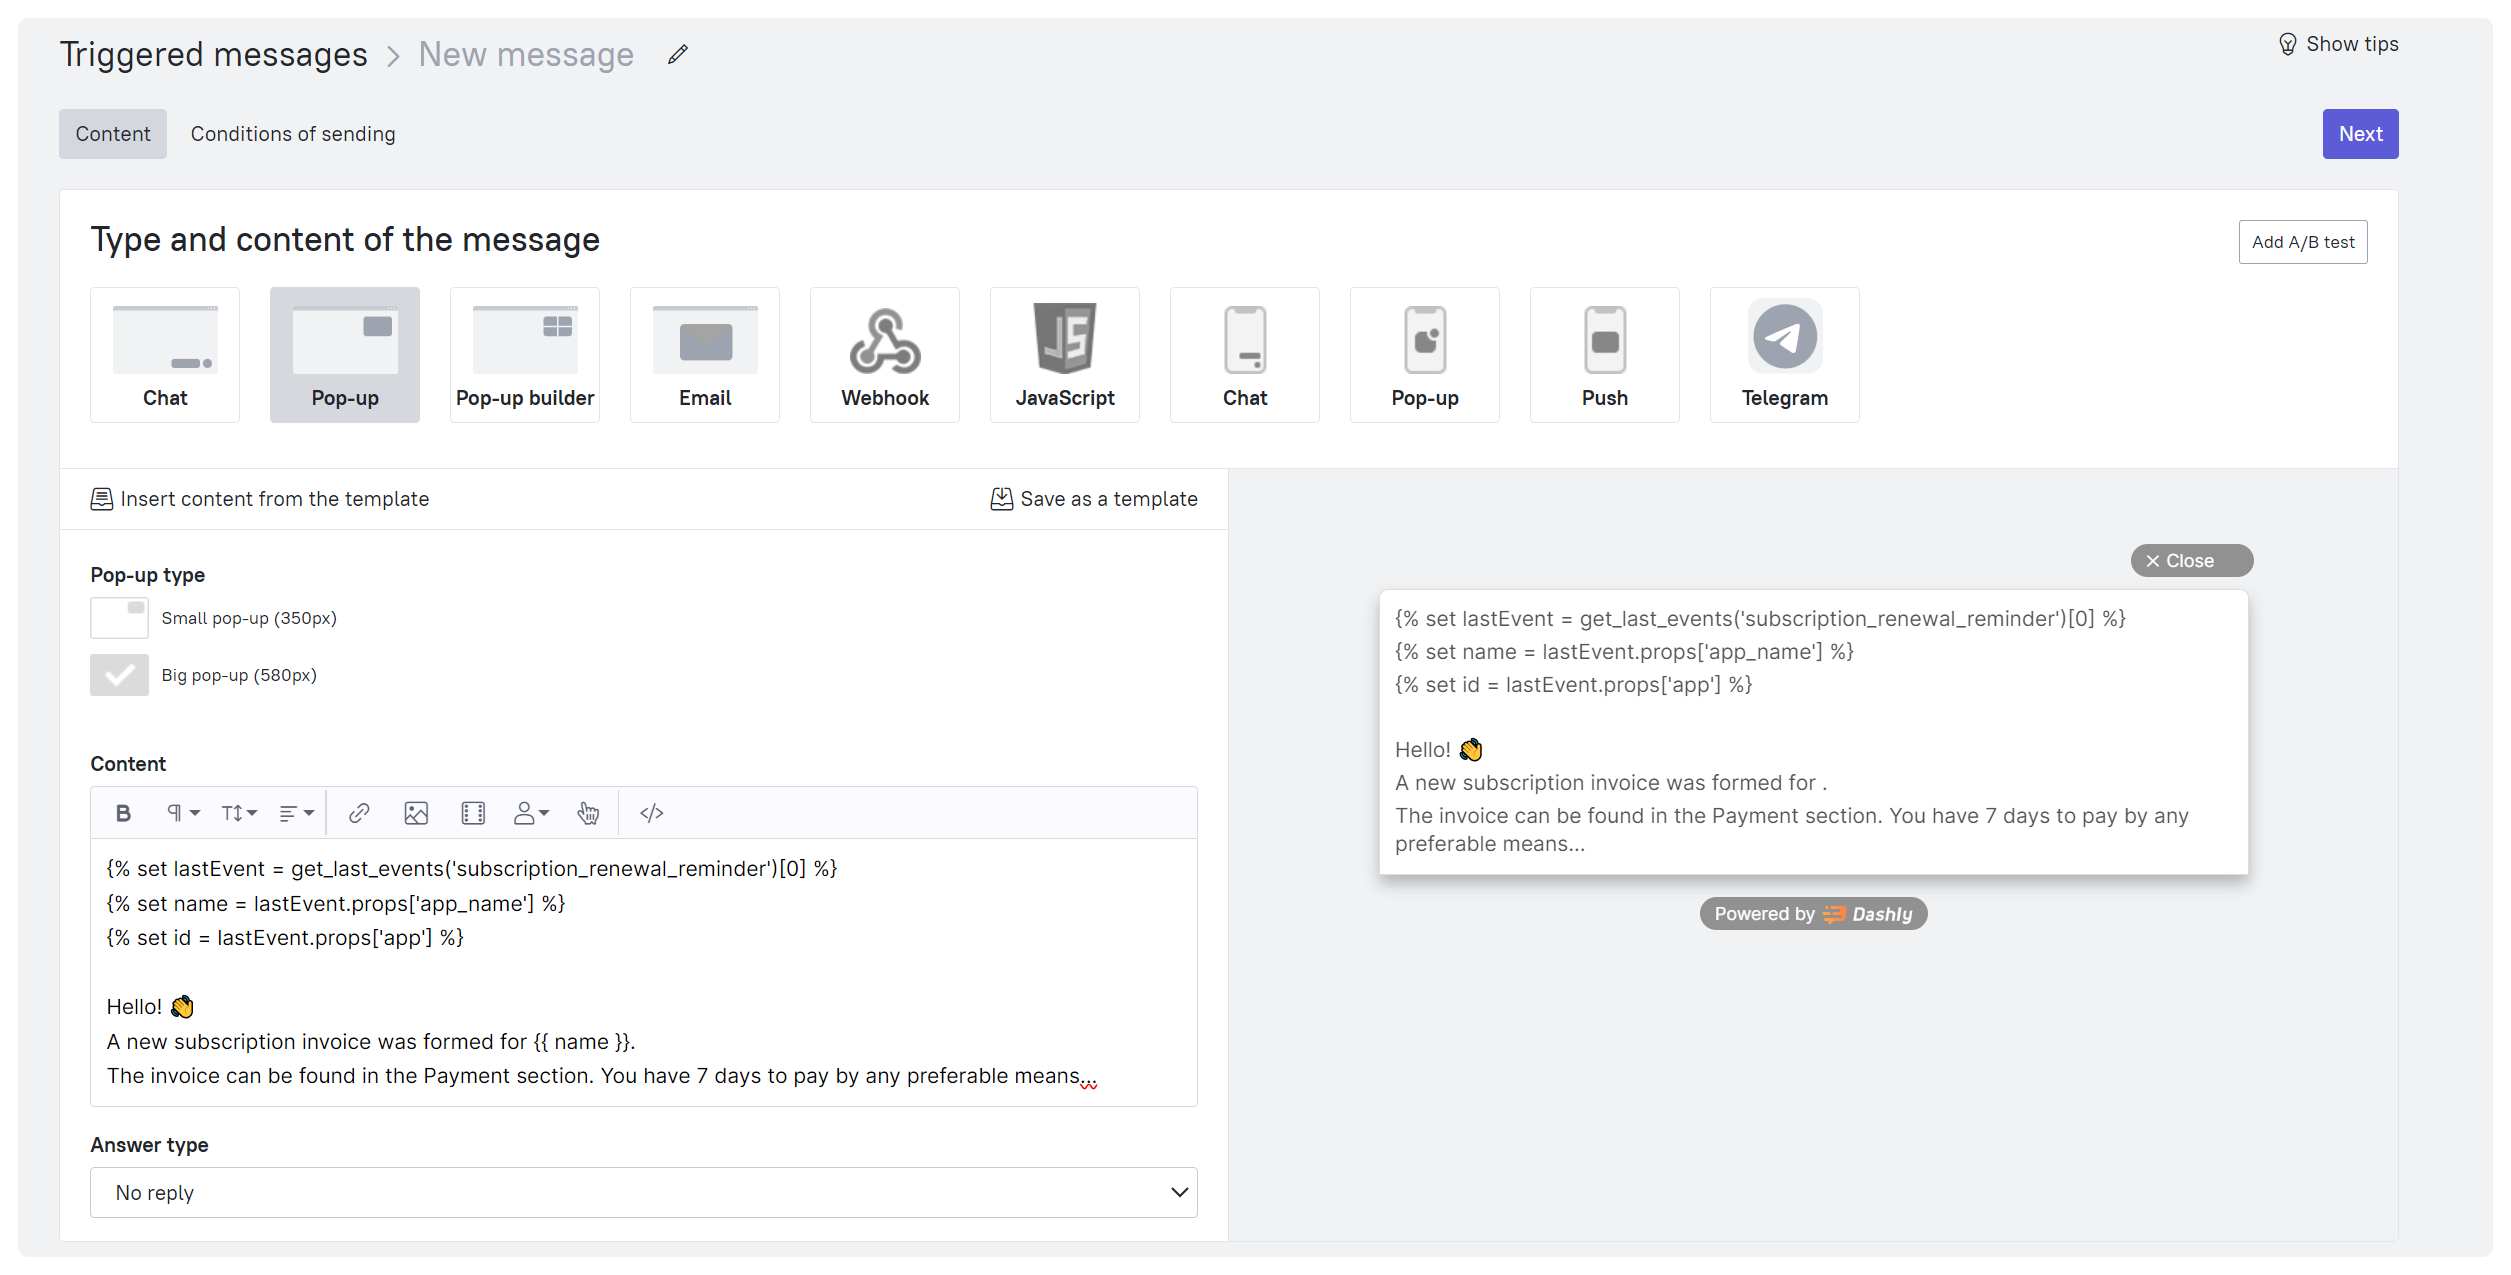
We place the script and the message text:

You can add the script to an email or a Chat message the same way.
The user will receive a pop-up with the text that has values from the attributes of the event used.
📖 Personalizing notifications about scheduled lessons
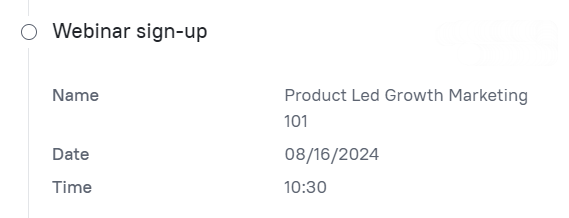
If you provide educational services, your website is likely set up to collect data about what class / webinar a student signed up for. For example, like this:

You can send a message to the user reminding them of an upcoming event:
{% set lastEvent = get_last_events('Webinar sign-up')[0] %}
{% set name = lastEvent.props['Name'] %}
{% set date = lastEvent.props['Date'] %}
{% set time = lastEvent.props['Time'] %}

Hello, {{ user['$name'] }}!
The webinar {{ name }} you signed up for will start {{ date }} at {{ time }}.
Hope to see you there :)
🛒 Personalizing the email with viewed products
Using the attributes of the "Viewed product" event, you can display the total cost of these products in the text of the email.
set total = [0] %}
{% for e in get_last_events('Viewed product') %}
{% set amount = e.props['Name of the attribute with the cost'] | int %}
{% if total.append(total.pop()+ amount) %} {% endif %}
{% endfor %}
<span>{{total[0]}}</span>
If you want to limit the number of recent events from which the cost is retrieved and summed up, replace the line {% for e in get_last_events('Viewed product') %} with
{% for e in get_last_events('Viewed product') [10:] %}where 10 is the number of events (up to 20 can be included).
Please note: if you record the cost and names of products in the lead properties, use the instructions for personalization from this article.
📝 Using alternative text if there is no such event/event attribute in the lead card
If you want to use a different text in your message depending on whether the lead has completed a certain event, use the following code:
{% if get_last_events('Event name') is defined %} Text option 1
{% else %} Text option 2 {% endif %}
To display a specific message depending on the attribute value contained in the lead card, use the following code:
{% set lastEvent = get_last_events('Event name')[0] %}
{% if lastEvent.props['Attribute name'] == 'Attribute value 1' %} Text option 1
{% elif lastEvent.props['Attribute name'] == 'Attribute value 2' %} Text option 2
{% else %} Text option 3 {% endif %}