
Zendesk
Zendesk definitely knows that “the main point of business is relationships”. And the relationships can be complicated. It’s hard to avoid bugs in a constantly developing product, so the question is how fast you can manage them. Your customers complain about some problem? Send it to Zendesk right from the Dashly chat with the help of our integration.
You can create a ticket from the conversation by typing the slash-command /zendesk and then the text of the problem. The ticket won’t be created without the text. Dashly will automatically add the link to this customer and the conversation in which the ticket was created, so you will have a possibility to return to it.
Integration setting
There are some pitch points we want to draw your attention to. You’ll need to do a little work in Dashly and in Zendesk.
1. In your Zendesk account, go to the "Administrator" section > "Channels" > "API”.
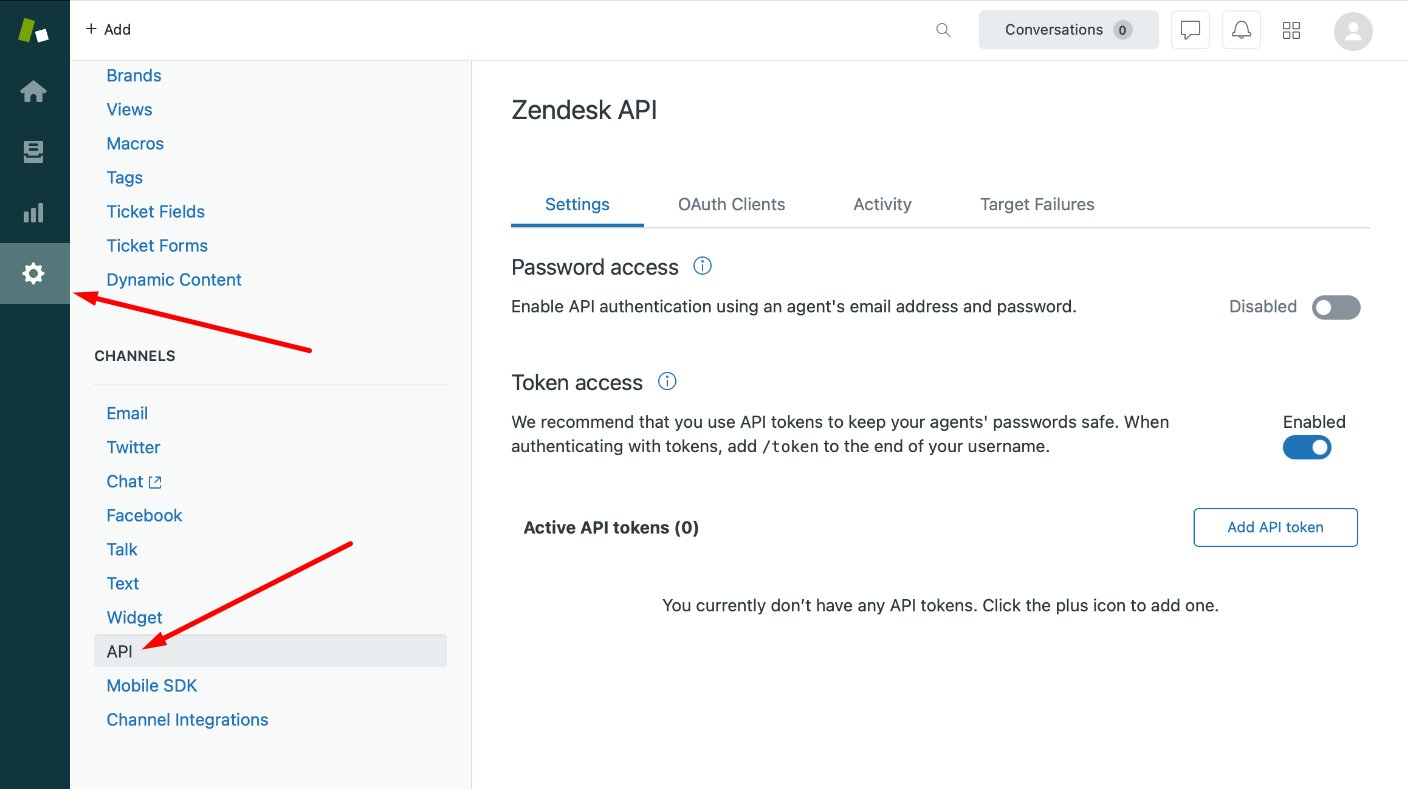
2. Enable the option "Access by token" and add the new token.
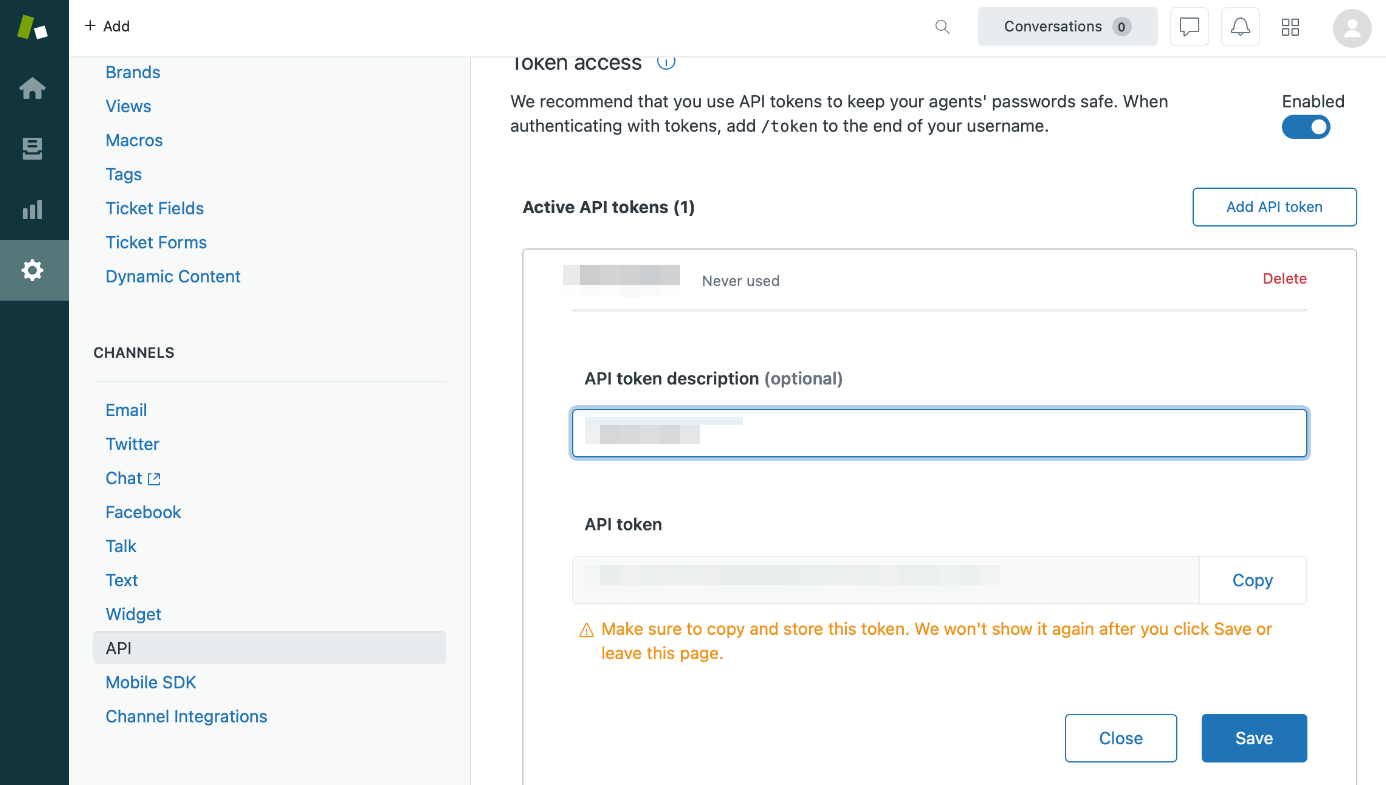
Be careful: new token is shown entirely only once - when created, so copy the token immediately upon its creation (if you’ve missed it, just delete it and create a new one).
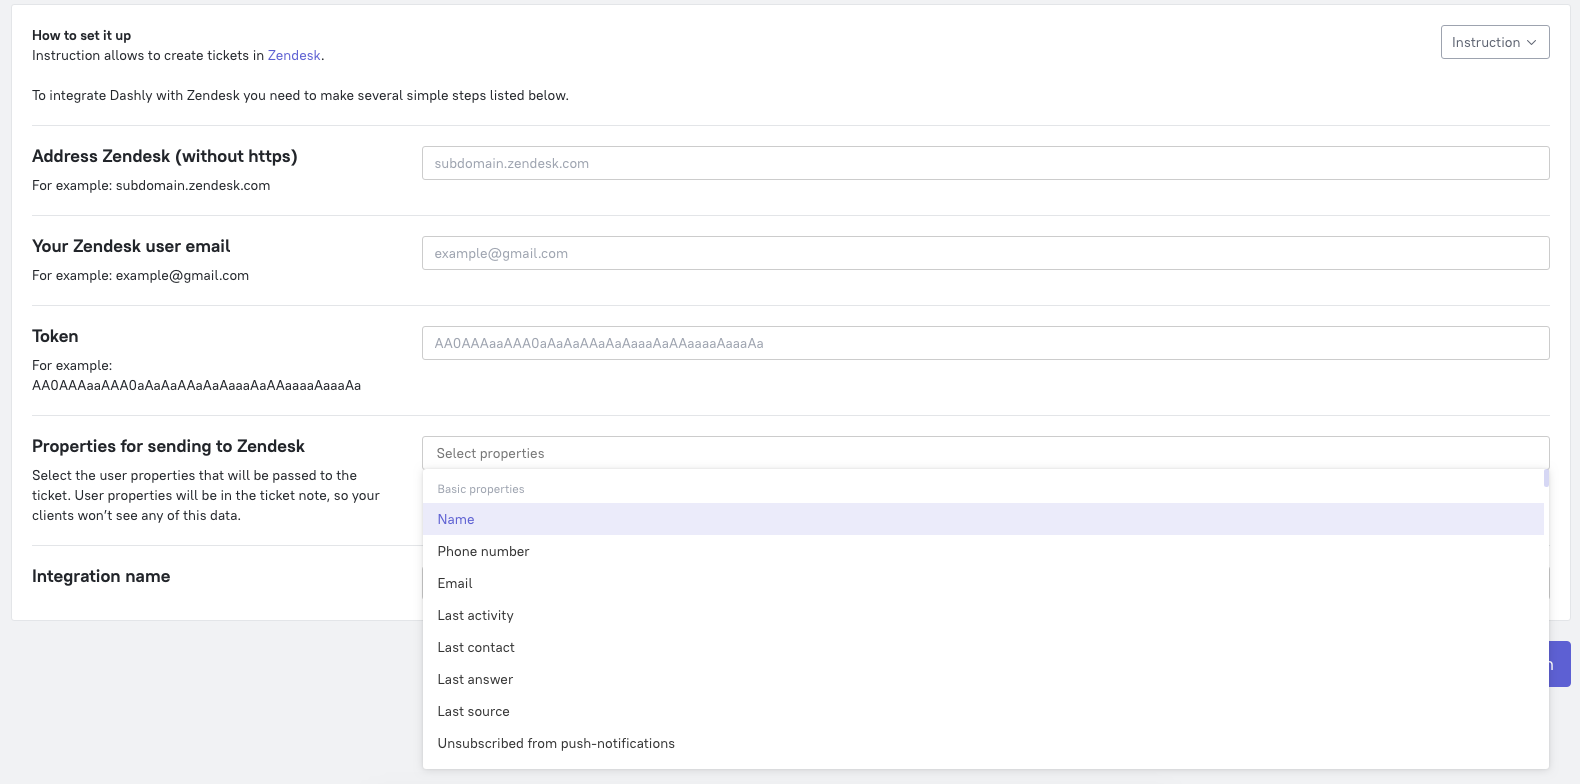
3. Go back to Dashly - Integrations - Zendesk. Enter your Zendesk address (without http), user email and paste the token into the corresponding field.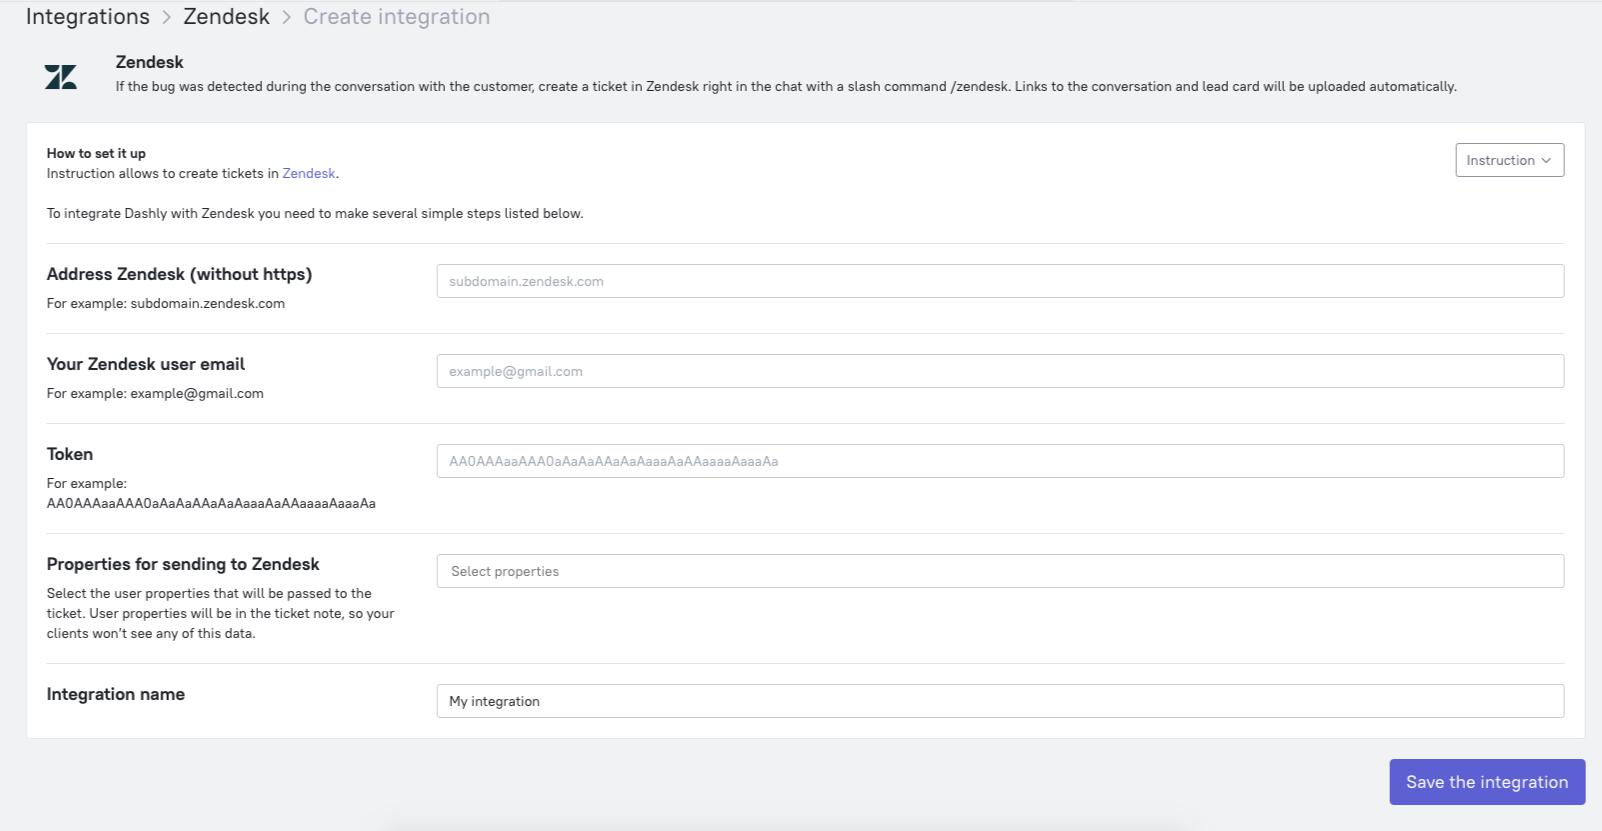 Select leads properties that you want to be shown in Zendesk.
Such properties as "email", "name", "phone" will be created in Zendesk automatically.
Save the integration.
Now in every conversation you will be able to create tickets with the help of slash command - enter the command /zendesk and the ticket text after it.