Funnels
"Funnels" is one of the main tools for marketing automation with Dashly. It shows the bottlenecks in user journey so that you can see at what stage visitors leave your website, and when users leave your platform.
When you build a funnel, you set the steps - these are actions a visitor takes on the way to a key action (payment, registration, etc.)
In Dashly you can build an unlimited number of funnels. Ideally, you can look at the funnel before launching a campaign or a triggered message. A funnel will show you when you should start talking to your (potential) customers.
How to build a funnel
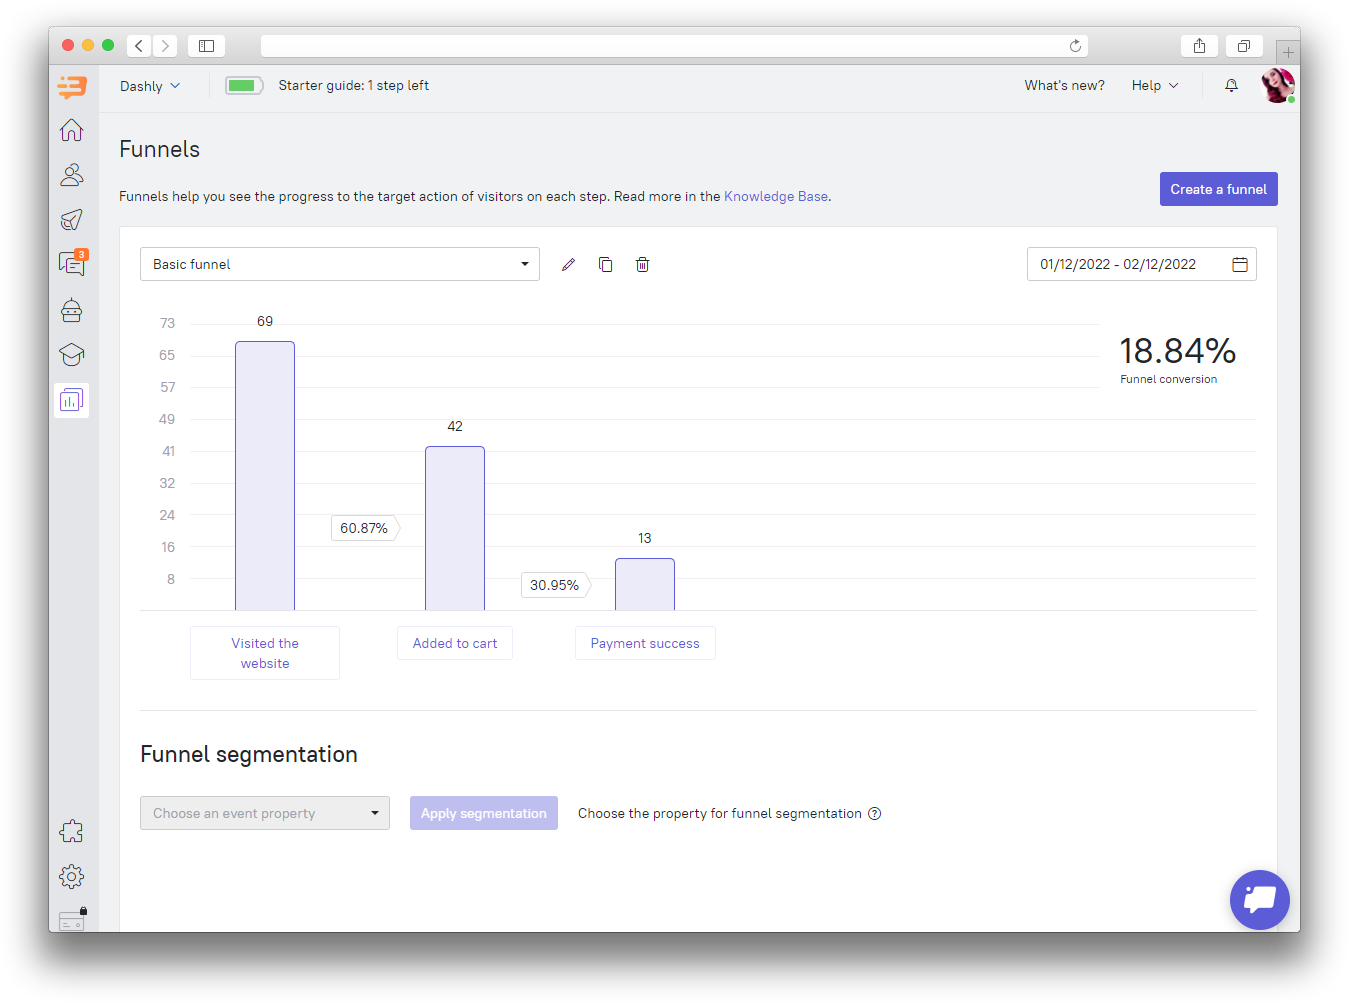
Go to the “Reports” – “Funnels” section and press the "Create a funnel" button.
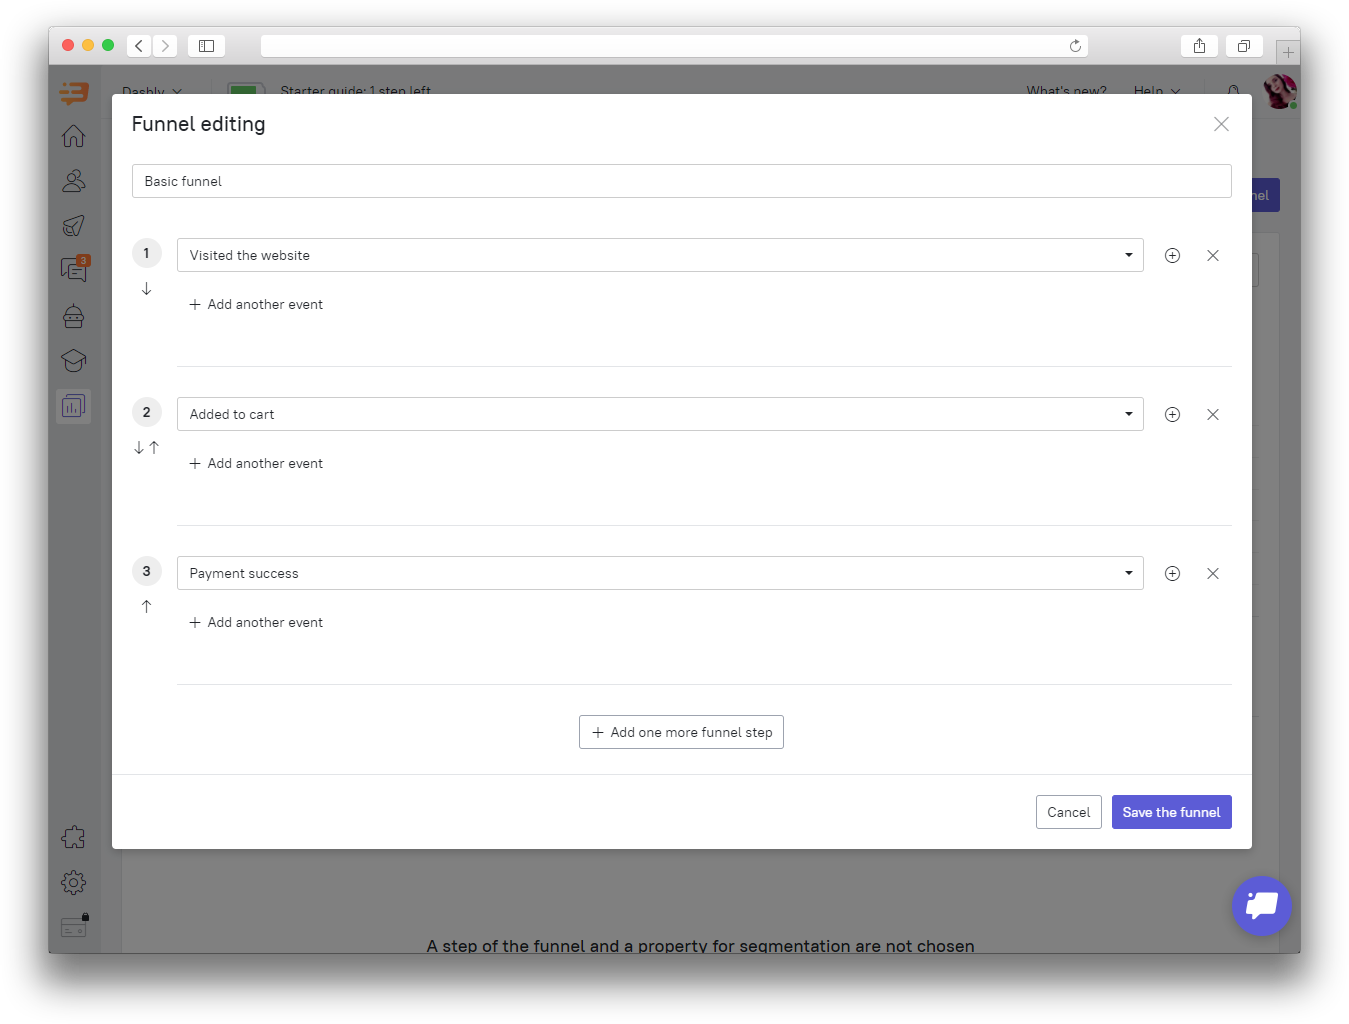
Name your funnel (pick a name that will be easy to understand).
Step 1 - Select the first step of the funnel. You can choose from previously created events. It is the first action that leads commits in your funnel. The most frequent event for your website visitors should be the "Visited the website" event (which gets recorded when a user visits the website). You can also add an event property to any step and the system will show you the number of users with selected properties from this step of the funnel.
Step 2 - This step is more individual for your website.
Step 3, 4, etc. - Your funnels can contain any number of steps. All you need to do is to click "Add one more funnel step" and your funnel will have the next step added to it.
An example:
However, if you’re aiming to create a funnel with a large number of steps, you should think about customer behavior on your website more in-depth, which may prove difficult.
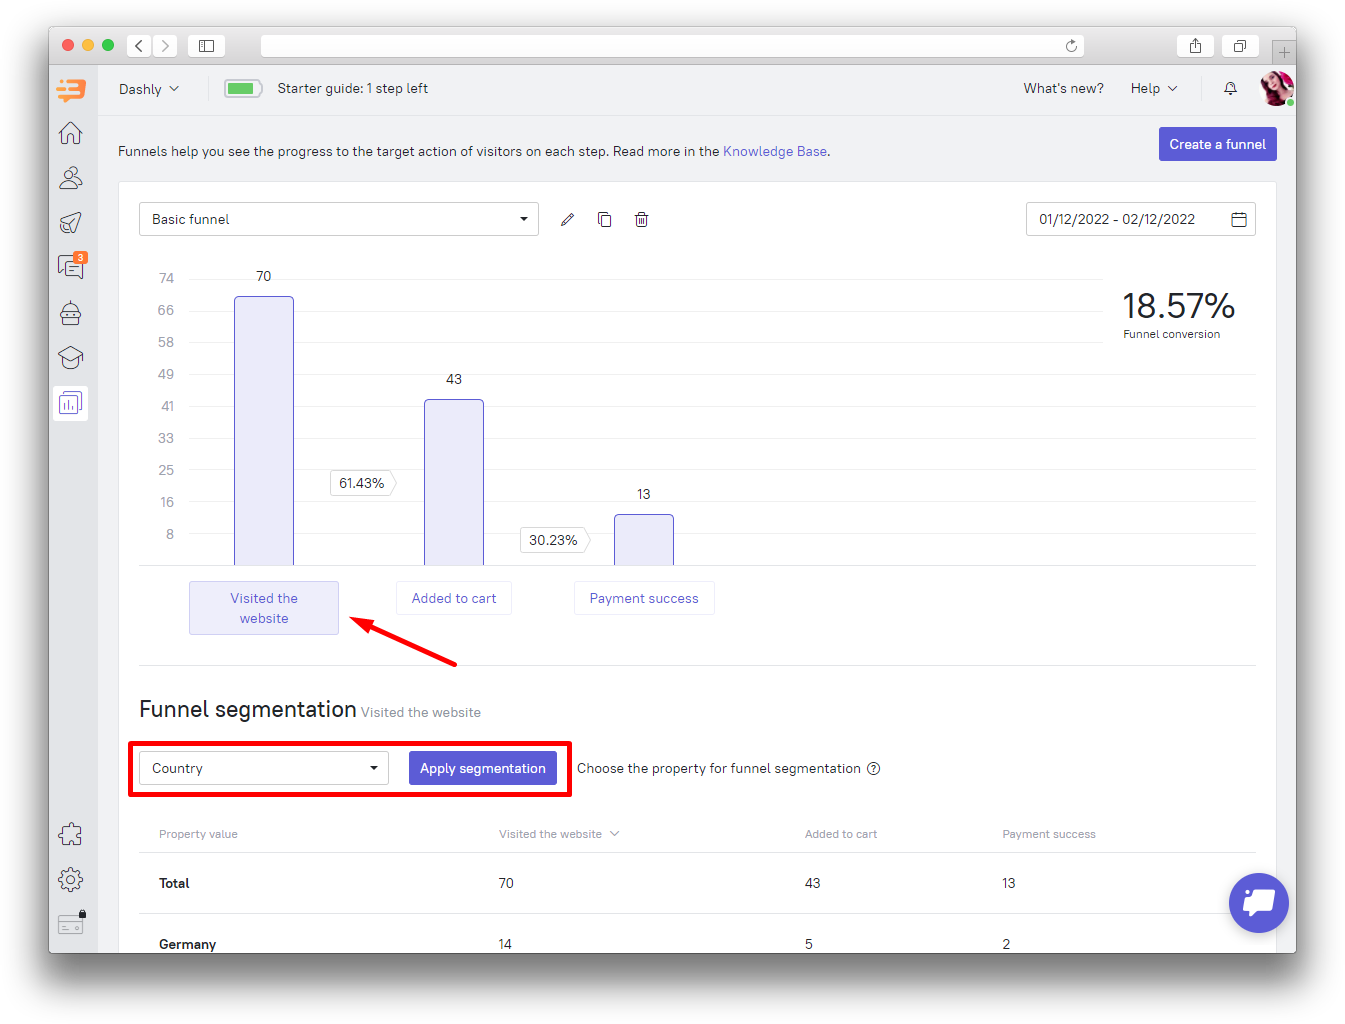
You can also apply segmentation by system property to a step of the funnel. It may help you check statistics for particular user segments.
An example: