
Lead import
There are two ways of importing leads to Dashly:
Via the Dashly interface;
Via Rest API.
💡 Before importing users:
1. Check your unique visitors quota
Imported leads will be included in the unique visitors quota. Make sure that the import does not exceed the quota. You can see your unique visitors quota in the “Subscription” section.
In case your unique visitors quota is exceeded, a unique visitors overrun payment will be included with your next invoice, you can read about unique visitors overrun on different Dashly plans in this article.
2. Pre-verify the emails you’re importing
If you’re going to send emails to the leads you’re uploading, we recommend you to go through email validation.
Dashly has its own verification system so you don't have to worry about getting blocked for bounce rate. Nevertheless, remember that imported leads are counted in the quota and the overrun may affect the price. Don't import the leads you won’t use.
You can use any verification service. We prefer emaillistverify.com. Our experience with it has always led us to a bounce rate below 3%.
Import via the Dashly interface
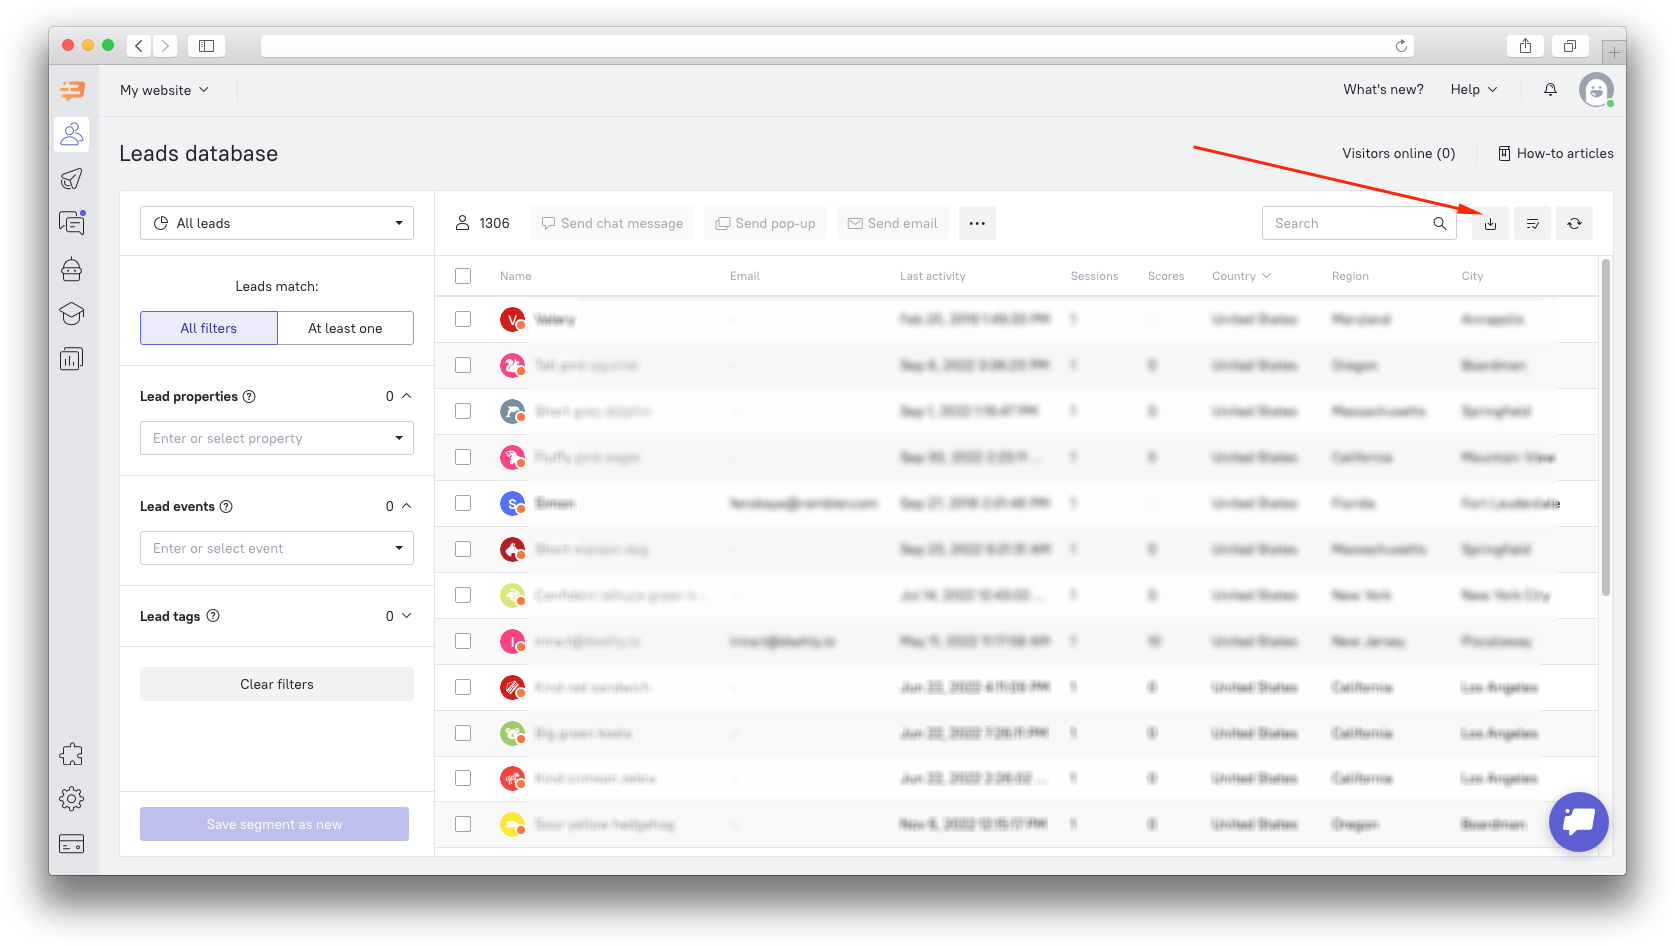
You can find the import interface in the “Lead database” section:
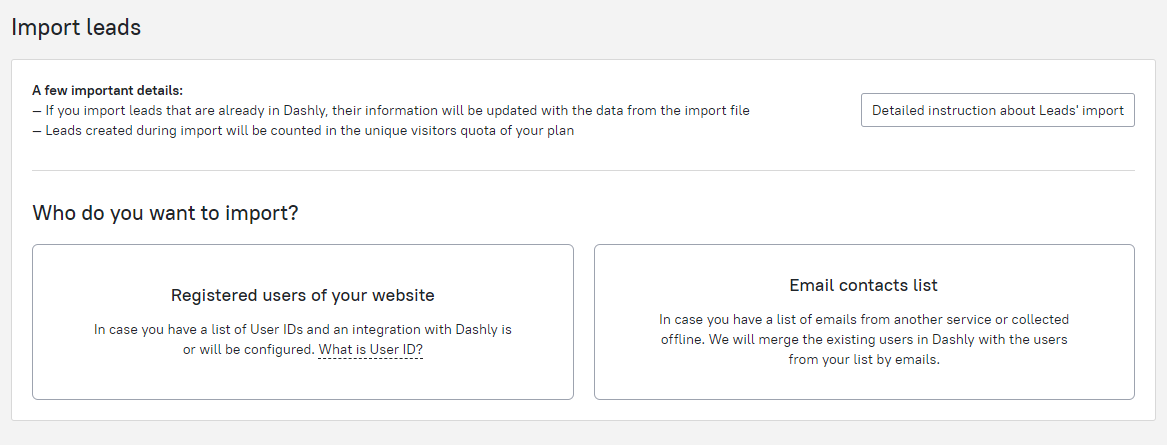
 You can import your lead base either with User IDs or with emails addresses.
Choosing either options will let you download a template import file. We recommend downloading the file and filling it with your lead database to make sure that the database is correctly prepared for uploading to Dashly.
❗ Please note:
- The imported file must be in .CSV format
- The file weight should not exceed 30 MB
- Property columns must have correct names. There is a list of standard properties in this article; the remaining properties will be custom and their names are not regulated (the custom name should not be preceded by a $ sign).
- Do not leave empty columns in the table (for example, if the table has a $phone column but no contents - remove it).
- Imported leads add to your user quota. However, if you import data into an existing lead card (the imported lead is merged with the existing active lead), it will not be considered new.
🧐Which import option should I choose?
- If your lead database contains the User IDs of your leads, select the “Registered users of your website” option. The User ID column must be placed first in the spreadsheet (the column must be named “$user_id”). If your Dashly leads database has lead cards with User IDs that match User IDs from the file you’re importing, the data you’re importing will merge with the existing Dashly lead cards.

- If you have an existing lead database with a list of emails, but missing User IDs, choose “Email contacts list”, add a column named “$email” (or simply download our template, it will have the said column as well) and fill it with the emails of the leads you want to upload to Dashly. In case with uploading leads as a list of email contacts, make sure your import file doesn’t contain the “$user_id” column.
As it’s possible that your Dashly lead database may have several lead cards with similar emails, the lead data from the import file you upload will merge with the last active Dashly lead cards with the same emails.

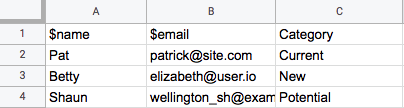
Let’s say you want to upload a leads database, where your customers are divided into several categories such as “Current”, “New”, “Potential”. You can add custom properties into the import file to divide these leads. To do that, add a column with the name “Category” and place the values “Current”, “New” and “Potential” into the rows with the emails of corresponding leads. You might end up with a table like this:
Segmenting leads by properties will allow you to send a manual email campaign to a target audience.
Check whether the properties you’ve added into the import file are correct, upload it, see if the encoding of property names and values is correct as well and click “Import leads”.

Note: Before you click “Import leads”, you can add a tag to the leads you’re importing. You will be able to segment the imported leads by this tag later.
The import process runs in the background, so you can safely close the tab or go to another section of your Dashly dashboard without losing any data.

Once the import is over, you will receive a notification showing that the import process has been successfully completed in the notification menu (the “Bell” icon in the upper-right corner of your dashboard).
This notification will also show you how many of the new leads have been added, how many of the previously existing lead cards have been updated with the data from your import file and how many of the leads weren't uploaded due to errors in the import file.
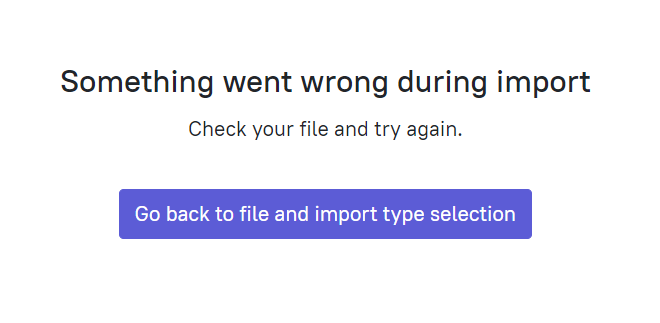
⚠️Errors when importing?
When importing, you may receive an error like this:
Check if the file preview shows any leads with errors. It looks like this; when you hover over the text, it will show which lines have errors:
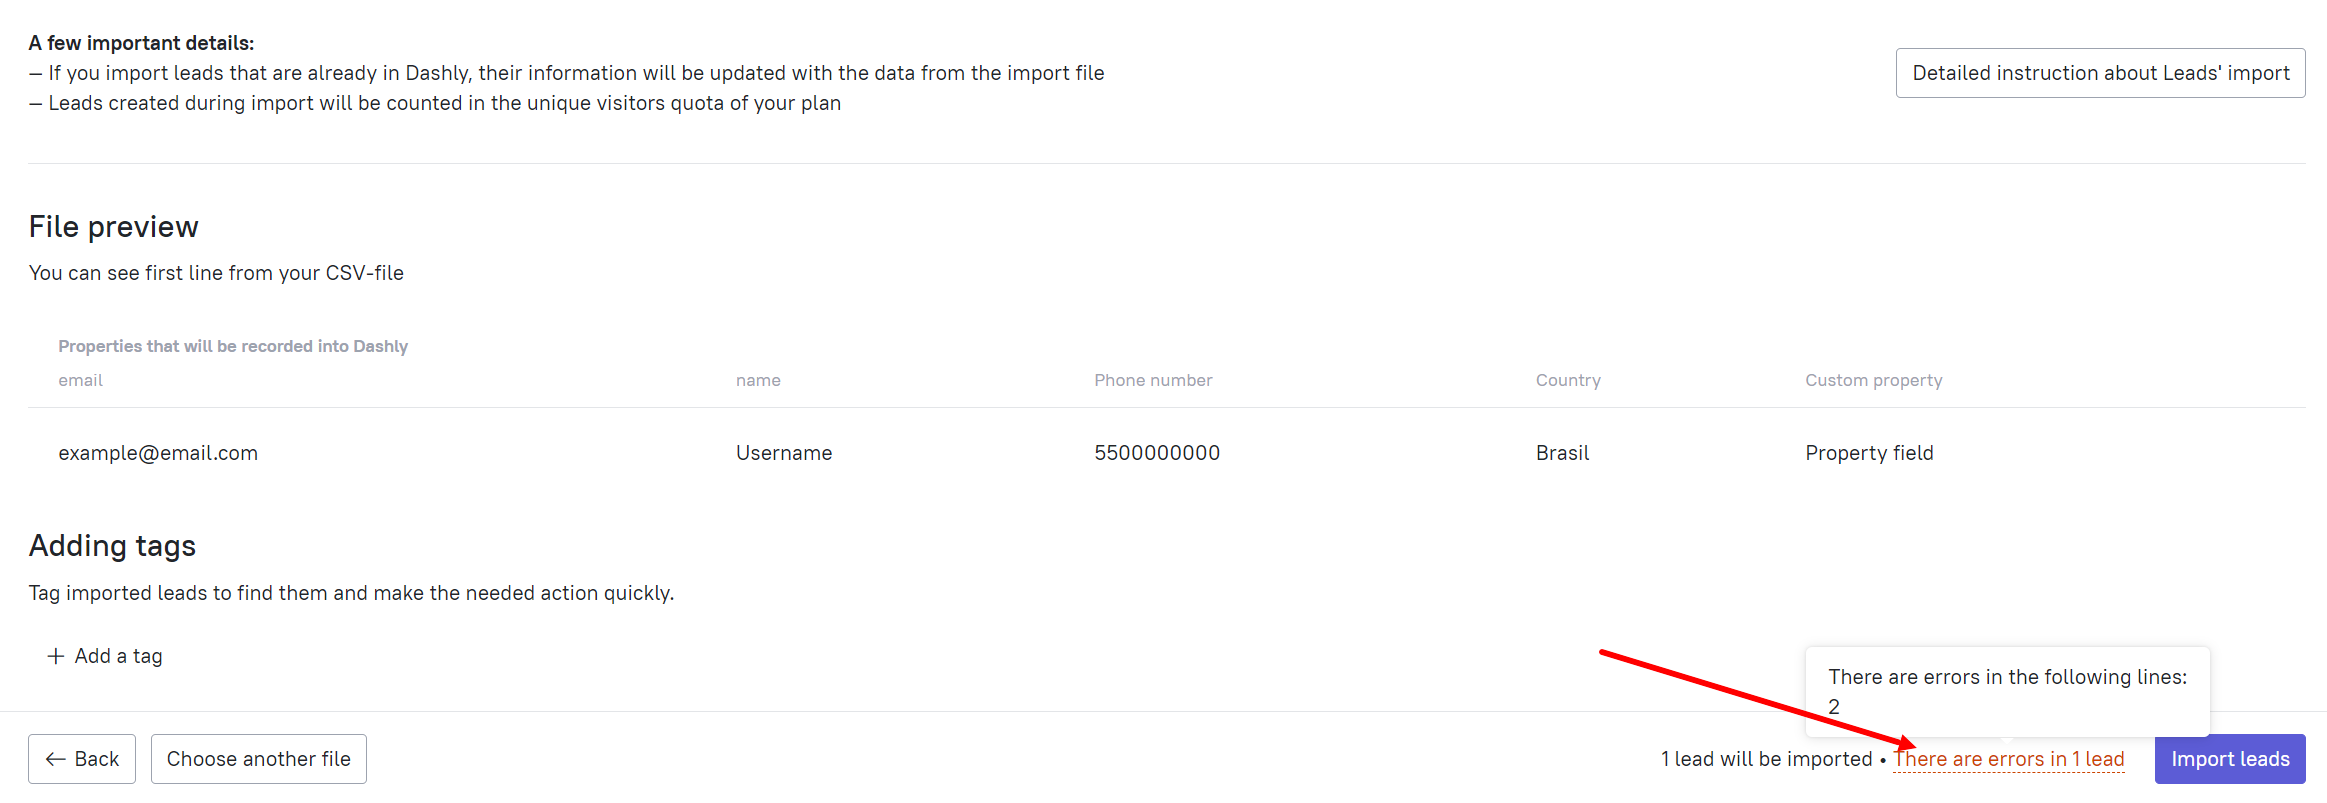
What can cause the error:
- incorrect column names;
- duplicates (same User IDs/emails);
- invalid emails - with a comma instead of a period, without the @ sign;
- several emails in one line separated by commas - split them into two entries.
The preview doesn't show any errors in the leads, but the import error still appears? Check the following:
- Data is divided into columns;
- System property columns have names, and these names are correct;
- When opened, the file has a readable encoding without replacement characters �;
- The file weighs less than 30 MB;
- The file does not have empty columns;
- The file is encoded in UTF-8 BOM (you can change it using Notepad++)
If the import still fails, contact support.
Import via REST API
You can import your lead base into Dashly via REST API as well. Read more about this method in our API documentation.
Important! Please refrain from synchronous API calls when importing leads, as it may overload our system and lead to your token getting blocked. The optimal call frequency is 2-3 calls per second.
Code example for leads import in PHP:
# List for import# The first element - User ID from your system$users = array(array('id' => 123,'email' => 'mail1@mail.ru','phone' => '891xxxxxx','name' => 'Test'),array('id' => 456,'email' => 'mail2@mail.ru','phone' => '891xxxxxx','name' => 'Test2'));$auth_token = 'xxx' # TODO: ADD YOUR AUTH_TOKEN, you can find it in Settings > API Keysfor ($i =0; $i < count($users); ++$i ) {$url = 'http://api.dashly.io/v1/users/'.$users[$i]['id'].'/props?auth_token='.$auth_token;$operations = json_encode(array(array('op' => 'update_or_create','key' => '$email','value' => $users[$i]['email']),array('op' => 'update_or_create','key' => '$phone','value' => $users[$i]['phone']),array('op' => 'update_or_create','key' => '$name','value' => $users[$i]['name']),));$result = file_get_contents($url, false, stream_context_create(array('http' => array('method' => 'POST','header' => 'Content-type: application/x-www-form-urlencoded','content' =>http_build_query(array('operations' => $operations,'by_user_id' => 'true')),))));print $result;}
How to save Excel in Windows-1251 encoding
Go to “File”,
“Options” – “Advanced”,
Scroll down to "General",
Click "Web document options",
Open the “Encoding” tab,
In "Save document as" field choose the most preferable value and click OK.
There’s also an alternative way of doing this:
Go to "File",
Select "Save as...",
Click "Service". There, you will find the same "Web document options" button.