
Abandoned cart email
Sometimes leads add items to their cart but do not complete their order. Situations like that are often called “Abandoned cart”, all online stores are interested in reducing the number of carts their visitors abandon.
If a lead adds an item to their cart, it means they are interested in this item, so our task is to lead them into finishing their order.
Read about how to create an abandoned cart pop-up in this article.
Let's see how to create an abandoned cart email. Follow these steps:
First of all, you need to set data collection, so the system is able to track items added to cart. Read about how to set up data tracking with JavaScript in this article and how to set up data tracking with Web API in this article.
All data (which will be added to the abandoned cart email message) will be taken from “Item added to cart” event properties.
After the data collection is configured, the events "Item viewed" and "Item added to cart" will start recording in user cards:
Create a new “Email” type triggered message;
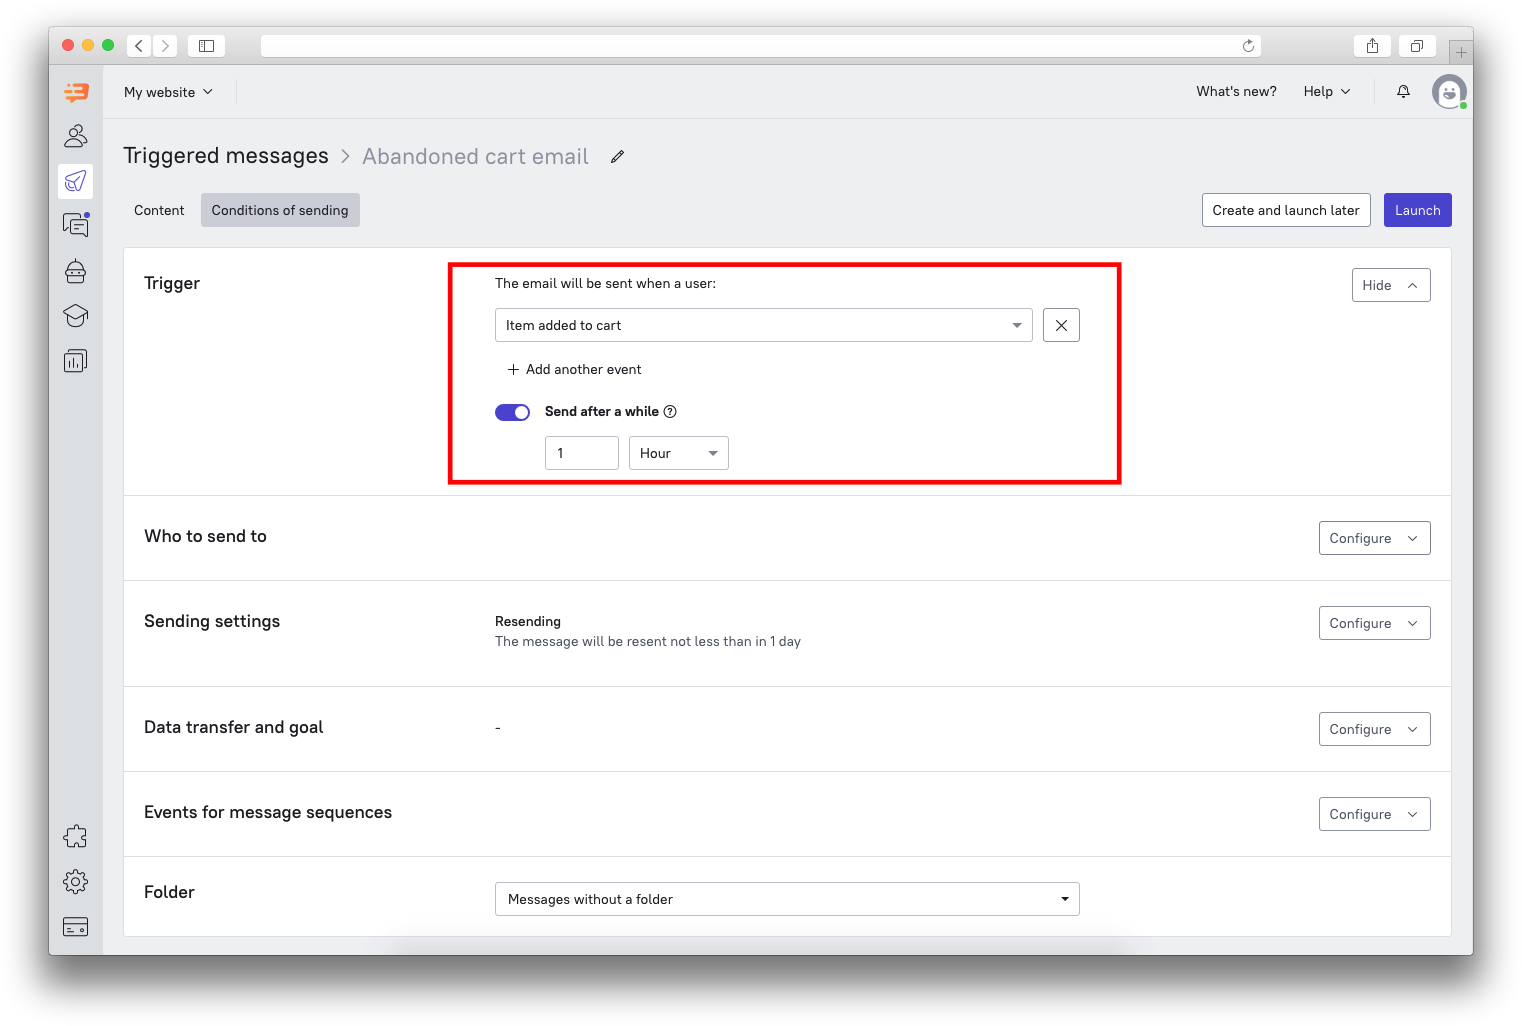
Select "Item added to cart" event as its trigger and add a 1 hour timeout to it. It means the message won't be sent immediately after one adds an item to the cart.
Now we need to set the audience so that the email gets sent to those who didn’t complete their order in one hour (or the time period which you’ve set in the timeout options of the “Trigger” tab). To do that, go to the “Who send to” tab and add the “Made an order” event with the attributes of “Date – More or undefined – 1 hour”
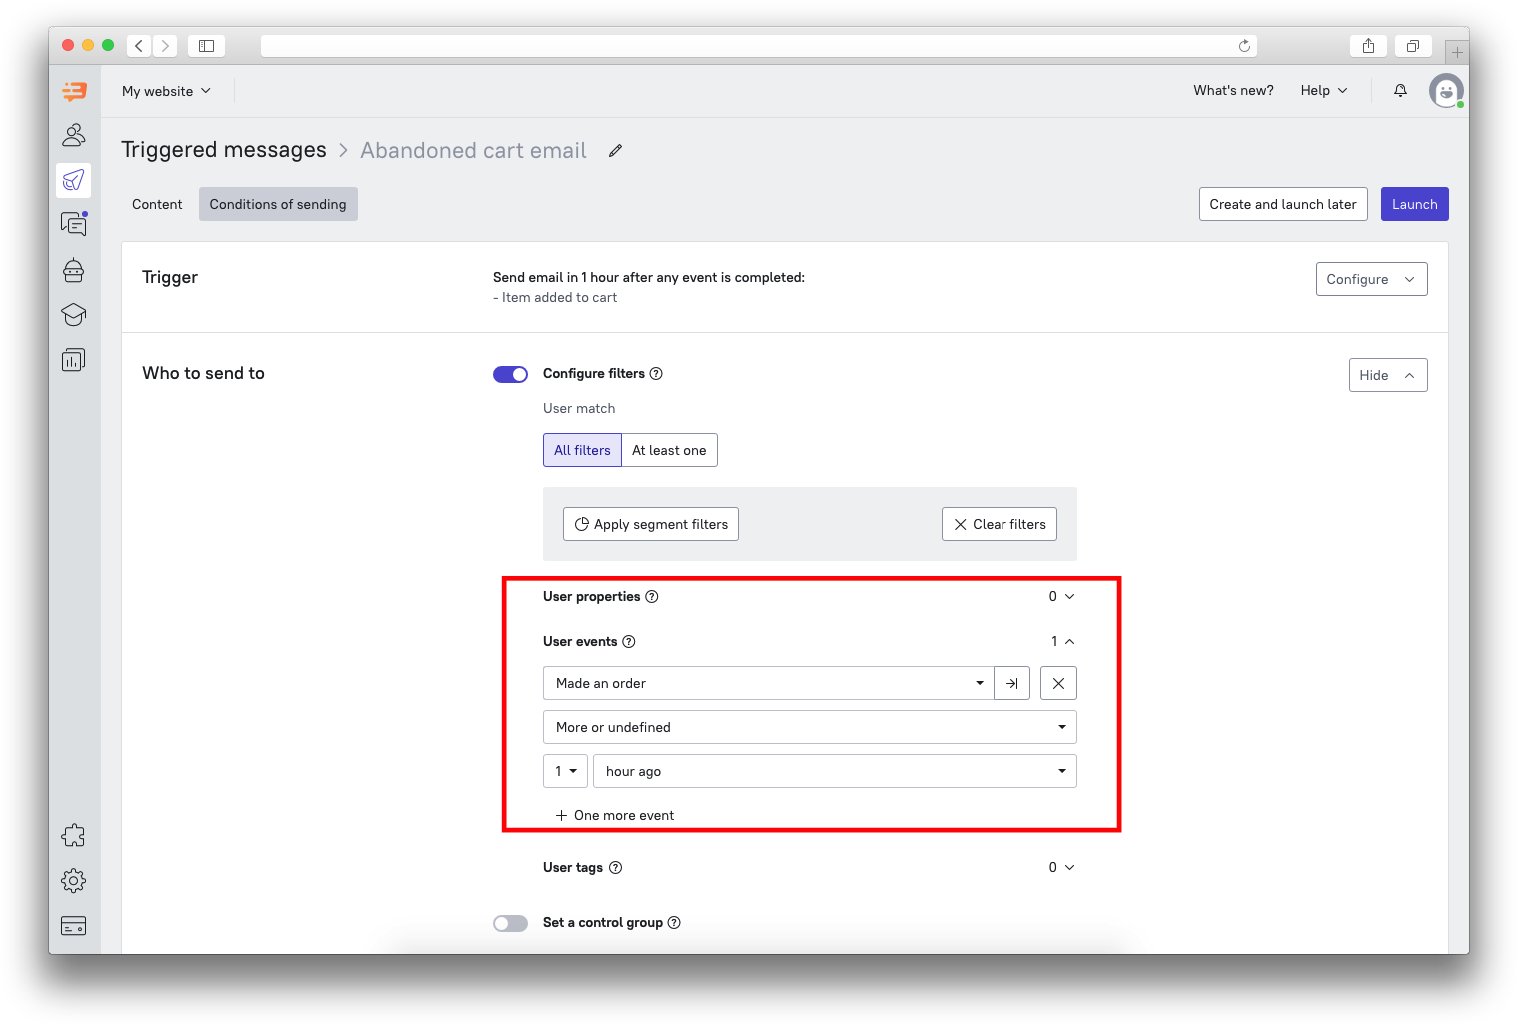 This way, the message won't be sent to those who completed their orders.
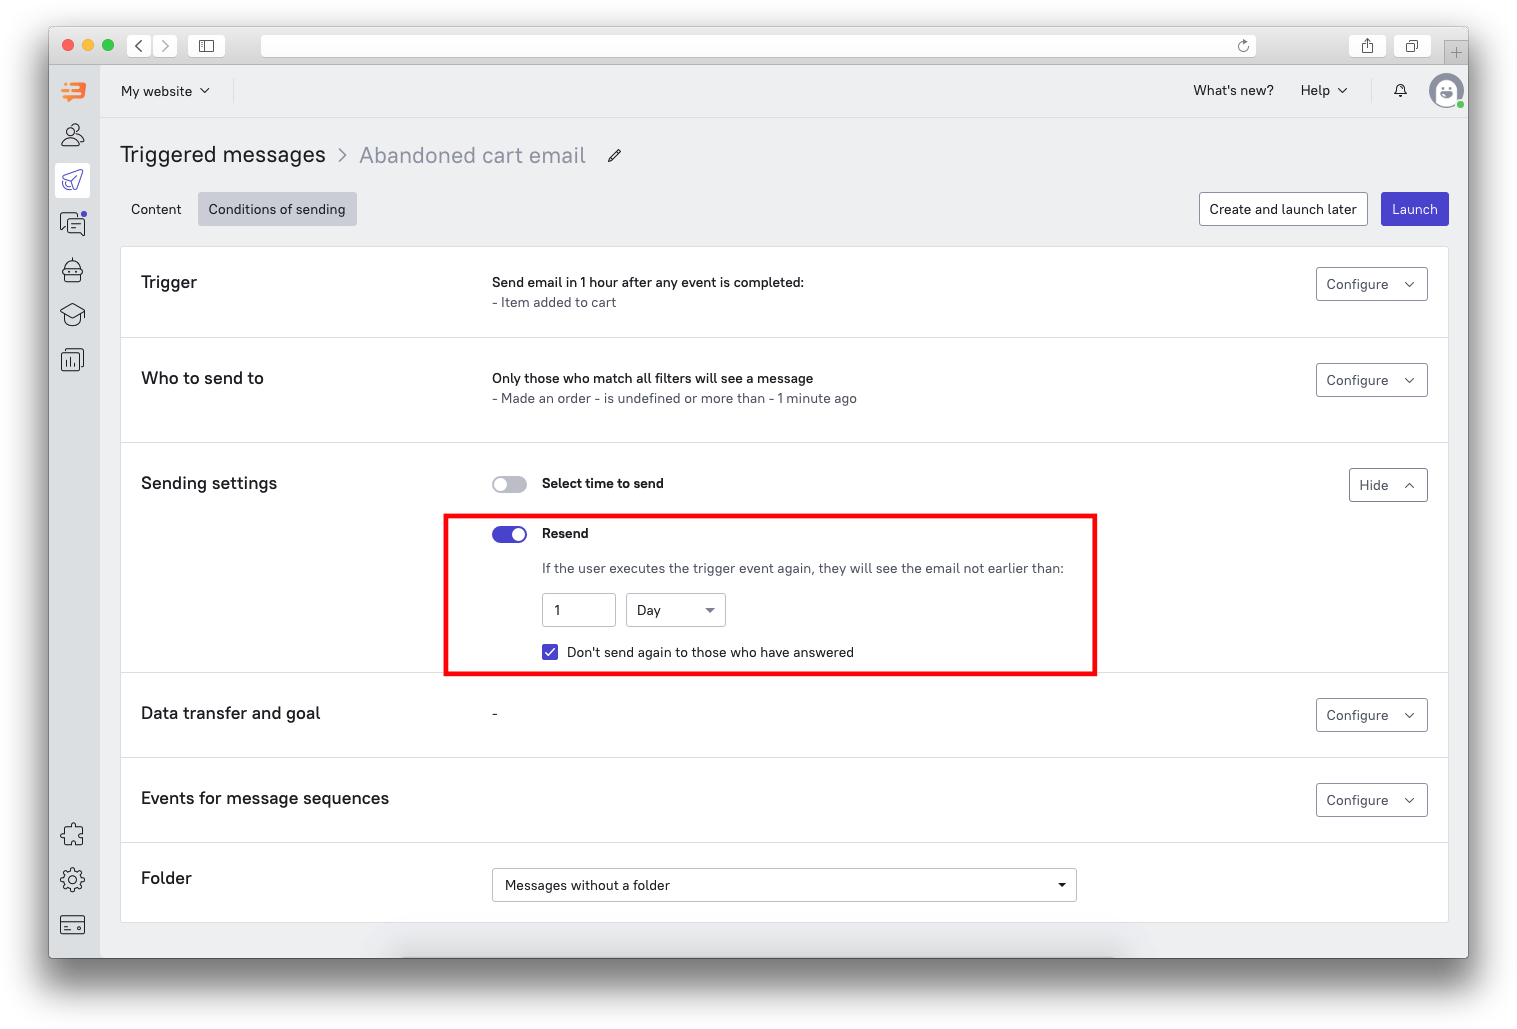
In order not to disturb leads with the same message over and over again, set resend conditions in the “Sending settings” tab.
Paste this code to the HTML code of the email, it adds the last 20 cart items added to cart into the message:
{% set lastDateCompleted = 0 %}
{% if get_last_events('$order_completed') | length > 0 %}
{% set lastDateCompleted = get_last_events('$order_completed')[0]['created'] %}
{% endif %}
{% set massOrder = [] %}
{% set massOrderName = [] %}
{% for e in get_last_events('$cart_added') %}
{% if e['created'] > lastDateCompleted %}
{% if e.props['$name'].lower().strip() not in massOrderName %}
{% set x = massOrder.append(e) %}
{% set x = massOrderName.append(e.props['$name'].lower().strip()) %}
{% endif %}
{% endif %}
{% endfor %}
❗Important: When you’re composing the HTML code of the email, do not forget to envelope the block above in a div tag with style="display: none" in order not to show this block in the message.
Insert a loop which will add data from the created array:
{% for b in massOrder %}
{% set link = b.props['$url'] %}
{% set img = b.props['$img'] %}
{% set price = b.props['$amount'] %}
{% set name = b.props['$name'] %}
After this, you’ll need to add a block with the items (it replaces the link to the item, its name, price and link to its image with corresponding variables: {{link}}, {{name}}, {{price}}, {{img}}).
For example:
<img src="{{img}}">
<a href="{{link}}">{{name}}</a>
<span>{{price}} USD</span>
{% endfor %}
Add a message goal if needed.
Check whether all settings are in order.
We would recommend adding events for message sequences in order to see what exact message was sent/read/replied/etc (it may also help you build funnels and analytics).
9. Remember to check the message statistics from time to time.