
How to install Dashly
Install Dashly
It only takes a few minutes to install Dashly on your website. Once it’s installed, you’ll be able to communicate with visitors on your website.
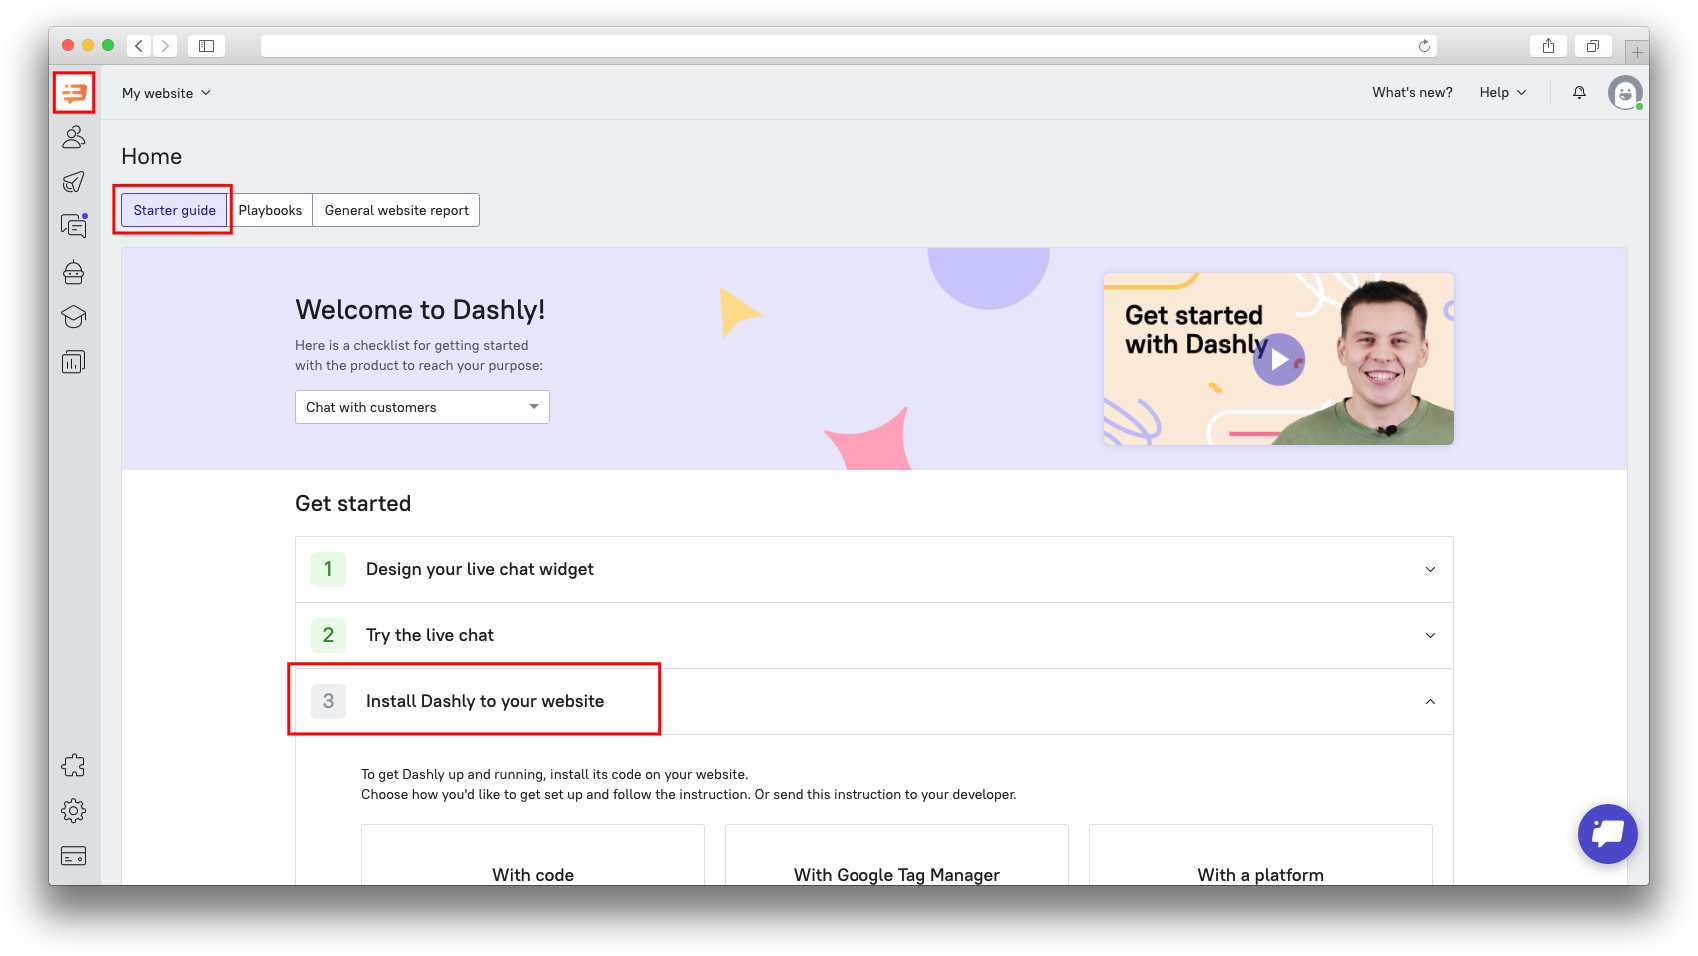
There are several ways you can install Dashly to your website. After you've registered in Dashly, you will be directed through the Starter Guide - it can be found on the Home page. The "Install Dashly to your website" is the third step in the onboarding:
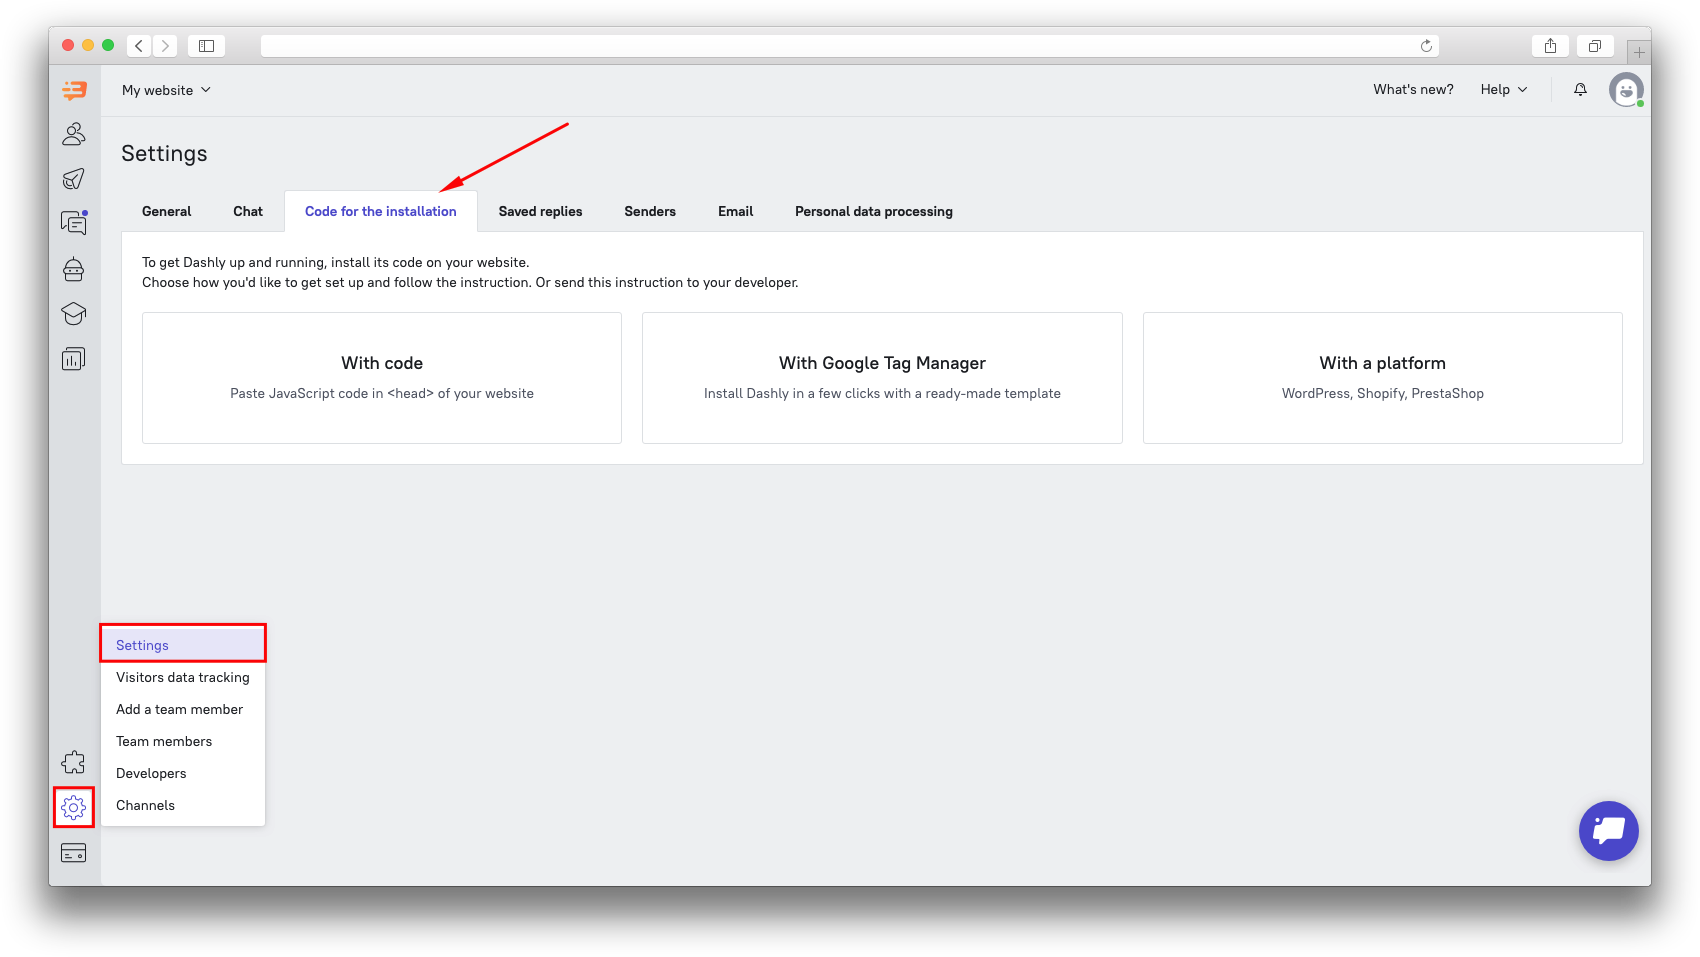
Alternatively, the installation code can be found in the Settings section:
Just copy the code snippet it contains and paste it right before the closing </head> tag of your site.
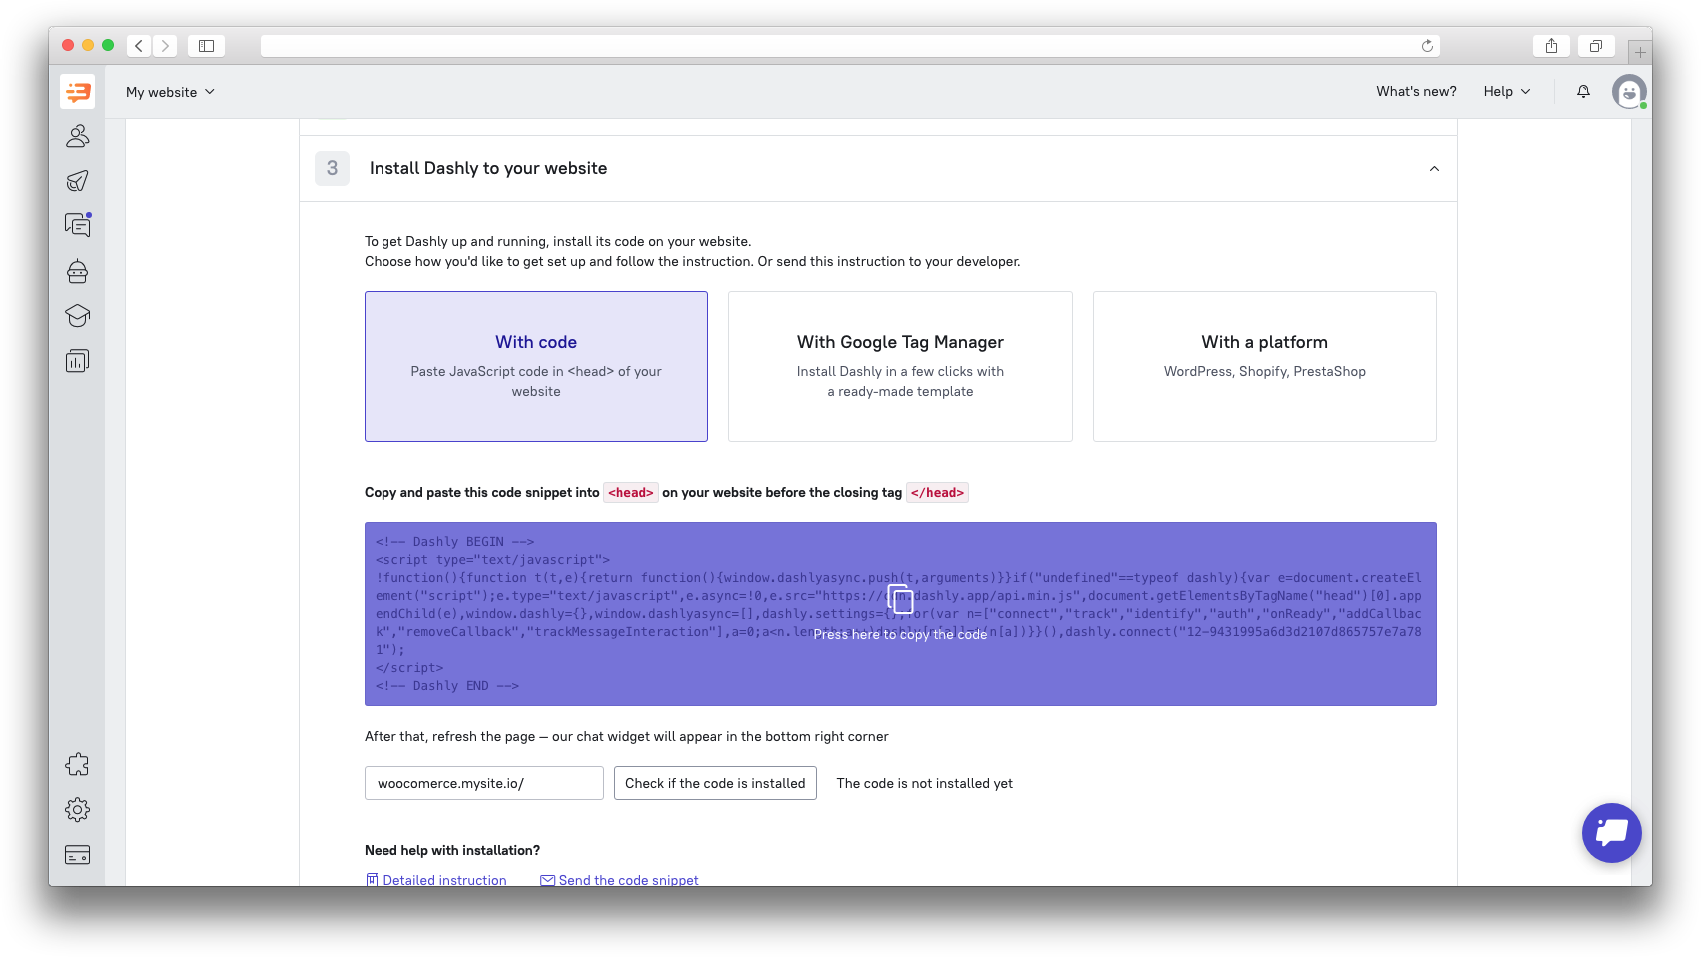
Installed code example:

This code asynchronously downloads a JS library and creates a global object ‘dashly’ which is used in API interactions.
Once added, the code starts working automatically on each page, including sub-domains.
Installation via Google Tag Manager
You can add Dashly code via Google Tag Manager by following a few simple steps.
Select Google Tag Manager in the starter guide:
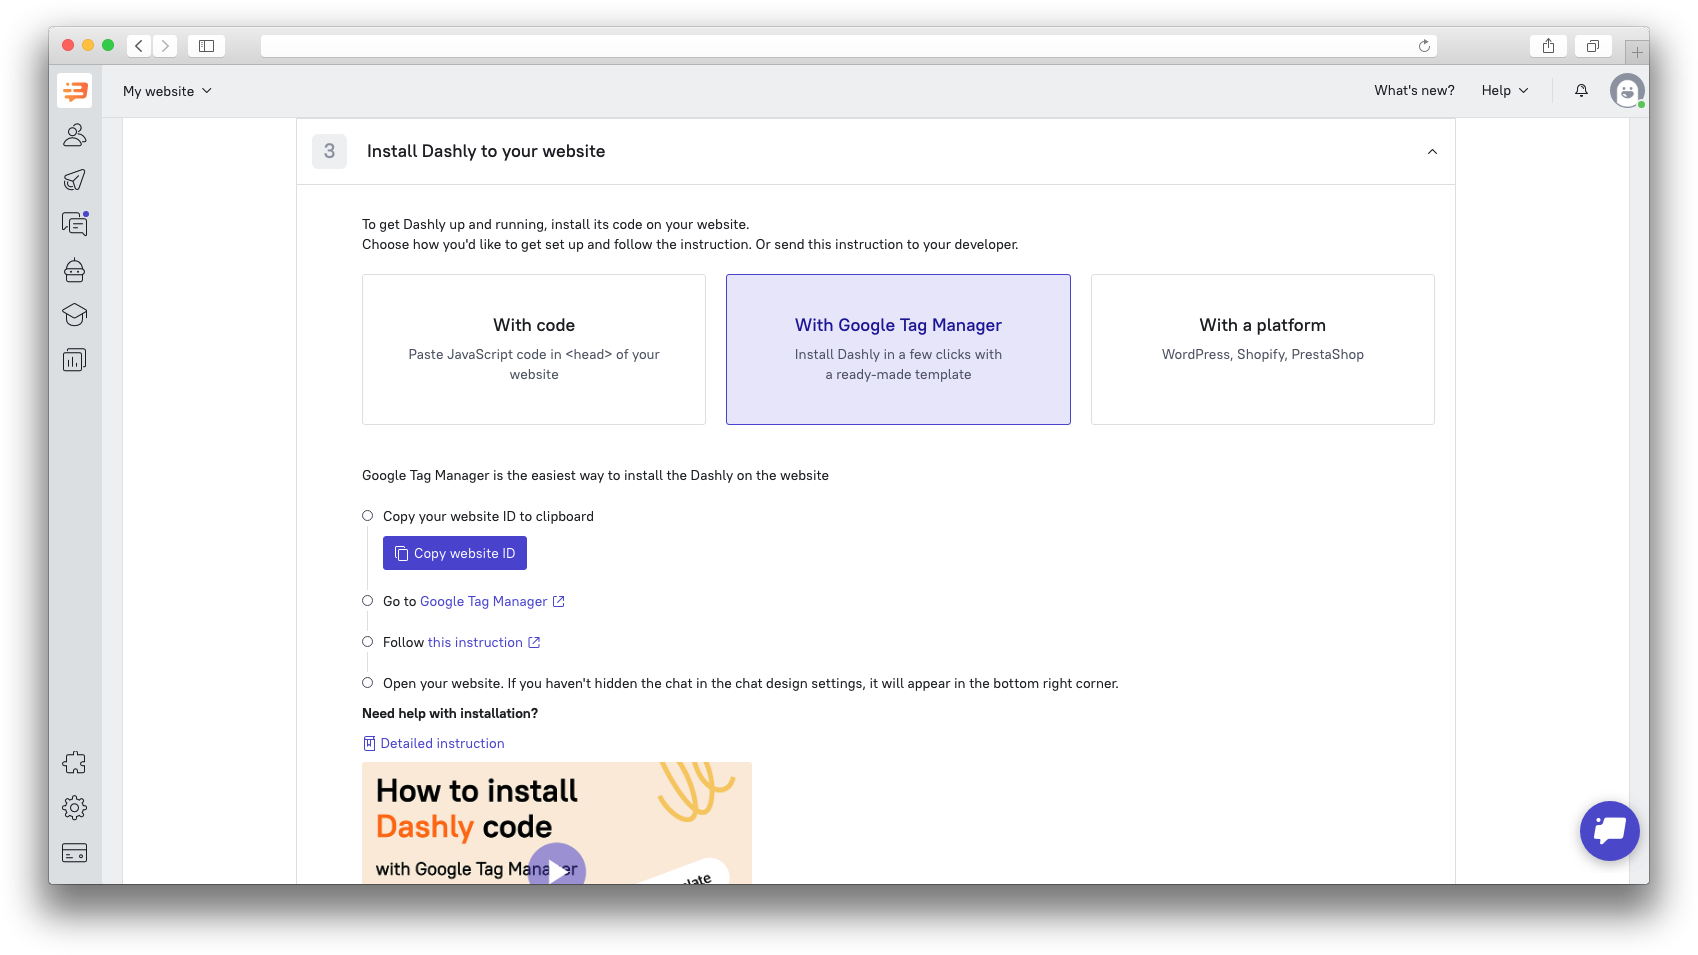
Copy website ID.
Move to Google Tag Manager.
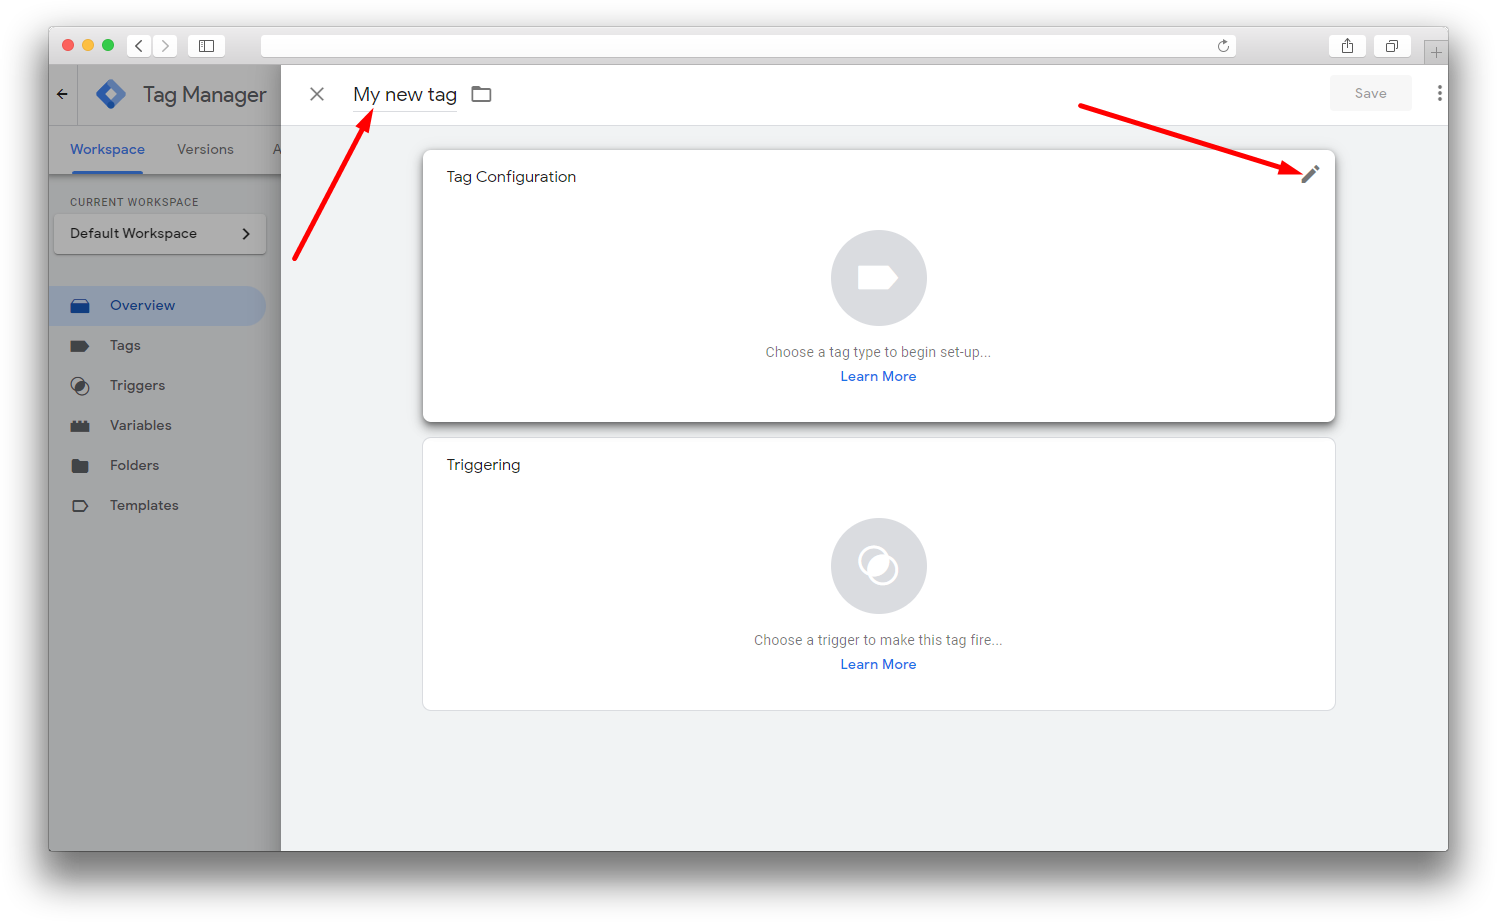
Add a new tag:

Name tag and edit its configuration:
Click on "Discover more tag types in the Community Template Gallery" and search for Dashly:
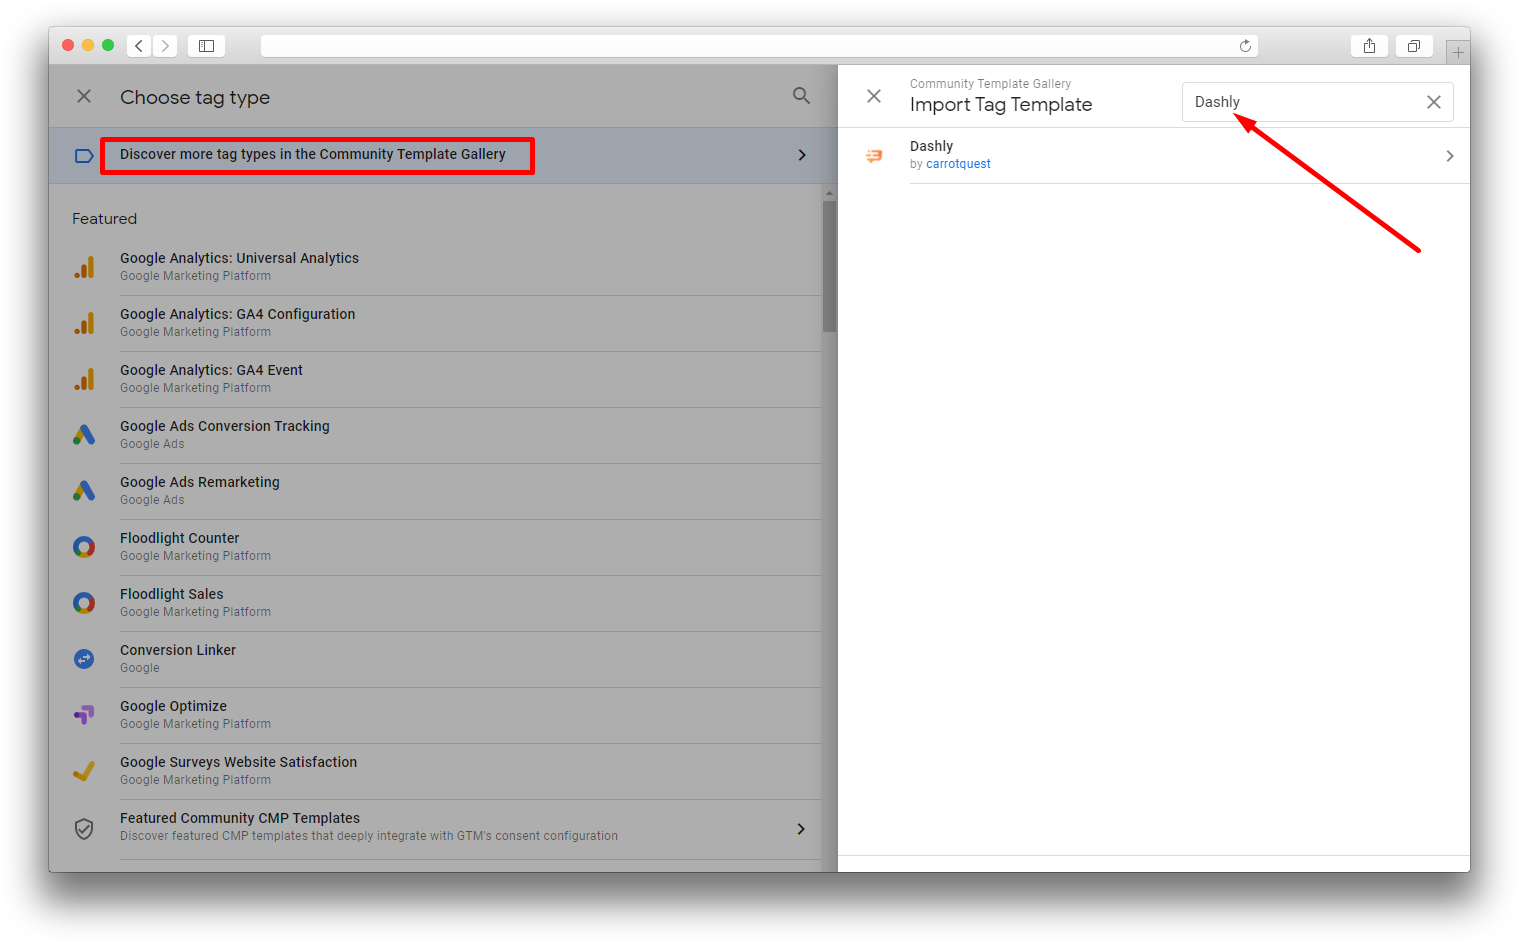
Add Dashly template to your workspace.
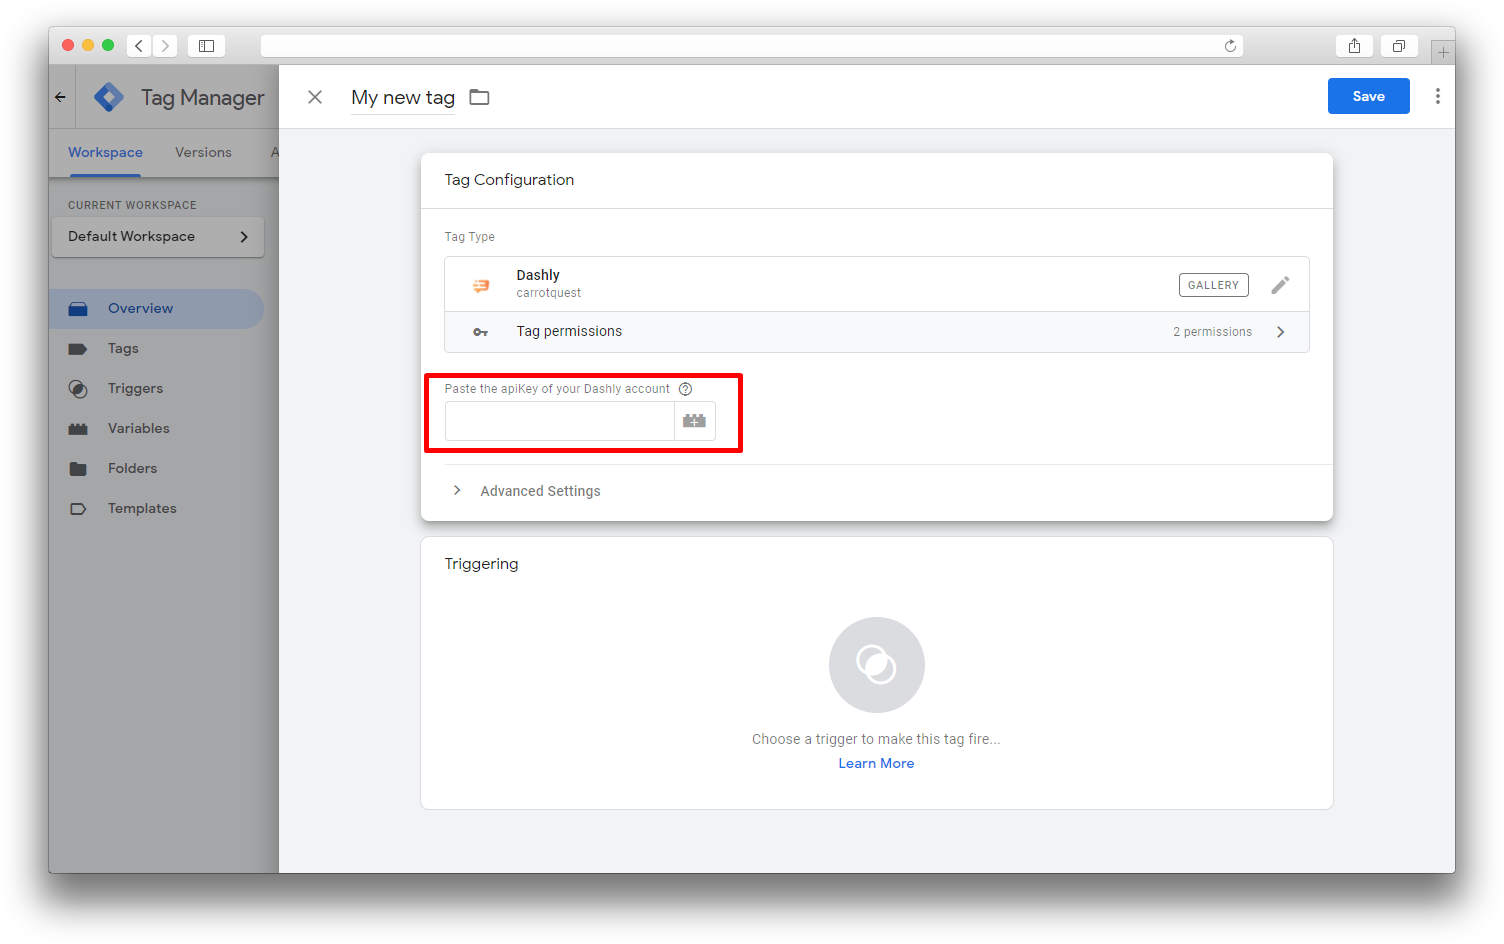
Enter copied website ID:
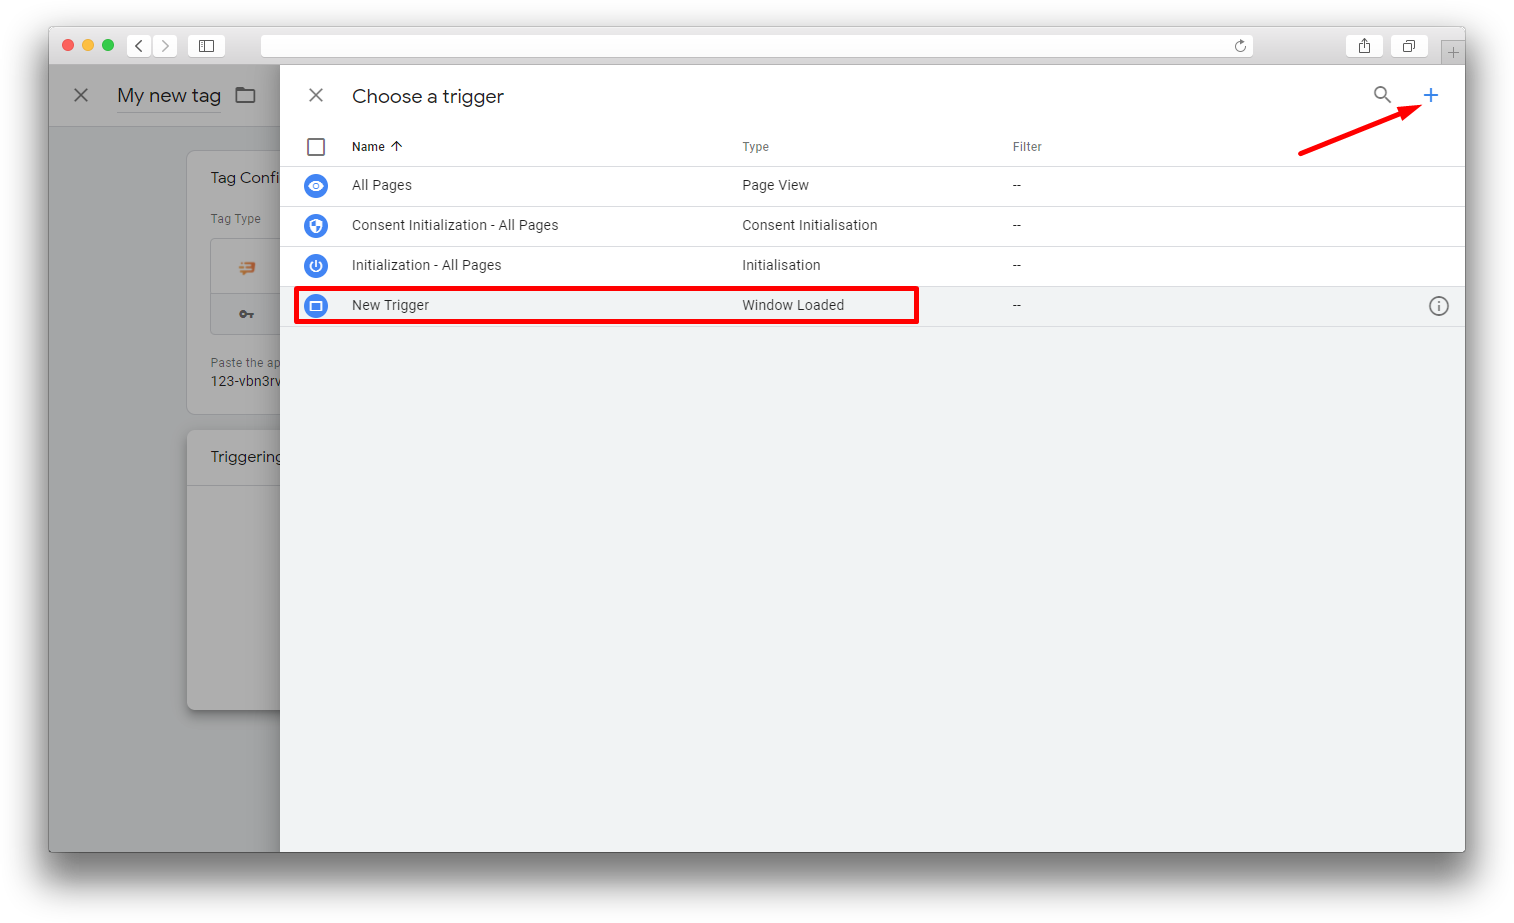
Once ID is there, add a Trigger. Select one with a "Window Loaded" type. If it is not there yet, you can create a new one by clicking "Add trigger" button:
Save tag settings.
That’s all! Now, when you update your page, you should see Dashly chat at the right bottom of your site (if it isn't hidden in “Settings”).
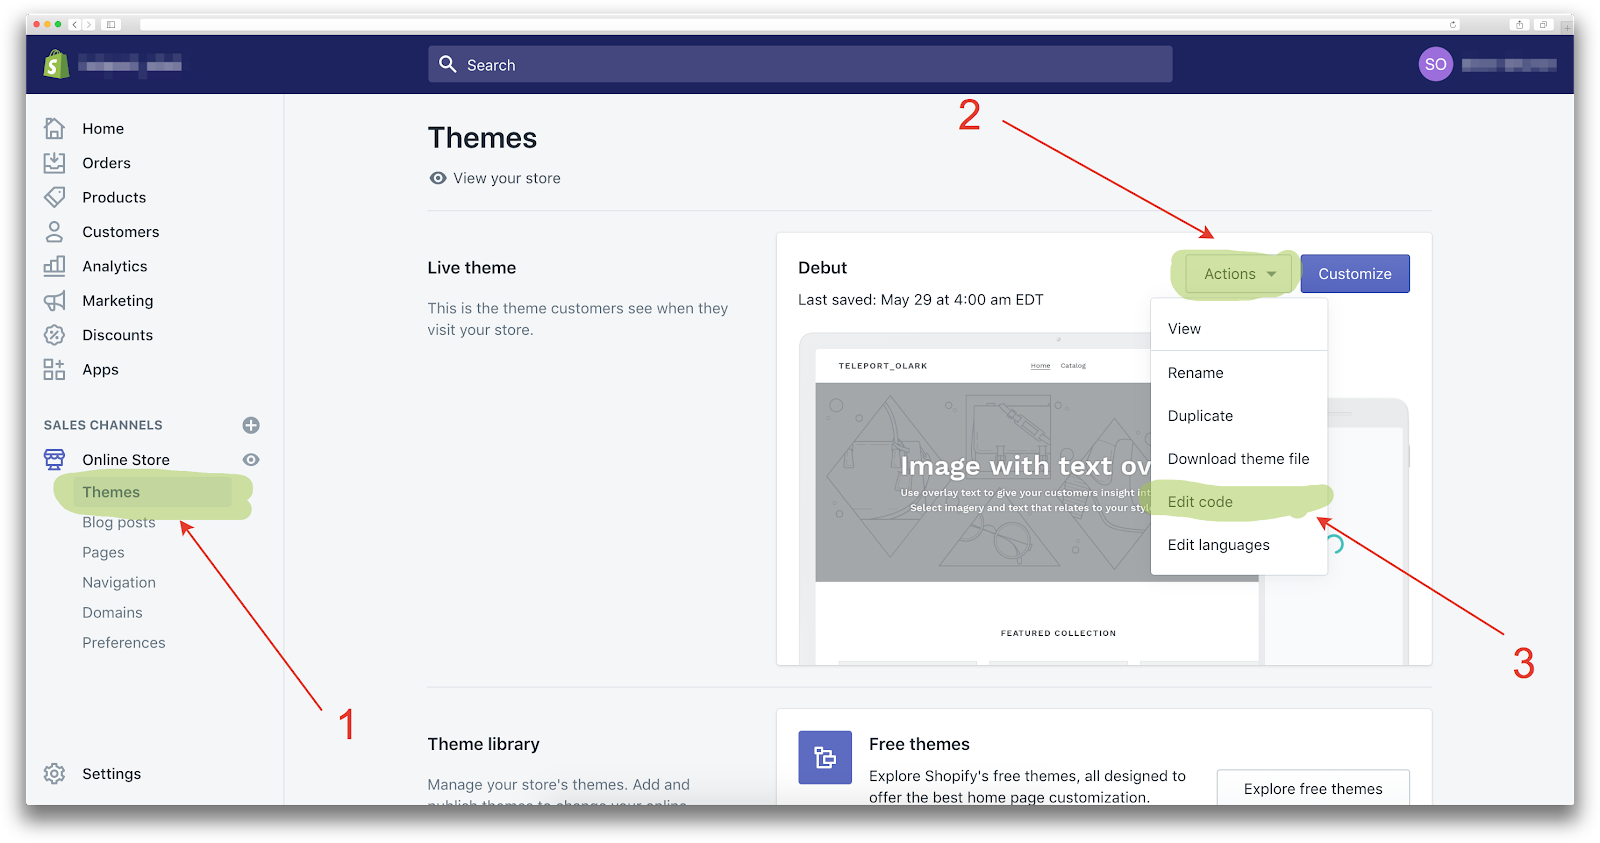
Installation on Shopify
You need to follow 2 steps and 6 clicks to add Dashly live chat to your Shopify store. After you created your Dashly account and got to the onboarding page, you just need to copy the code and go to Shopify to Log in as an account owner.
Go to "Themes” page.
Find the “Actions” list and open it.
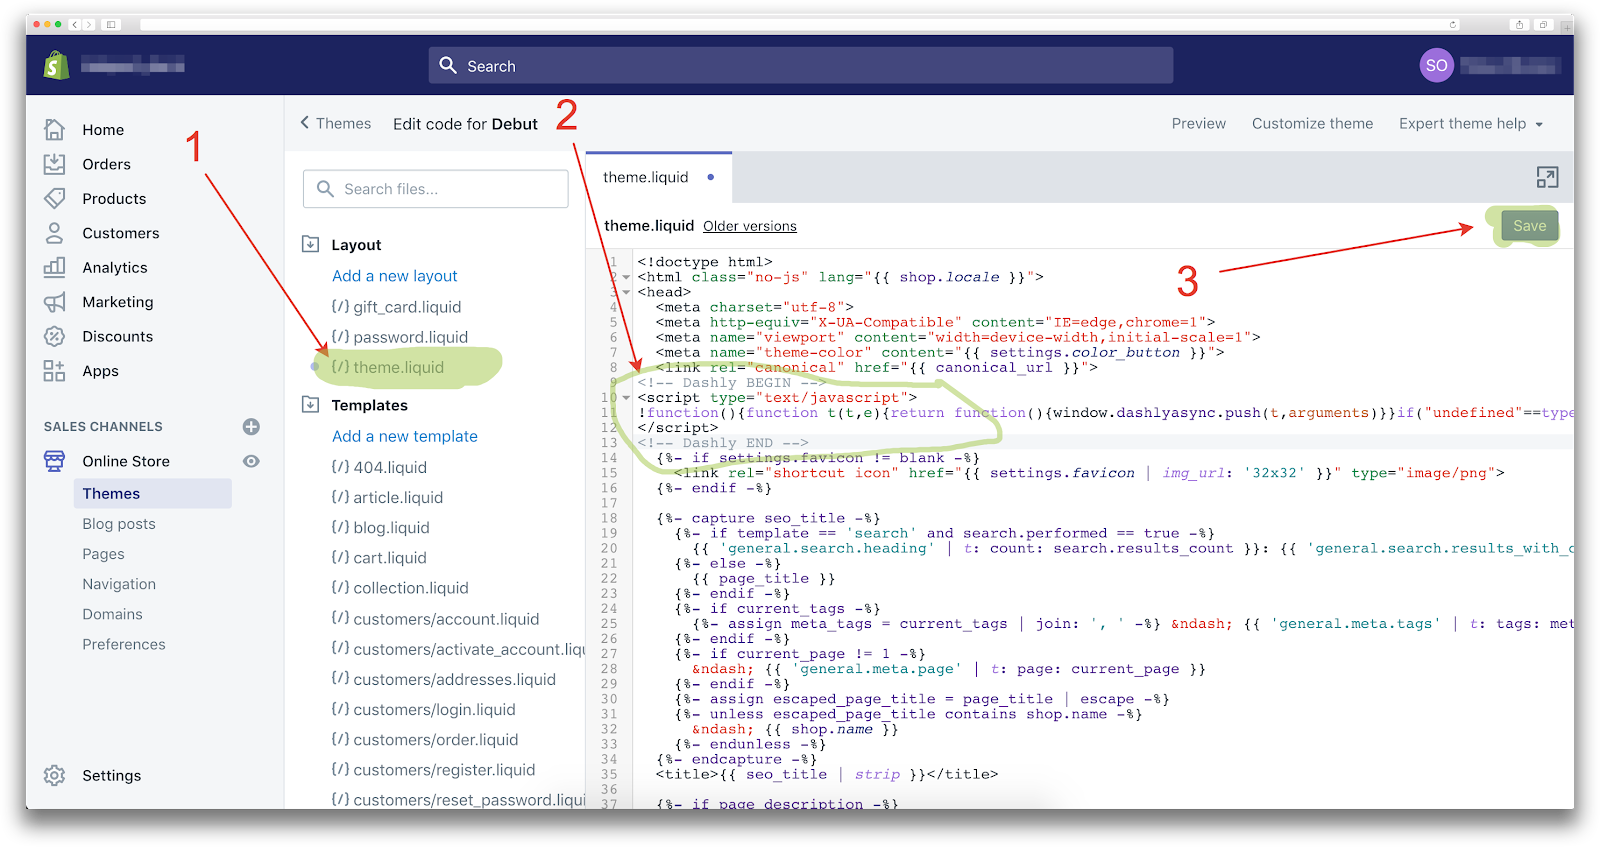
Go to the Edit code page.
On the “Edit code” page choose your theme layout. Adding the Dashly JS snippet to the layout will install it on every page of your Shopify store.
Paste the Dashly JS snippet between the <head> and </head> tags – it is the best place to install Dashly.
Save the layout and check your Shopify store, there could be an awesome animated live chat icon.
Dashly modules
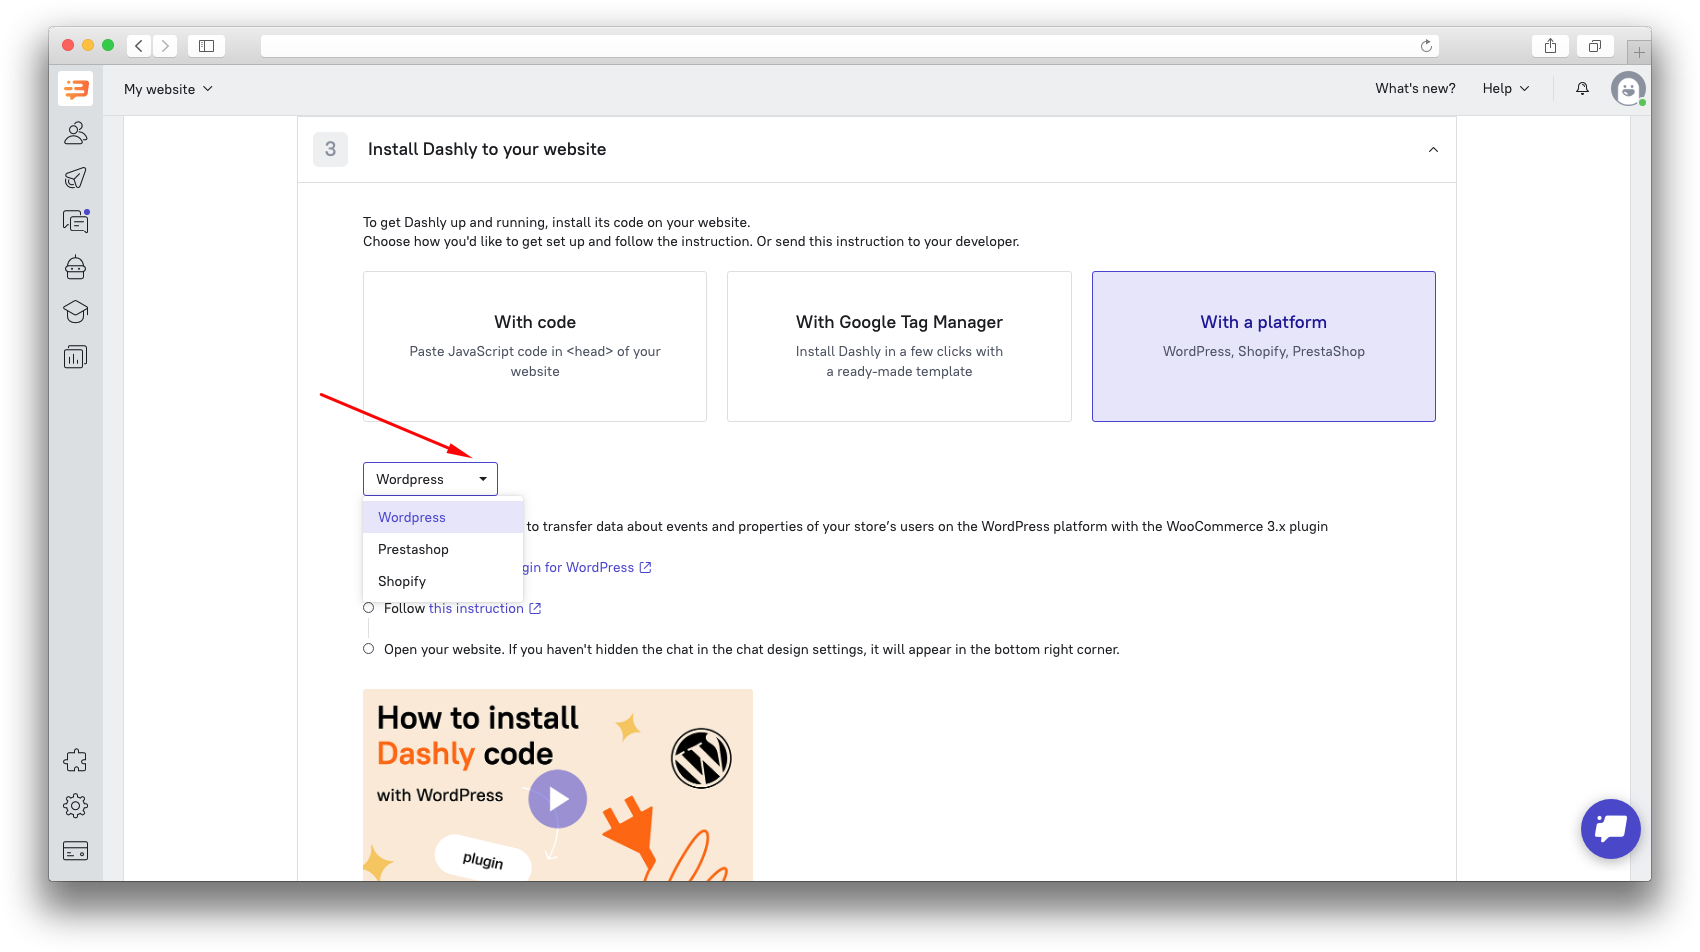
Modules are alternative to using plain code in case your site is on WooCommerce, Shopify or PrestaShop.
Modules are preconfigured to be able to track shop events, such as adding a product to cart, viewing product page, making an order, etc.
You can choose a module in the Starter Guide, clicking on the "With a platform" option:
How to add a new website
To create an account in Dashly, you’ll need to add your website – just put your website URL while signing up.
If you have several websites, you can add all of them to your account.
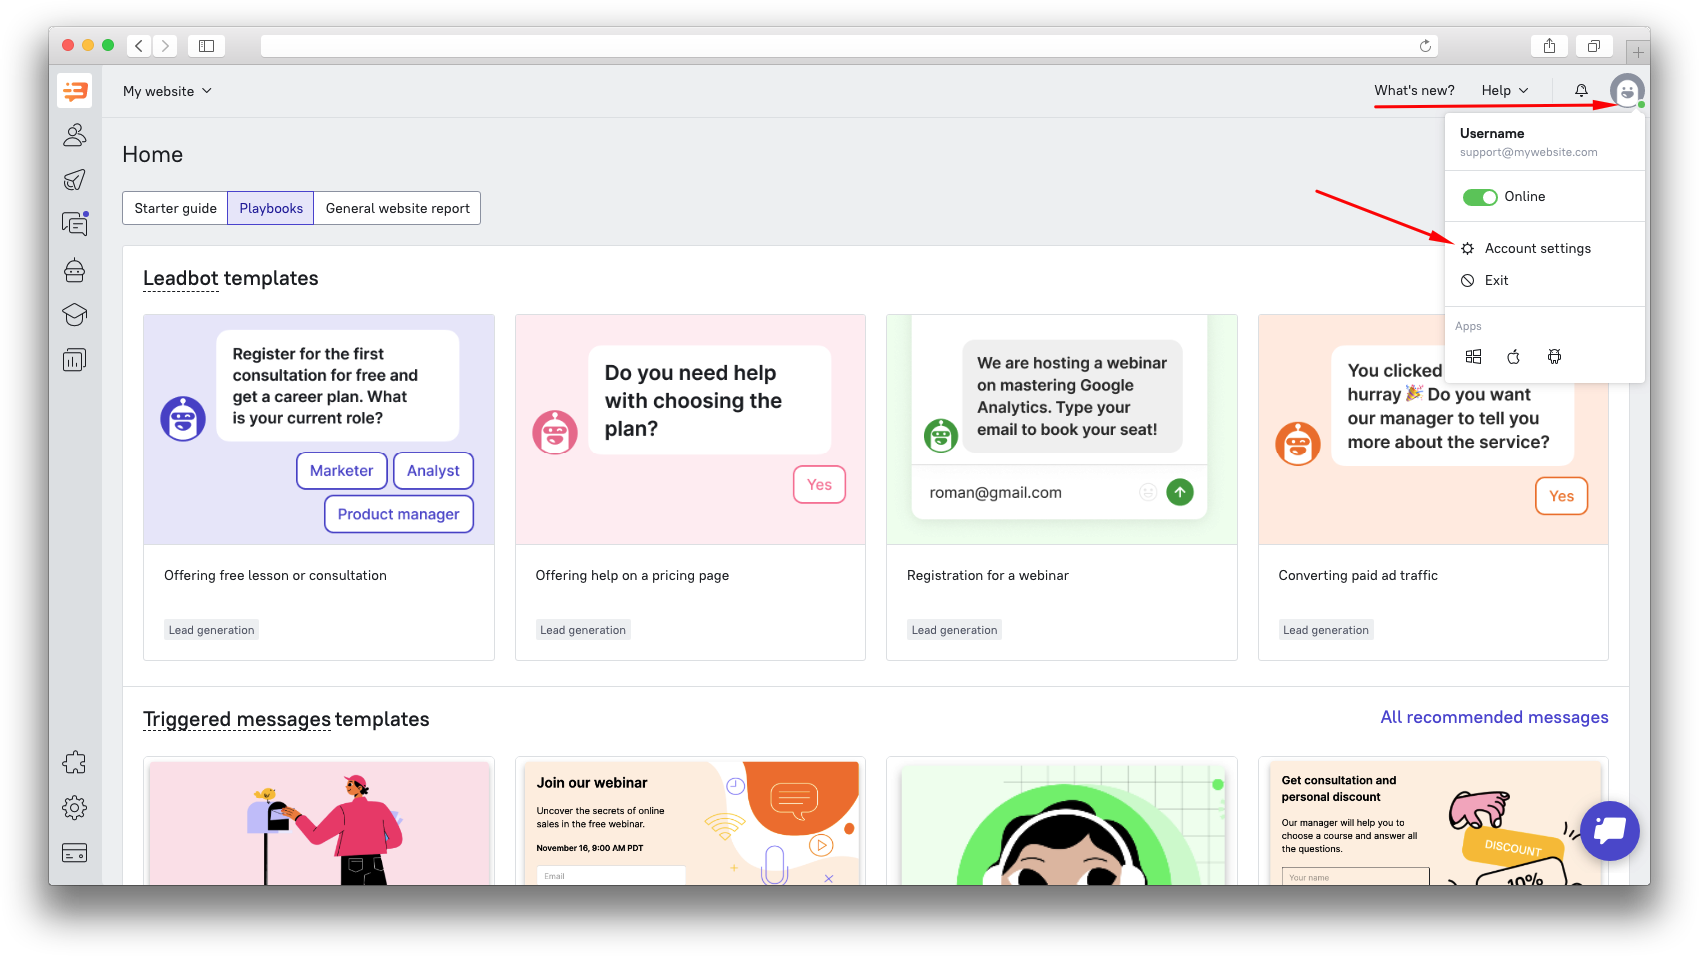
In your admin panel click on your profile at the top of the page and choose “Account settings” there, which will take you to “My websites” page.
There you will see the list of your websites. Press “Add another site” button to connect one more site.
Now you’ll see the same steps as those you’ve already taken during the registration. Choose the type of the website you want to add, then put your website address and a company name.
After you add the website, you’ll see it on “My websites” page. Dashly will ask you to choose the needed website’s admin panel every time you sign in.
P.S. Different websites have to have several code snippets and are paid separately.