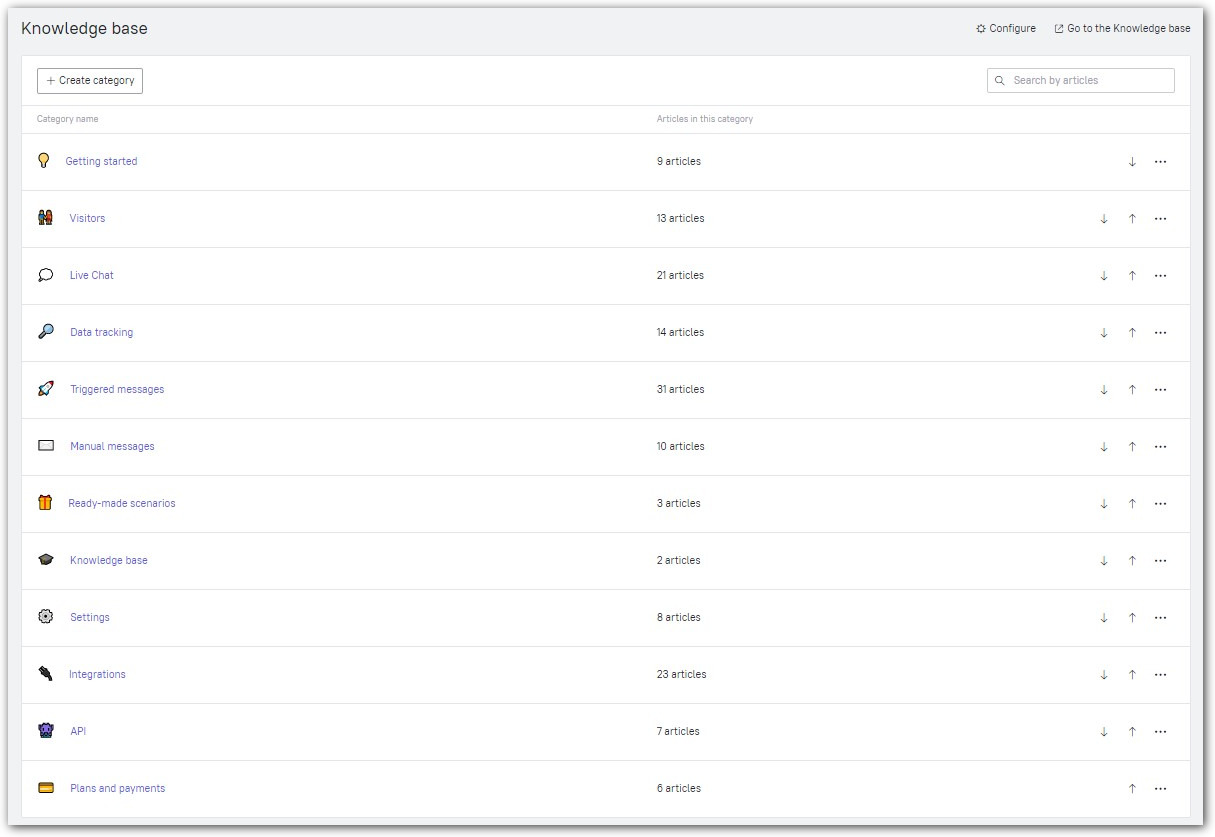
Knowledge base
Knowledge base articles will help your operators answer frequently asked questions in just a few clicks, letting them pay more attention to more complicated questions. Using Dashly Knowledge base will help you increase the answer speed of your chat managers and make your customers even more content with your service.
Setting up your Dashly Knowledge base
You can set up Basic Knowledge base on any Dashly plan. To remove your Knowledge base limits, you can activate the Knowledge base Pro add-on. Its monthly cost will be added to your plan.
Here is the difference between Basic Knowledge base and Knowledge base Pro:
Knowledge base Standard | Knowledge base Pro | |
Max amount or articles | 30 | Unlimited |
Max amount of categories | Unlimited | Unlimited |
Domain | Dashly domain or your own domain | Dashly domain or your own domain |
Adding your custom logo | Yes | Yes |
Access to robots.txt | Yes | Yes |
Article indexing by search engines | All articles | Choose what articles to index |
Adding Google Analytics Counter | No | Yes |
Disabling the "We are using Dashly” caption | No | Yes |
Access to editing Knowledge base articles for admins and superadmins | Yes | Yes |
Sharing articles from the Inbox | Yes | Yes |
You can see your Knowledge base settings by going to Settings → My knowledge base or by using this link.
You can place a link to your Knowledge base anywhere on your website or just share Knowledge base articles with your visitors via Dashly chat (read about the easiest way to do it at the end of this article).
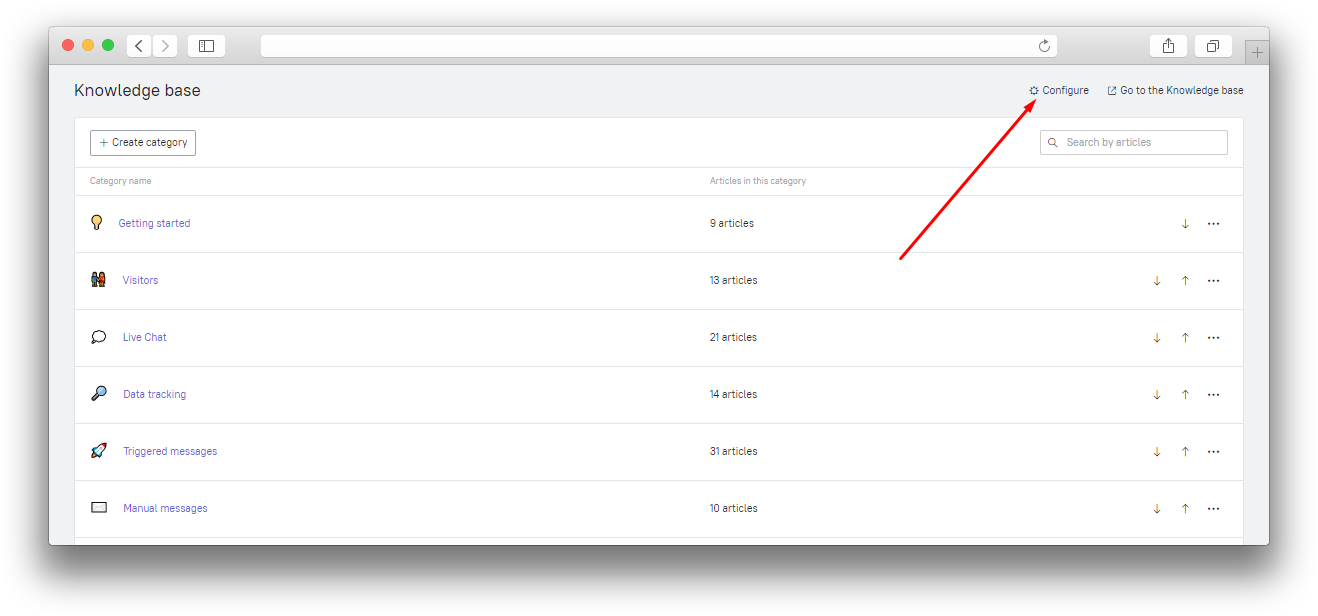
You can find Knowledge base settings in the upper right corner of your Knowledge base:
You can use your own domain or use the default domain Dashly provides. Default Knowledge base domains look like this: appXXX.dashly.help where XXX is the ID of your Dashly website. To change your Knowledge base domain, contact us in chat and we'll help you set it up.
Important: If your Knowledge base domain is different from the one your Dashly code is installed on, the users visiting your Knowledge base won't merge with the ones on your website, which will cause an increase in the unique visitor count. We recommend using a subdomain of your main domain for your Dashly Knowledge base.
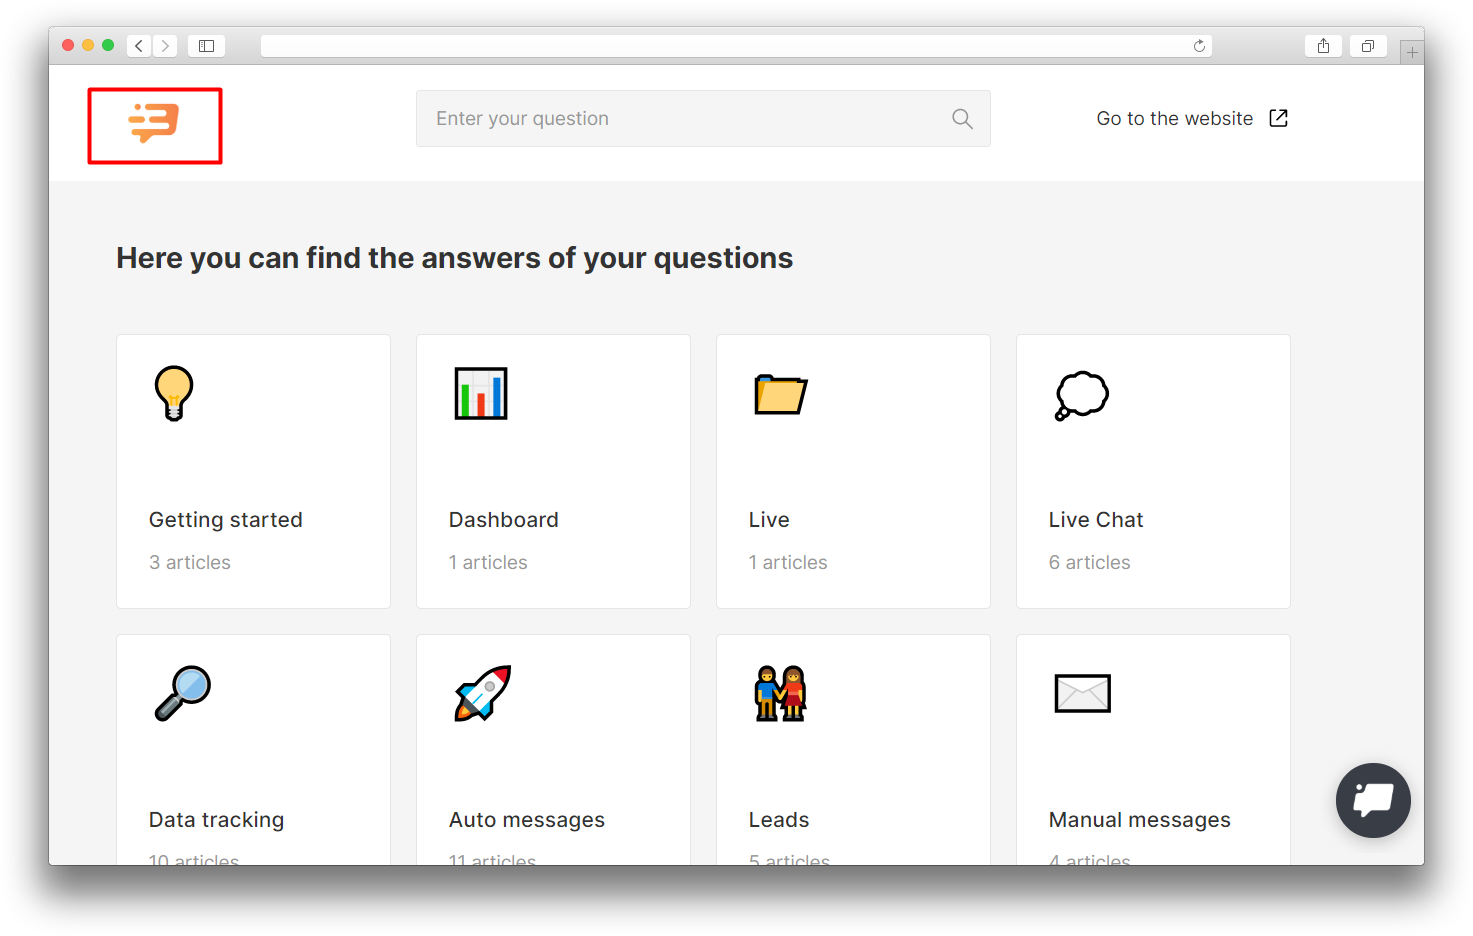
Add your logo. It will be displayed in the upper left corner of your Knowledge base:
The color used to highlight articles when a user hovers their mouse cursor over them corresponds with the color of your chat widget (which you can change in the “Settings” – “Chat section”).
Read the robots.txt file to learn how your Knowledge base is being indexed in search engines. You can't edit robots.txt, but you can add separate articles as an exception to indexing in the settings of each article (available with Knowledge base Pro).
Advanced settings:
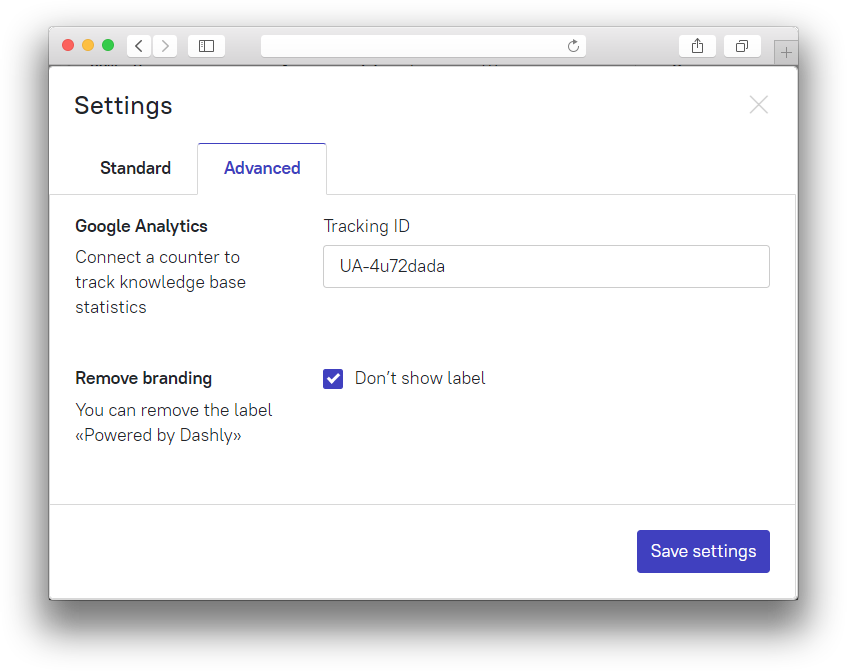
Add Google Analytics Counter to see how effective your articles are. This way you can track page visits, desired action conversion and other metrics that will help you understand how customers use your Knowledge base and how it helps them use your platform.
You can also remove the “Powered by Dashly” caption displayed in the Knowledge base footer.
Only Admins and Superadmins have access to editing and configuring Dashly Knowledge base.
Categorizing articles in the Knowledge base
Each article must belong to a certain category. Use categories to sort information. This will help your visitors and chat operators find the answer to their question within the shortest amount of time.
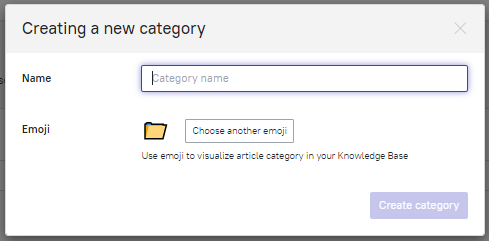
Article categories
When adding a category, you can add a name and an emoji, which will serve as an icon of your article.
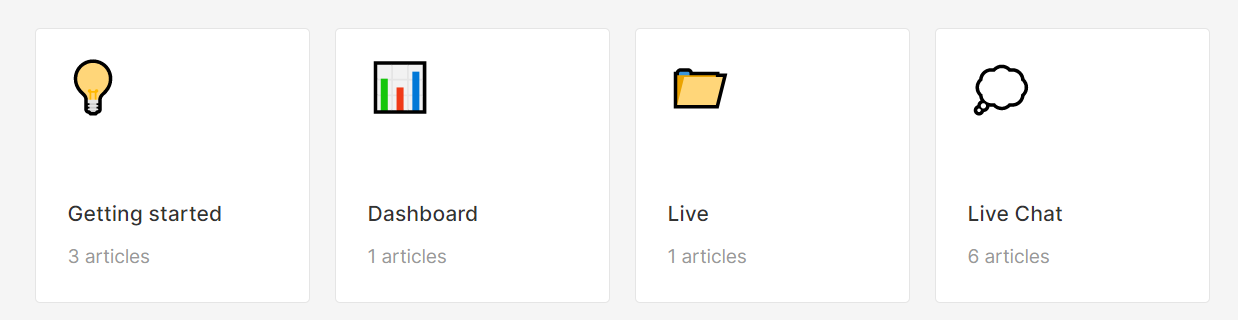
This is how categories are seen by your visitors
Right after you create a category, it appears on your Knowledge base page. You can sort categories by changing their relative position using the arrows to the right.
If you want to delete a category, click the "Delete" button in “More options” section.

To create an article, choose or create a category that this article should correspond to and click the "Create article" button. You can move this article into another category later.
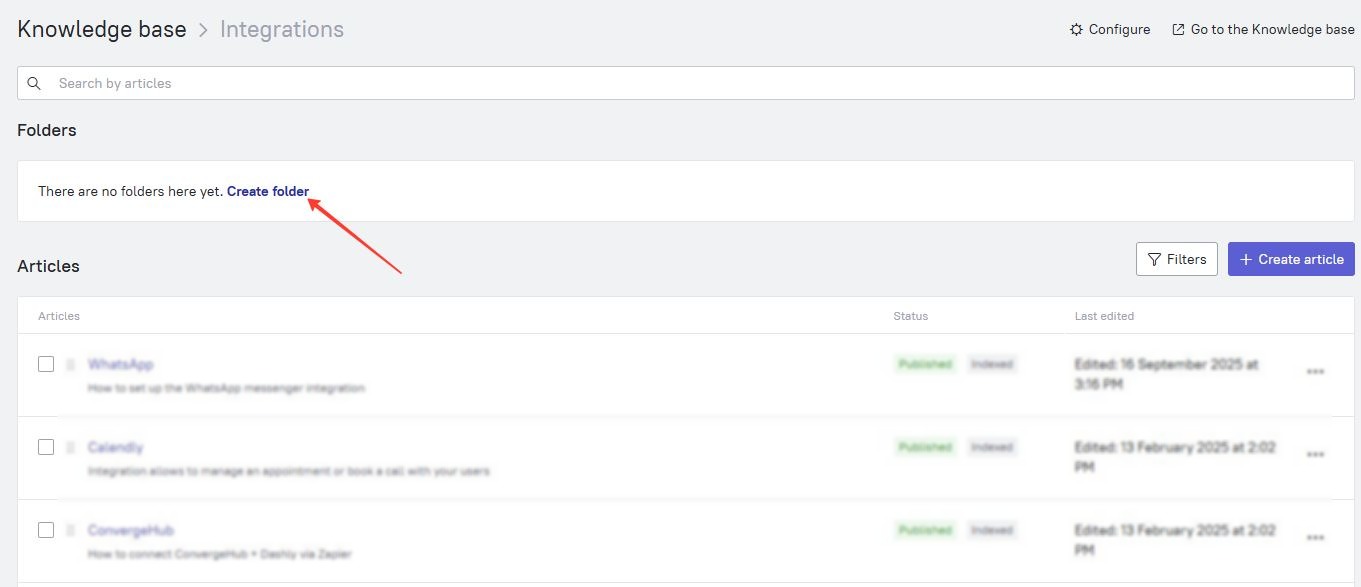
Folders in Knowledge base
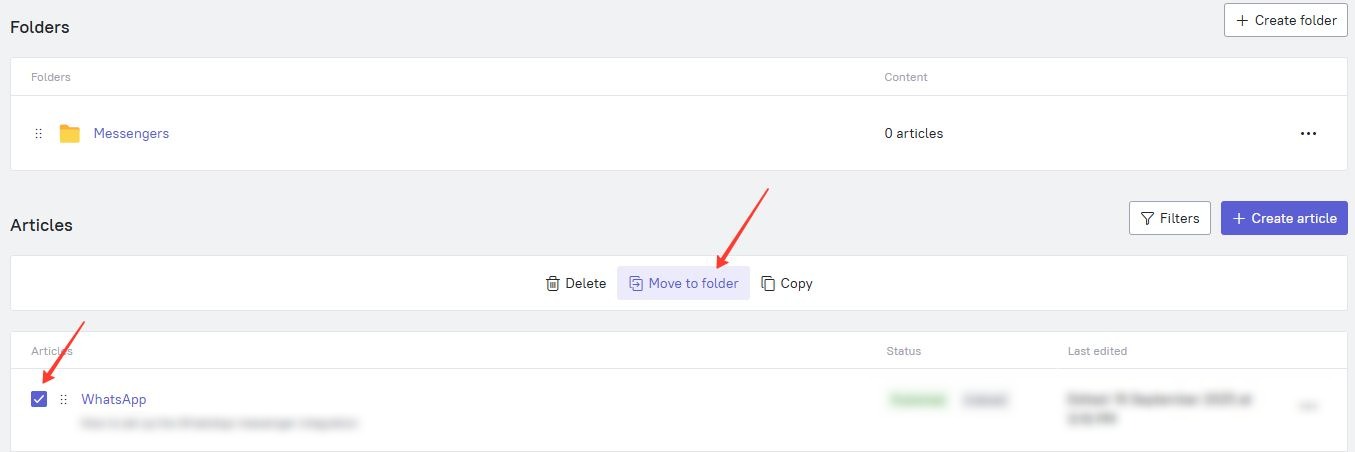
You can create folders within categories to help organize articles and make searching easier for your Knowledge Base users.
When creating a folder, you need to choose a name for it, and you can also change the icon:

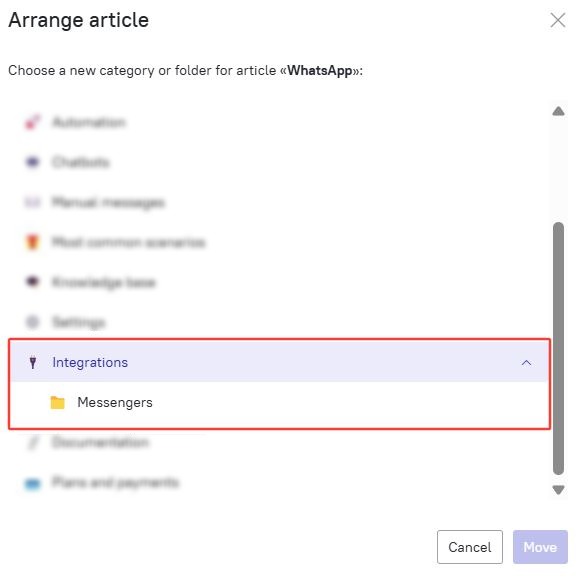
By selecting several articles within a category, you can move them to a folder:
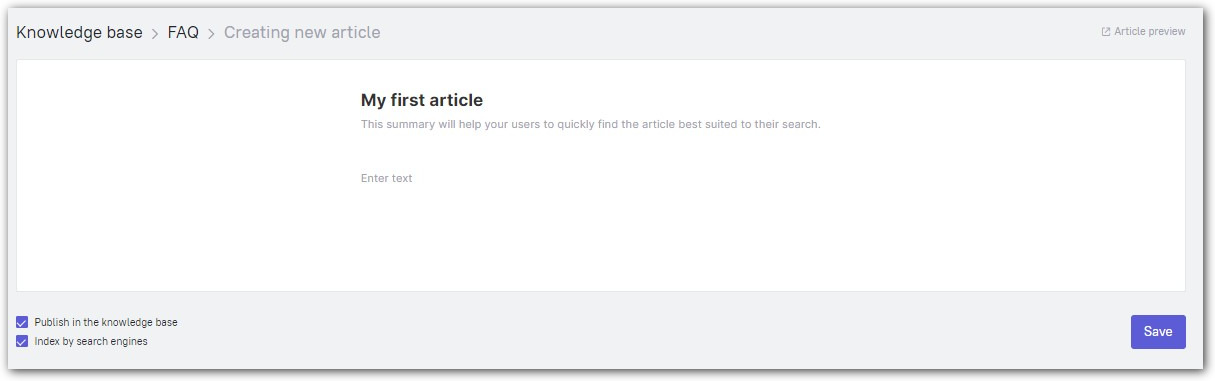
Inline article editor
You must enter the article name and description to be able to save an article. Article description will display in the article list and also when you share an article with your visitors.
In search engines, article names correspond with Title. Article description corresponds with Description. These fields affect the indexability of your articles and their position in search results. Add them according to SEO guidelines if search optimization is important for you.
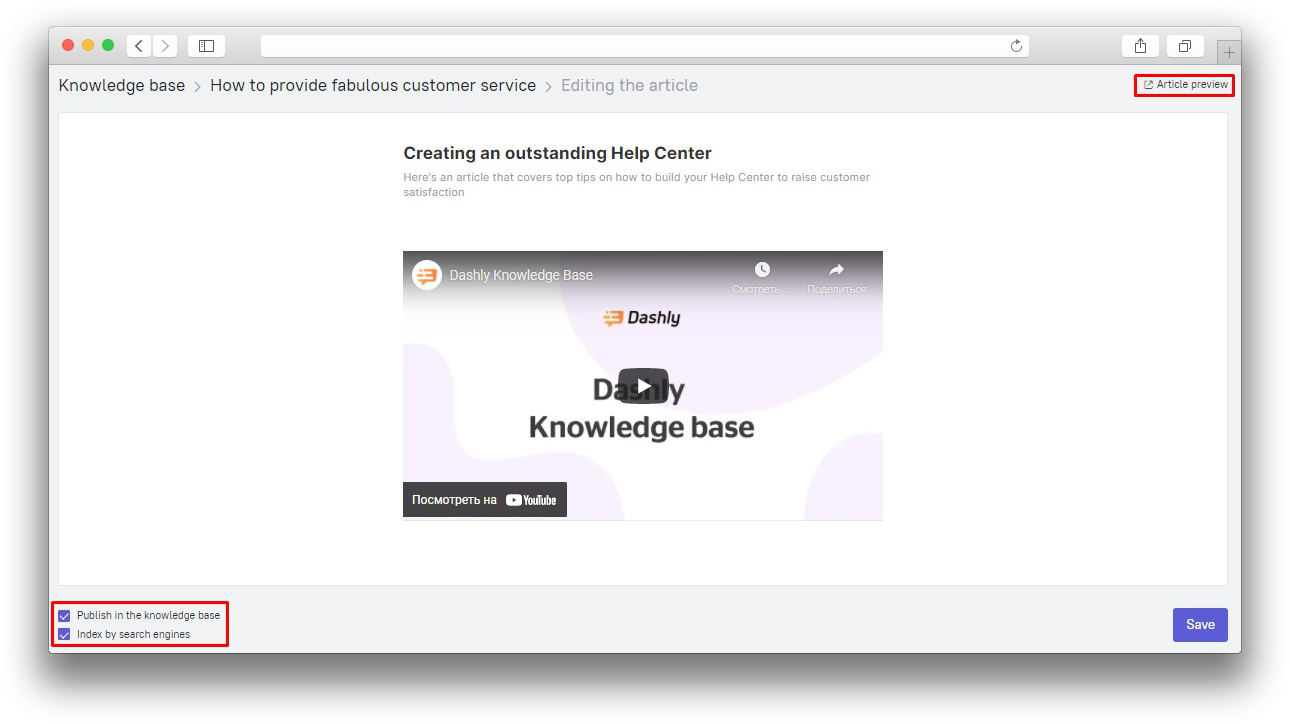
If you want to save an article but it is too early for your visitors to see it, uncheck the "Publish in the knowledge base" button. If you want to hide your article from search robots, uncheck the "Index by search engines" button (only available in Knowledge base Pro). Your articles are published and indexed by the search engines by default.
After you save an article, you can view this article by clicking "Article preview".
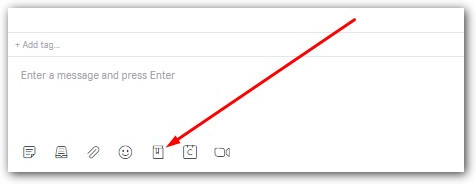
Using Knowledge base in chat
Chat operators don't have to leave the “Inbox” section in order to find an article to send it to a user, they can simply click the "Knowledge base" icon, pick an article and share it with the user right in the conversation window.