
Google Spreadsheet
You can significantly expand Dashly's capabilities using Google Sheets and Google Apps Script.
For example, you could record Dashly ID of each user who made an order, or set a promocode for each particular user, all using the spreadsheet. In addition, you can use data from your sheets in triggered messages, say, pop-ups.
Here's an example of using the data in a pop-up.
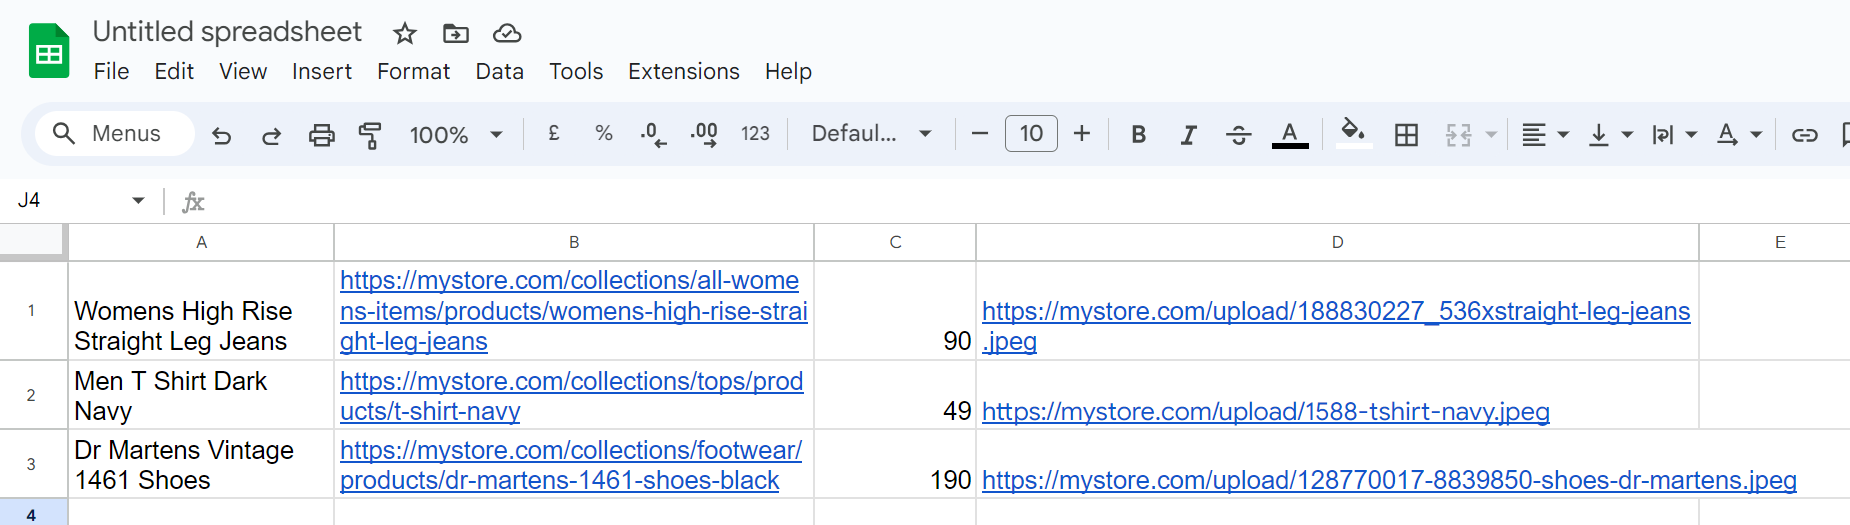
1. Create a new table or open the one you already have. We'll be using the table with some information about the products as an example.
2. Go to Extensions -- Apps Script. You'll be redirected to a new page containing three script lines.
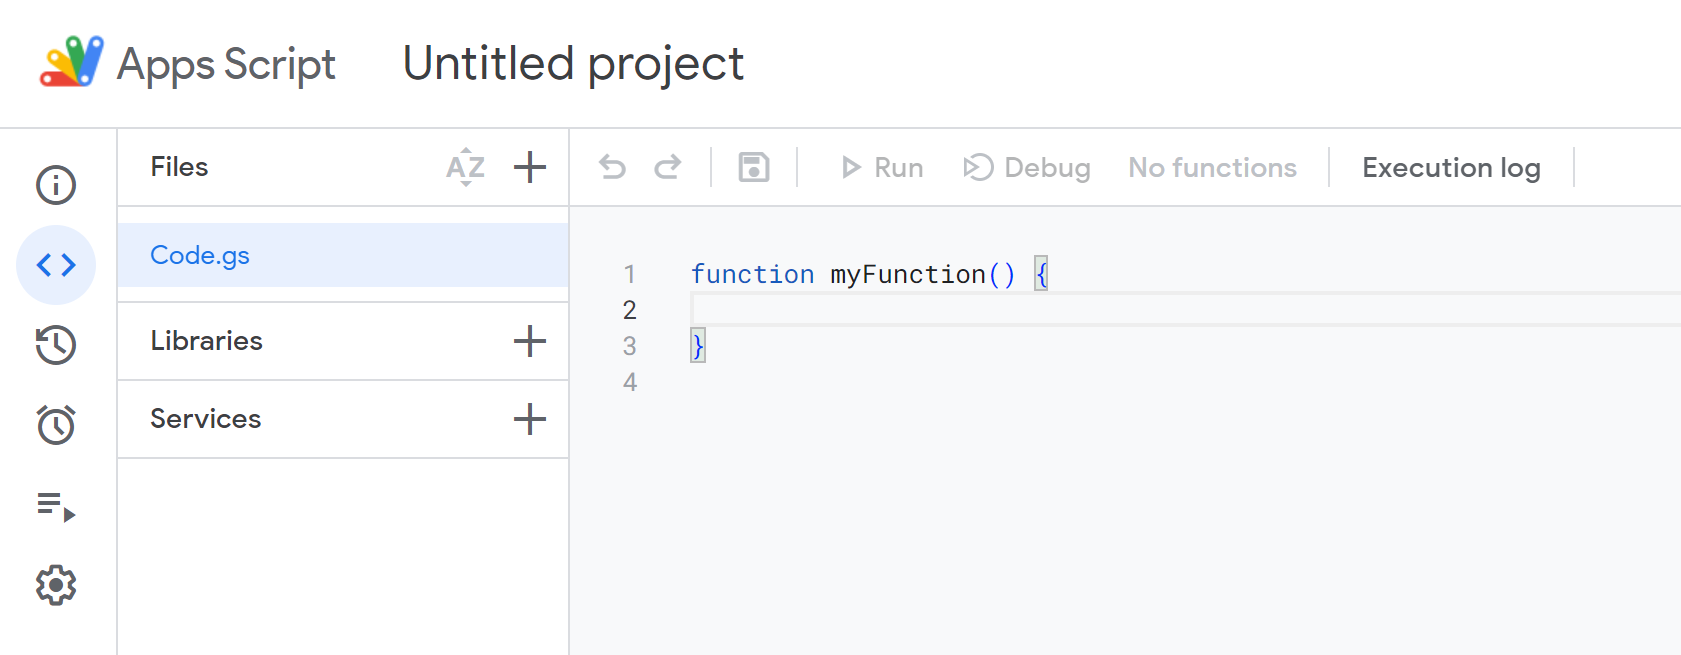
3. Delete the lines and instead paste the following script:
function getData(){
 try{
   var values = SpreadsheetApp.openById('ХХХ').getSheetByName('YYY').getDataRange().getValues();
  return values;
 }catch(e){
  return [[e.message], ['U SENT ' + JSON.stringify(parameters)]];
 }
}
function doGet(e){
 var cs = ContentService.createTextOutput();
 cs.setMimeType(ContentService.MimeType.JSON);
 cs.setContent(JSON.stringify(getData()));
 return cs;
}
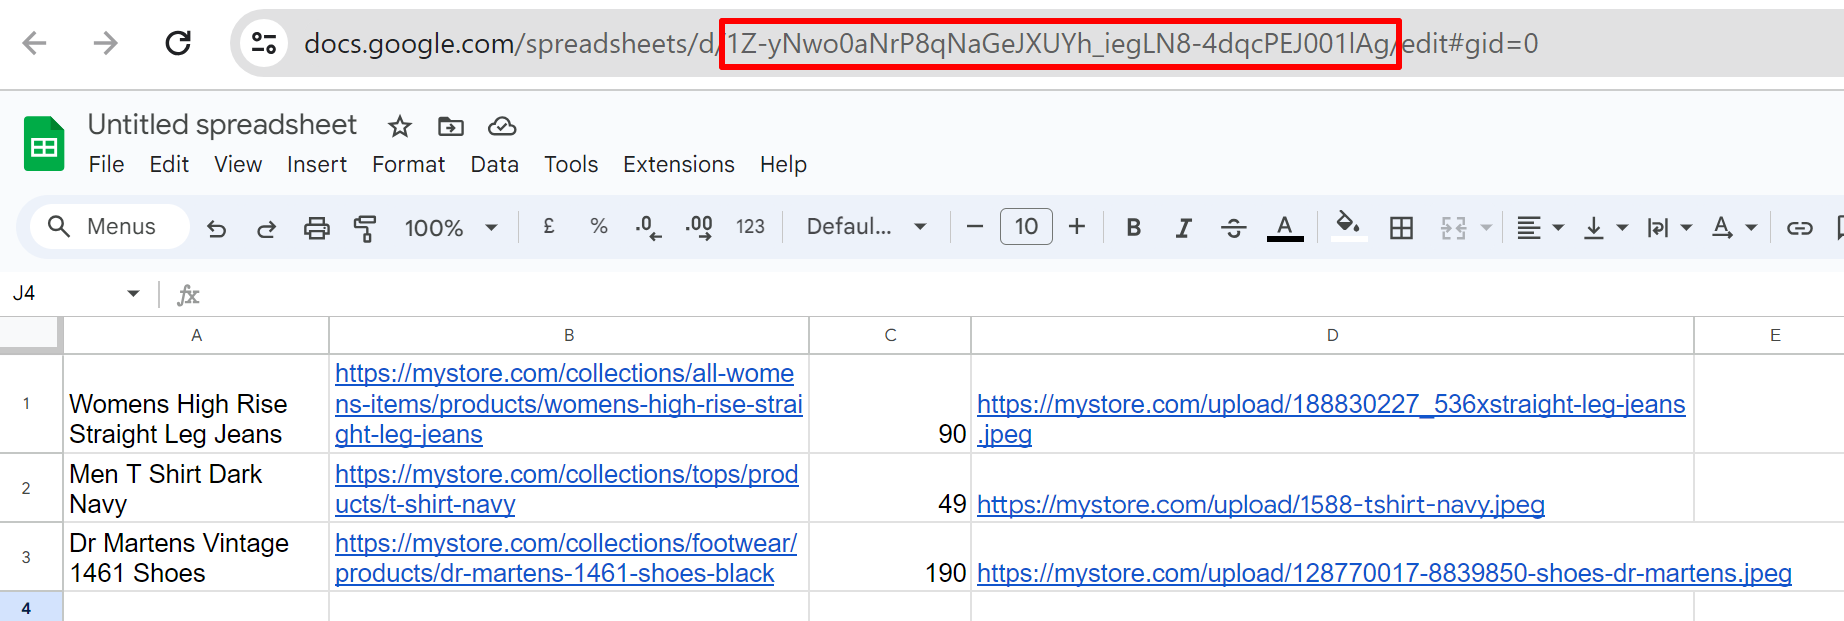
Instead of XXX, insert the table ID.
Instead of YYY, insert the name of the table sheet containing the data, for example, Sheet 1.
Using a GET request, you can return the data from the sheet with the help of the inserted script.
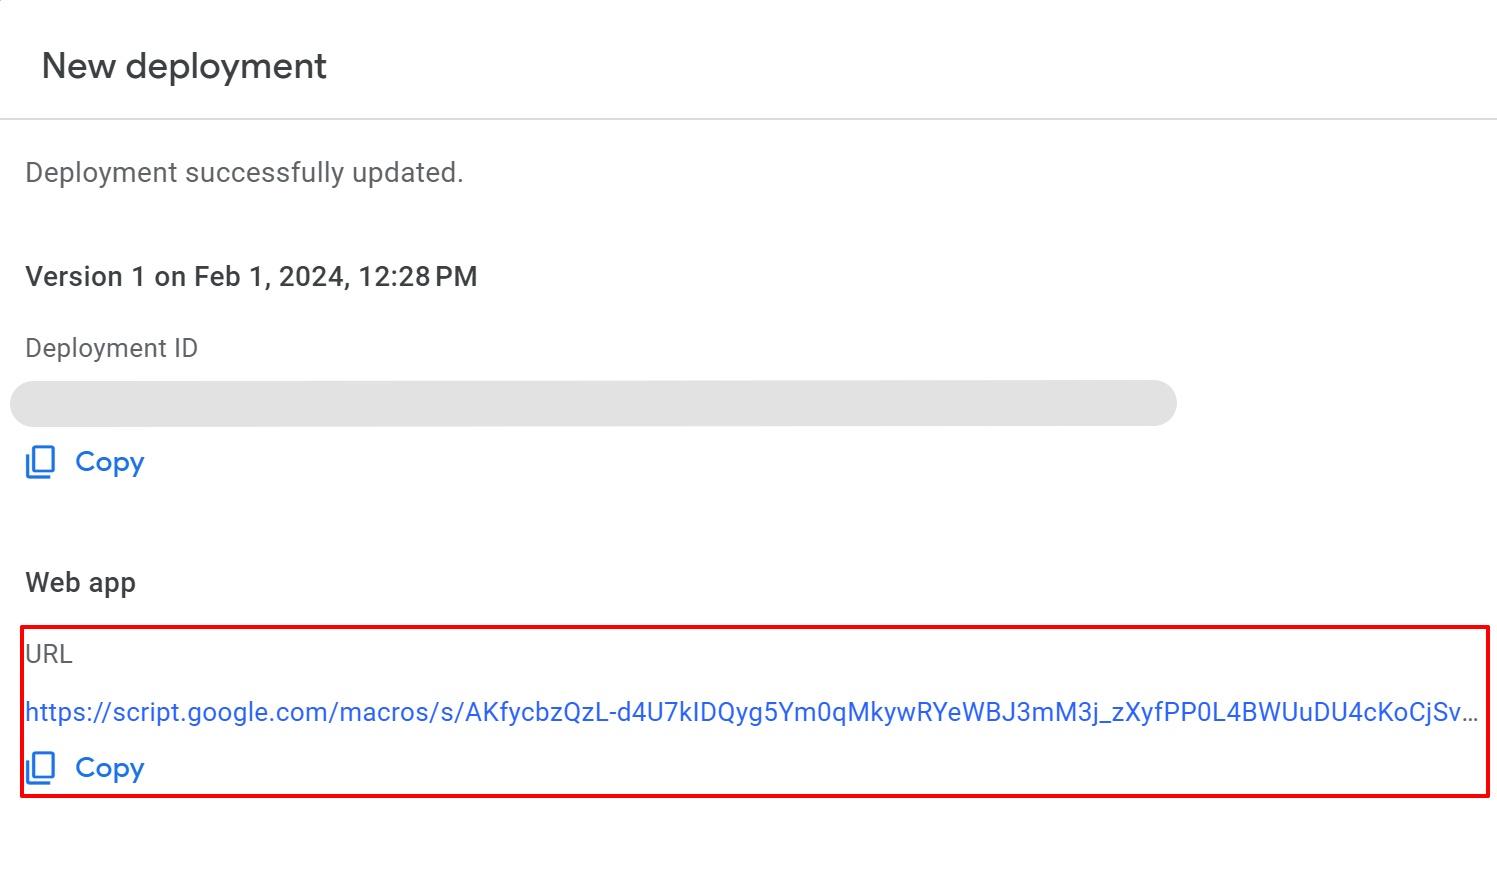
4. Click Deploy- New deployment. Select "Web app" as a new deplayment type. Set the project's name, set access for Anyone. Then click Deploy.
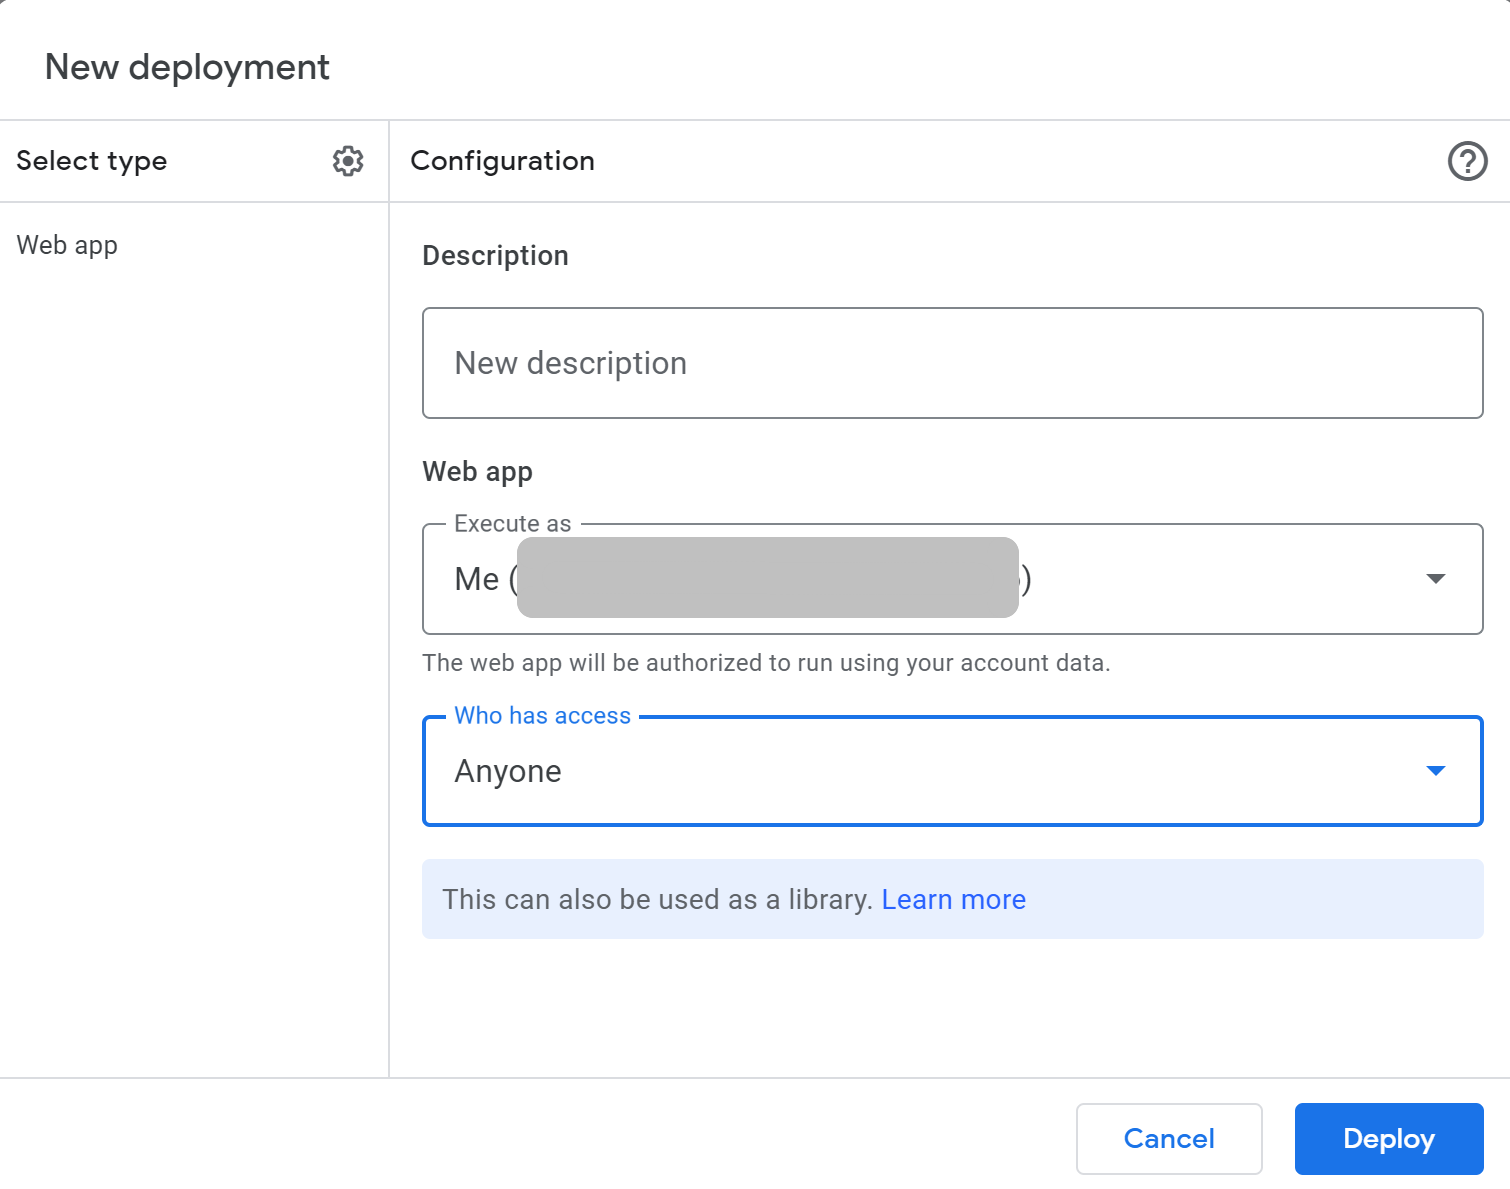
You will then get a Web app link, save it for later:
 5. Let's move on to editing the pop-up. Suppose the block with products contains the following:
<div class="dashly-custom-carts">
 {% for b in massViewed[:3] %}
  {% set link = b.props["$url"] %}
  {% set img = b.props["$img"] %}
  {% set price = b.props["$amount"] %}
  {% set name = b.props["$name"] %}
     <div class="dashly-custom-cart">
      <div class="dashly-custom-item-img">
       <a href="{{link}}" target="_top" title="{{name}}"><img src="{{img}}" alt="{{name}}"></a>
      </div>
     <div class="wrapper">
     <div class="dashly-custom-item-name">
        <p><a href="{{link}}" target="_top">{{name}}</a></p>
      </div>
      <div class="dashly-custom-item-price">
        <p>{{price}} р.</p>
      </div>
      <div class="dashly-custom-item-href">
           <a target="_top" href="{{link}}">More</a>
         </div>
       </div>
     </div>
  {% endfor %}
   </div>
6. You'll need a function to execute an ajax request using the GET method and substitute the data received in response (the products) into the block with products.
This is what you should get:
function get_discount() {
    $.ajax({
        url: 'ZZZ',
        type: 'GET'
    })
    .done(function(data) {
        $('.dashly-custom-cart').each(function(index, el) {
            for (var i = 0; i < $(data).length; i++) {
                $(el).after('<div class="dashly-custom-cart"> <div class="dashly-custom-item-img"> <a href="' + data[i][1] + '" target="_top" title="' + data[i][0] + '"><img src="' + data[i][3] + '" alt="' + data[i][0] + '"></a> </div> <div class="wrapper"> <div class="dashly-custom-item-name"> <p><a href="' + data[i][1] + '" target="_top">' + data[i][0] + '</a></p> </div> <div class="dashly-custom-item-price"> <p>' + data[i][2] + ' р.</p> </div> <div class="dashly-custom-item-href"> <a target="_top" href="' + data[i][1] + '">More</a> </div> </div> </div>')
            }
        });
    })
};

get_discount();
Instead of ZZZ, place your web app URL. Paste this code into the pop-up and finish creating the message.