Tracking master: add events and properties
Tracking master can help you learn more about website visitor actions without writing any code. You can use the visitor data you collect for lead segmentation and to send personalized triggered messages.
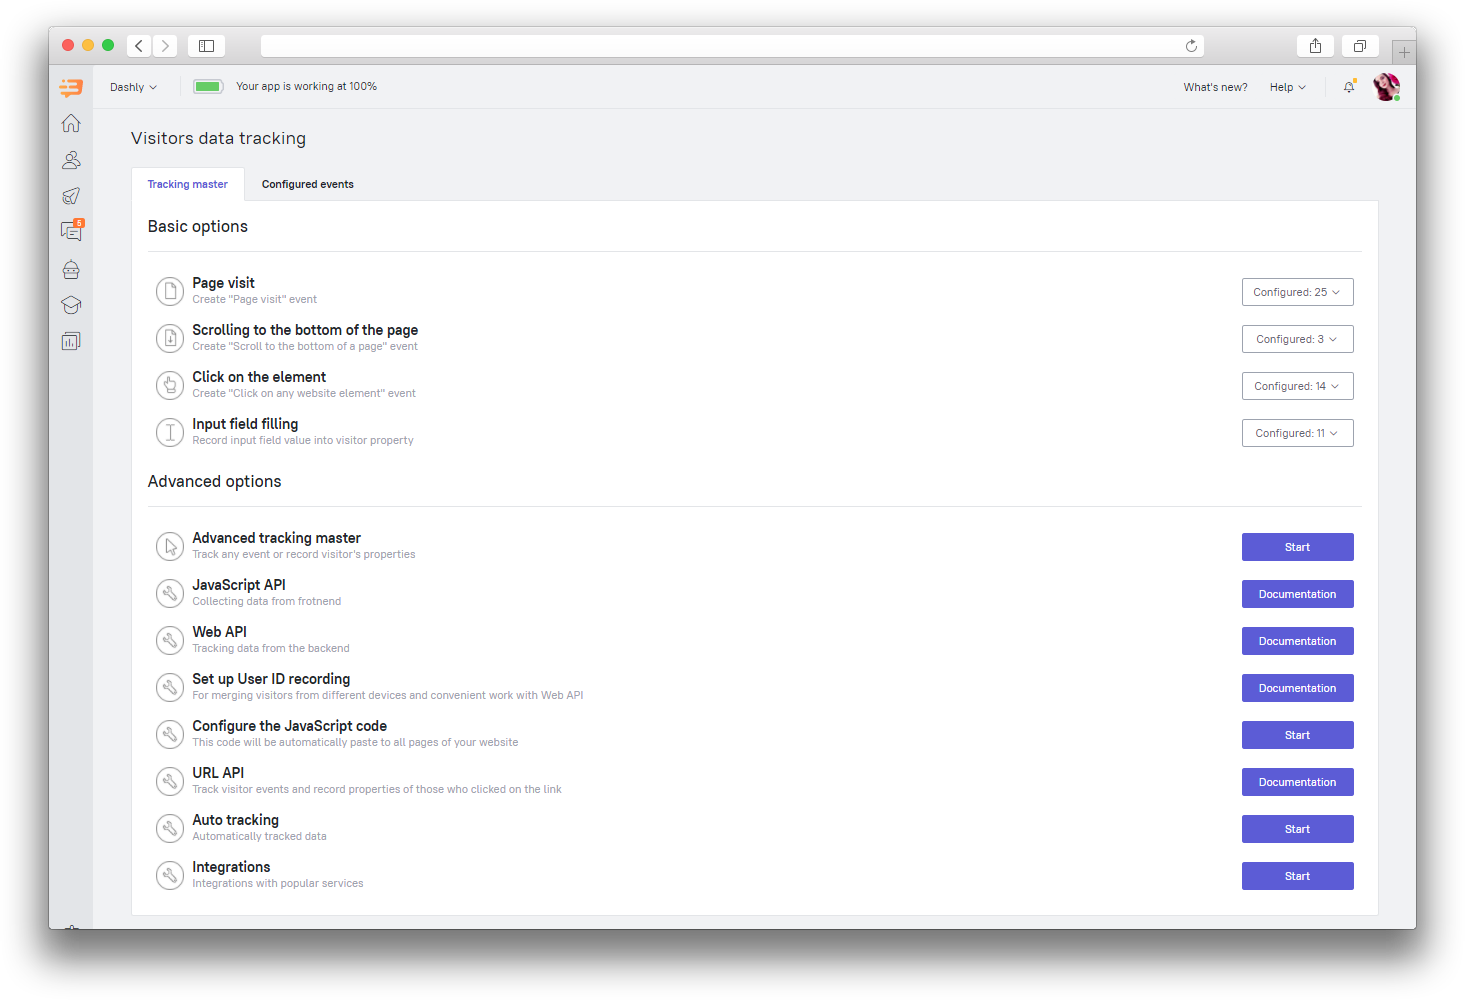
You can find Tracking master in the “Settings – Visitors data tracking” section.
Basic features
Basic features include 4 types of lead events:
Page visit;
Scrolling to the bottom of the page;
Click on the element;
Input field filling.

Unlimited number of events can be created for each event type. Let's see how to configure each event type.
Page visit
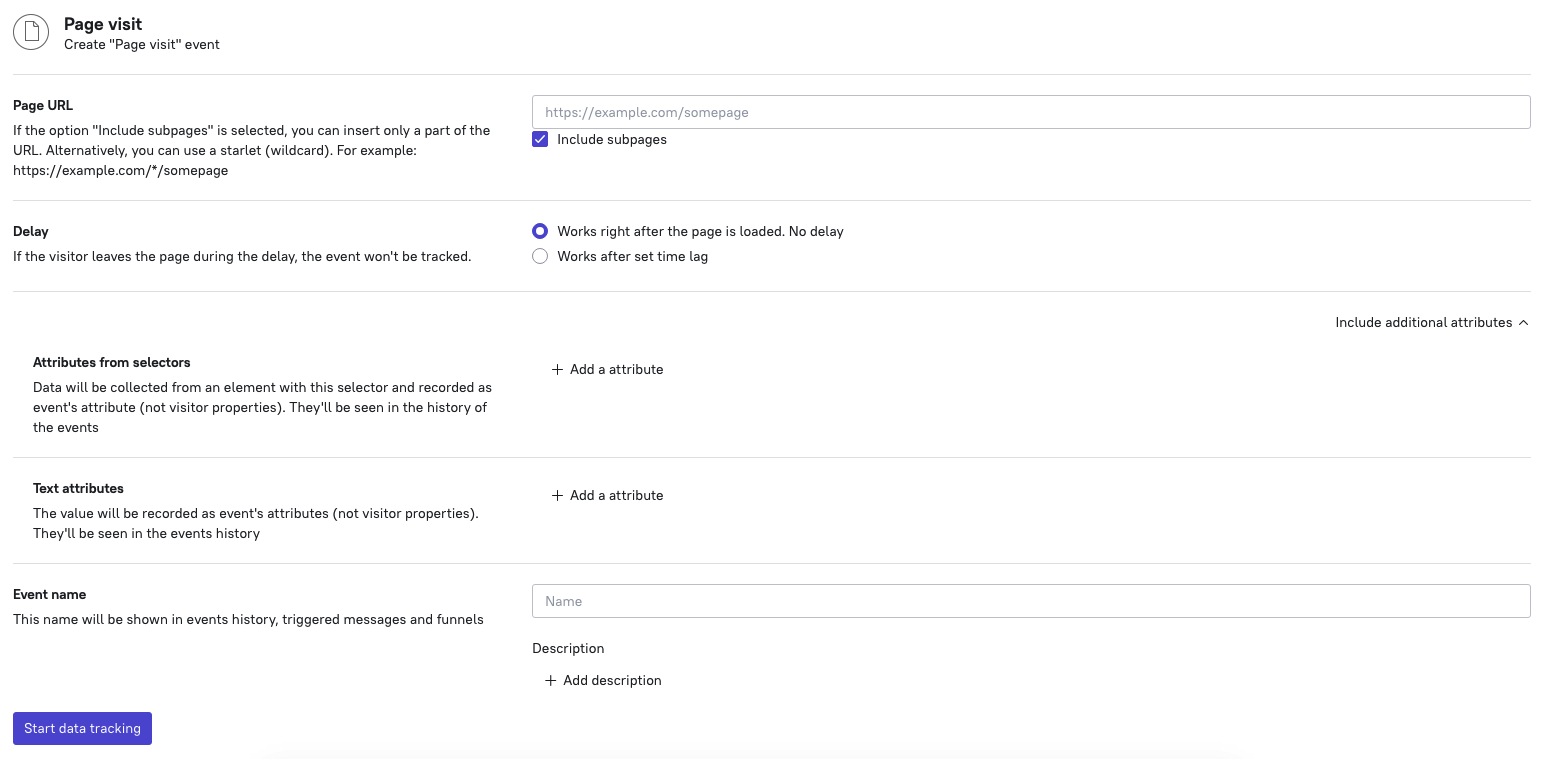
Go to the “Settings – Visitors data tracking” section.
Select "Page visited" event.
Enter the page URL. Upon visiting the page accessible via this URL, the event will be recorded.
Tick "Include subpages" if needed.
❗Important: www.test.com and test.com are considered as different pages. To consider both options without the "Include subpages" option, use the * symbol: *test.com.Delay. Specify when the event must be triggered: immediately upon visiting the page or after a time lag.
❗ Important: The event won't be recorded if the lead moves to another page before the time lag has expired.Include additional properties. These will be displayed in the event history tab of your leads’ lead cards.
Enter the event name. It will be displayed in the event list. You can add the event description as well.
Check the settings and click "Start data tracking".
Scrolling to the bottom of the page
This event is configured the same way as the "Page visit" event.
Click on the element
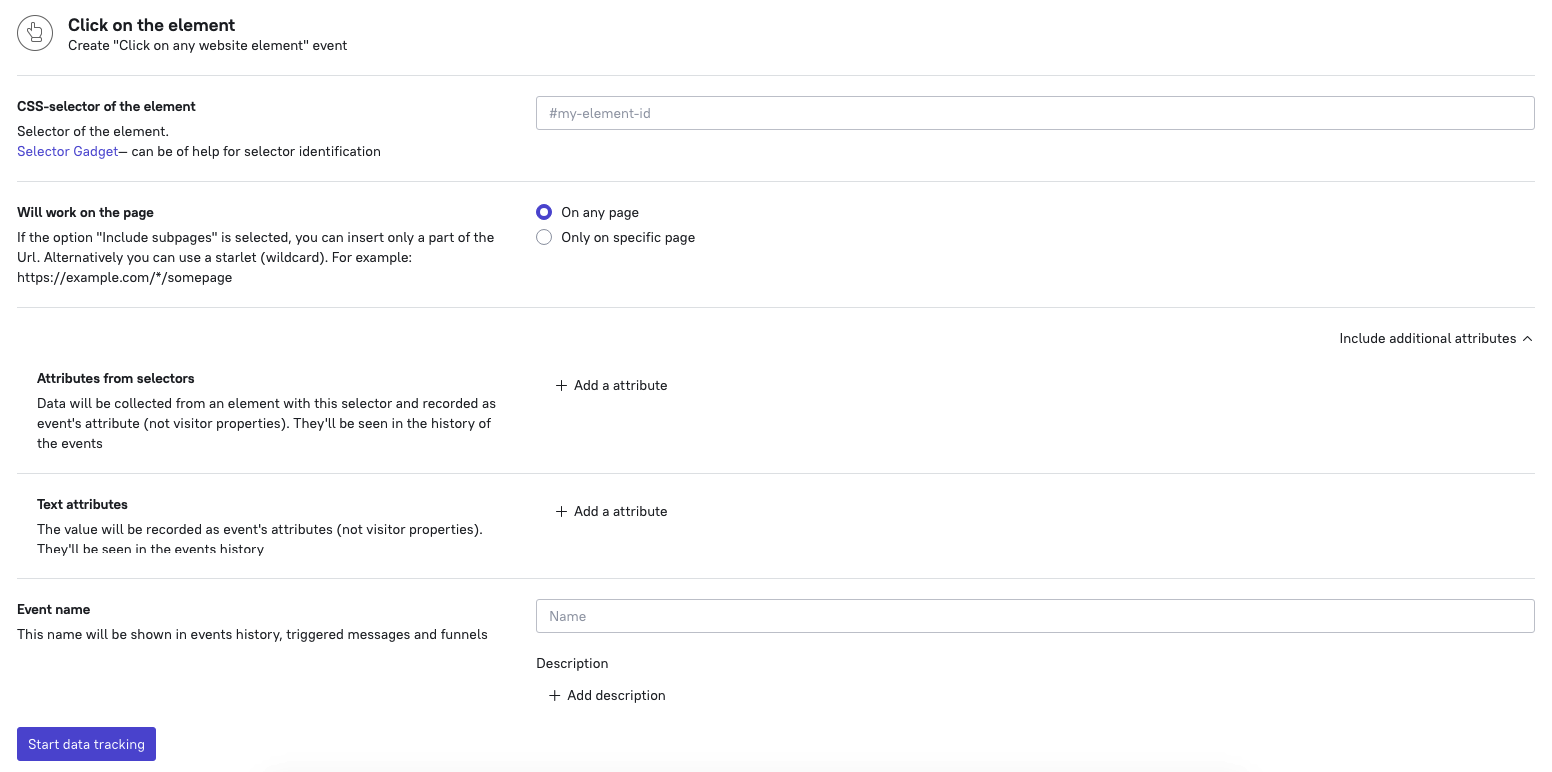
Find the CSS selector of the needed element. A click on this element will be recorded as an event. To find a CSS selector, either install Selector Gadget for Google Chrome or look for it in the HTML code of the page.
There can be elements with the same selector on different pages. Therefore in cases like this it is necessary to choose whether the event is performed on any page or on a specific one. Choose "On any page" or "Only on specific page".
Enter the event name (it will be shown in the event list). You can add the event description as well.
Check the settings and click "Start data tracking".
Input field filling
This event is configured the same way as the "Click on the element" event.
Advanced tracking master
Advanced tracking master helps to record any triggered event into a lead's card or add properties upon completing a specific action. You can also configure the recording of the "Input field filling” event to a lead's card.
Let's see how to configure events and properties in advanced tracking master.
Go to the “Settings – Visitors data tracking” section.
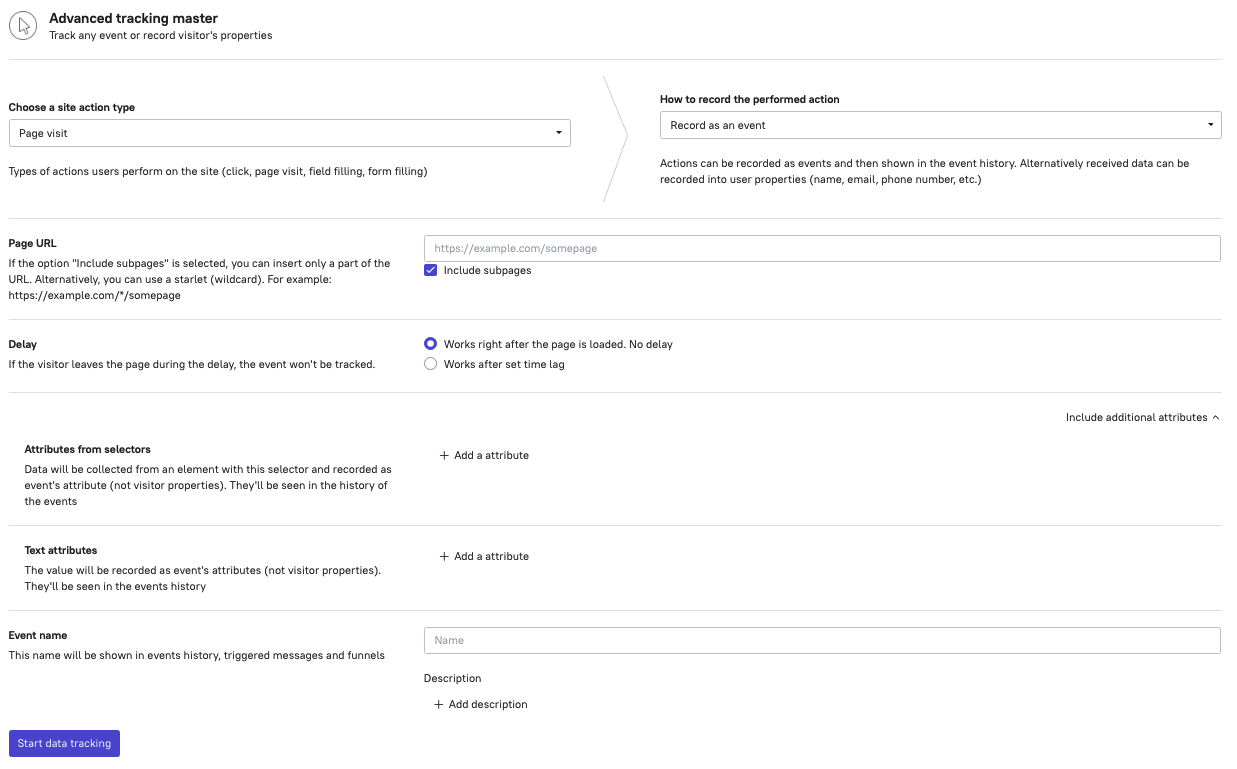
Select “Advanced tracking master”.
Select the action type.
Select what you will do with this action: record it in the event history of the lead card or record this data to the lead properties.
Proceed by configuring the rest of the feature the same way we’ve covered configuring “Page visit” / “Scrolling to the bottom of the page” / “Click on the element” or “Input field filling” event in this article.
