
Triggered message sequences
One of the main features you can find in Dashly is our tool for creating triggered message sequences. It allows you to build communications with your visitors based on their interaction with previous triggered messages you've sent them.
💡Here's a few examples of such scenarios:
User read triggered message A, but didn't follow the link in it (didn't reach the goal event) – Send them another email;
User read triggered message A, followed the link in it (reached the goal event) – Send them a chat message.
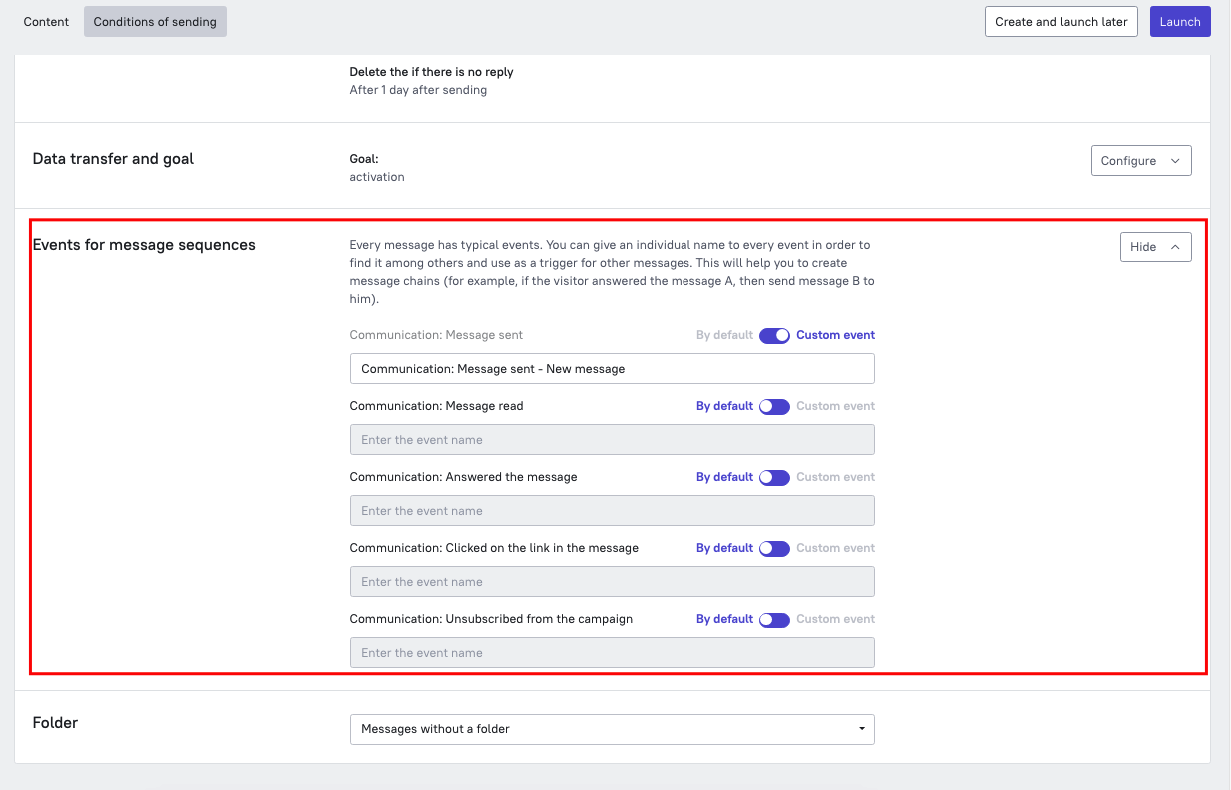
Dashly triggered messages have default events that can be triggered by users when they interact with said messages (Communication: Message sent/Message read/Answered the message/Clicked on the link in the message/Unsubscribed from the campaign). You can assign unique names to these events in each triggered message so you can use them as triggers for other triggered messages later. Let's find out how.
❗Please note: all of the triggered messages you want to chain together into your triggered message sequence have to be active at the same time, when you're building the sequence. When you pause a triggered message at the moment of creating another message from the same sequence, you prevent the second triggered message from this sequence from working as your users won't be able to trigger it.
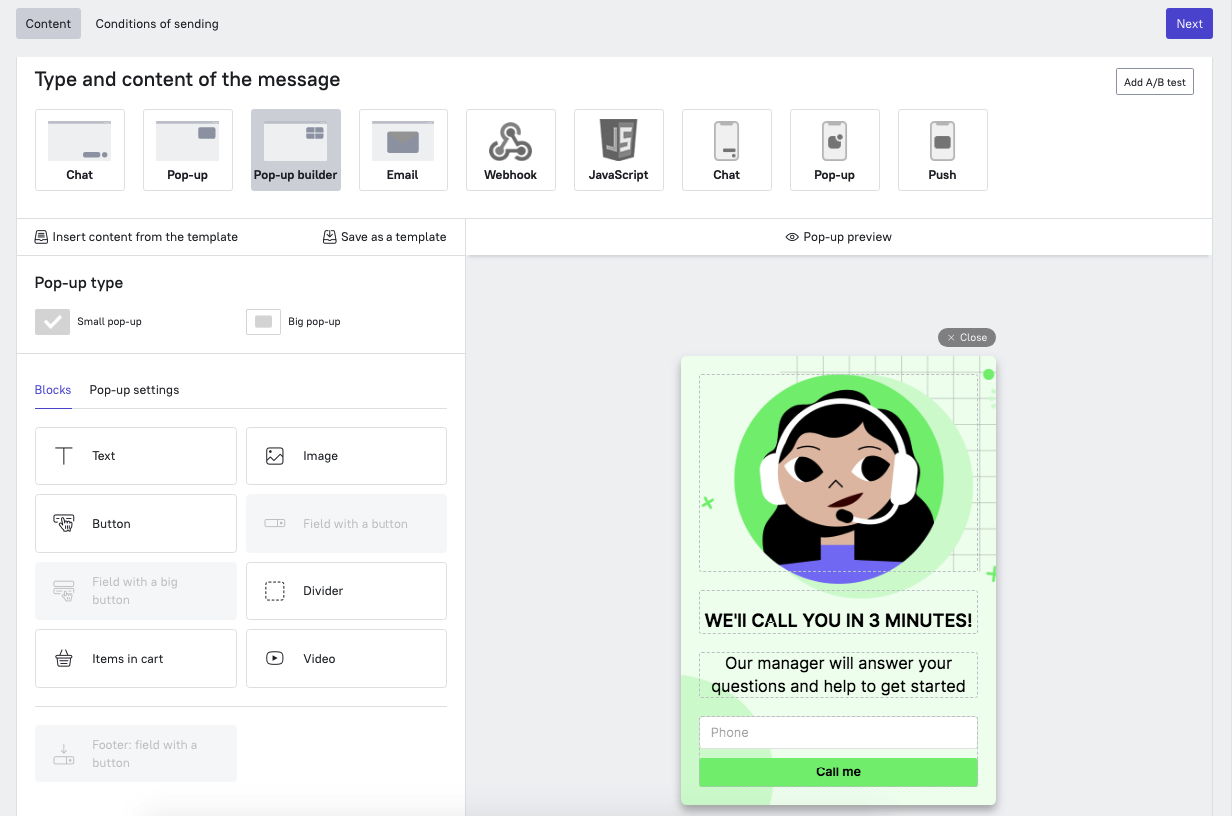
1. Create a triggered message (pop-up, chat message or email).
2. Choose what interactions with this triggered message you want to serve as triggers for subsequent messages. To do that, click Events for message sequences and toggle the trigger next to the communication event you want to serve as a trigger for the next message from the sequence. After that, you'll be able to find this event with other trigger events when creating the subsequent triggered message.
❗It's important: We would recommend naming communication events in a similar way: "Communication: <communication type> - <message name>". It will let you recognize these events easier.
❗It's important: If you're creating a Pop-up builder pop-up, you can either create a pop-up interaction event in the Content tab or create "Communication: Clicked on the link in the message" message sequence event.
Submitting an input field in a pop-up from Pop-up builder will record the information they've typed in the field to their user card, but won't send this info to the Inbox. However, you can set a Pop-up builder pop-up to send the data your users leave in the pop-up to your Dashly inbox this way: https://help.dashly.io/article/991
You can create an event in the Content tab like this:
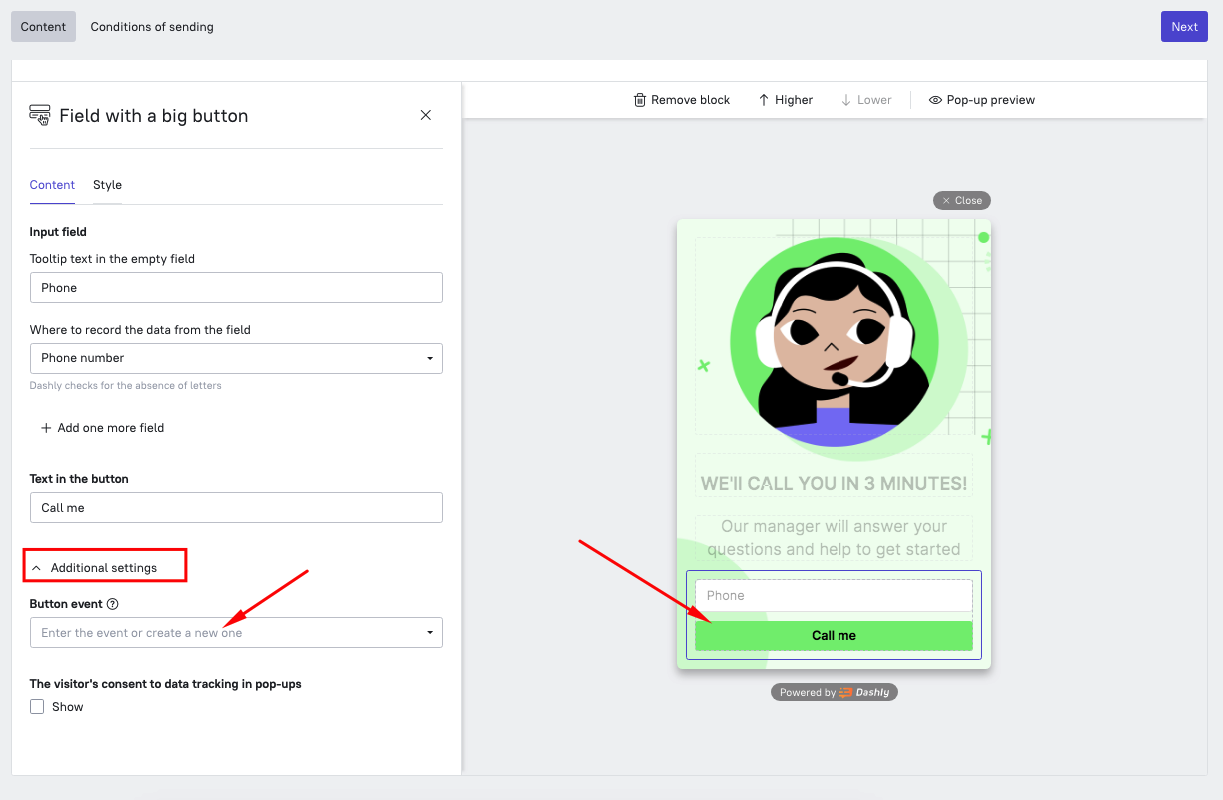
Click on the Field with a button block. Move to Additional settings – Button event in the menu on the left. Open the droplist and create a new event.
3. Now let's move on to creating the next triggered message of the sequence. Choose the event you've set in the previous message as a trigger.
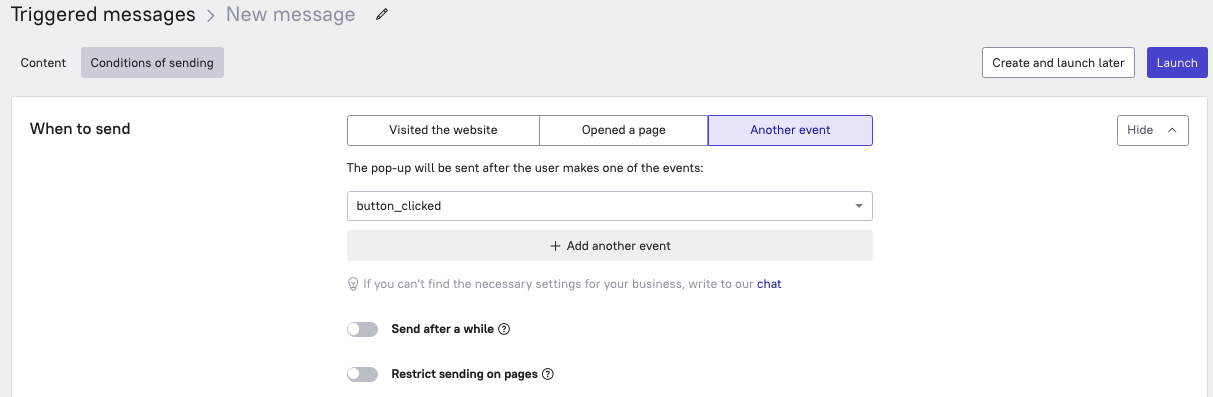
If you created a new event instead of choosing an existing one, it will have a red icon next to it, indicating that this event hasn't been recorded yet. As soon as it's first recorded by a user, this icon will disappear and the name of this event will become black instead of gray.
The rest of the triggered message creation process goes as usual.
4. If you want this triggered message to be followed by another triggered message of this sequence, you can set new triggers on the last tab of creating this message (similar to step 2).
💡Examples
Let's take a closer look at the process of creating a sequence based on a simple scenario:
email No.1 briefly describes what's so good about a product and suggests buying it;
email No.2 suggests buying additional products and only gets sent to the customers who have shown their interest by opening and reading the previous message of the sequence.
Step 1
So, email No.1 is already running. Now, to make the condition of the scenario above work, we need to create a new event to be able to automatically determine whether or not a user has opened email No.1.
To do that, edit email No.1 and go to the Conditions of sending -> Events for message sequences.

Clicking the Configure button will expand an additional screen, where you can create events that will be recorded when interacting with this triggered message. You can also assign names to these events and choose the events you want to track.
Step 2
After you've saved this triggered message, the additional events you've set will be added and saved in the event list. You can use them as a trigger for the next message of the sequence right away.
Then you can start creating the next triggered message (email No.2). In the Trigger tab you will need to choose communication event that you just created in the previous message:
Next, just set up this triggered message the usual way and save it. Well done, your triggered message sequence is now running.
Such sequences will help you fully personalize and automate communication with your visitors. You can create sequences of any length and complexity.